Projects & Environments
Create and manage the projects and environments of your Permit.io workspace in the dashboard: add them, copy their keys and API keys, and control which members can reach them. This page is for admins and developers who set up a Permit workspace.
An environment is a silo (a logical grouping) of your policy (roles, resources, condition sets) and data (users, tenants, role assignments). Each project can have several environments. For example, you can create a production environment for your production deployment and a staging environment for your staging deployment, and use environments in CI/CD flows and for testing.
Working with the Permit hierarchy
The Permit object model has three levels:
| Level | What it holds | Typical mapping |
|---|---|---|
| Workspace (organization) | All of your projects, members, and API keys | Your company |
| Project | A set of environments | One application or service that needs its own policy |
| Environment | One policy and its data | One deployment of the application, such as dev, staging, or production |
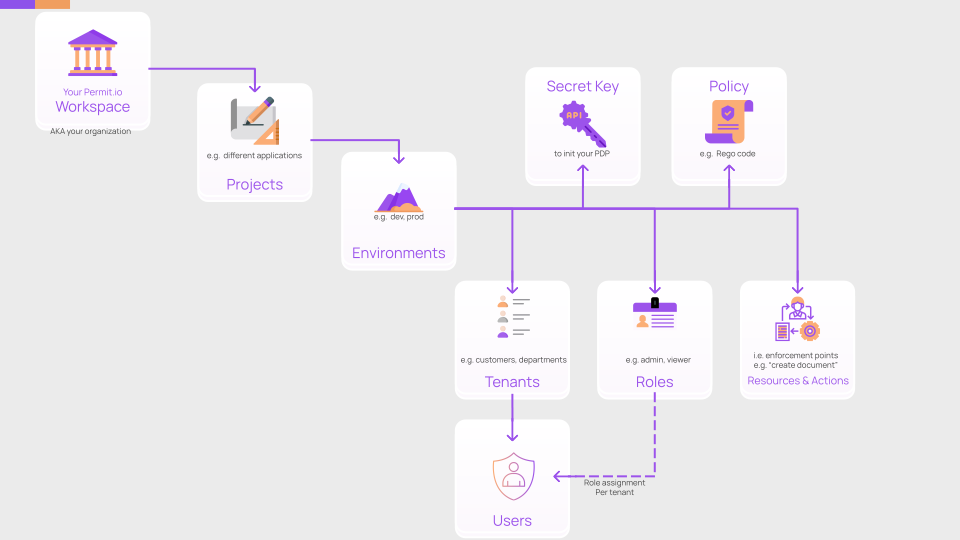
Each environment contains:
- Tenants: isolated groups of users and resources, usually one per customer of your application
- Users: the identities you check permissions for
- Your policy and roles
- Resources and actions: the objects in your application that you control access to, and the operations on those objects
Within an environment, role assignments link users to tenants. For example, user alice has the role admin in tenant my-customer. The same user can belong to several tenants in the same environment. See Multi-tenant authorization.
Projects
A project groups the environments of one application or service that needs its own policy and roles. A workspace can have several projects, one for each product, service, or tool you offer. A new workspace includes a project named Default Project.
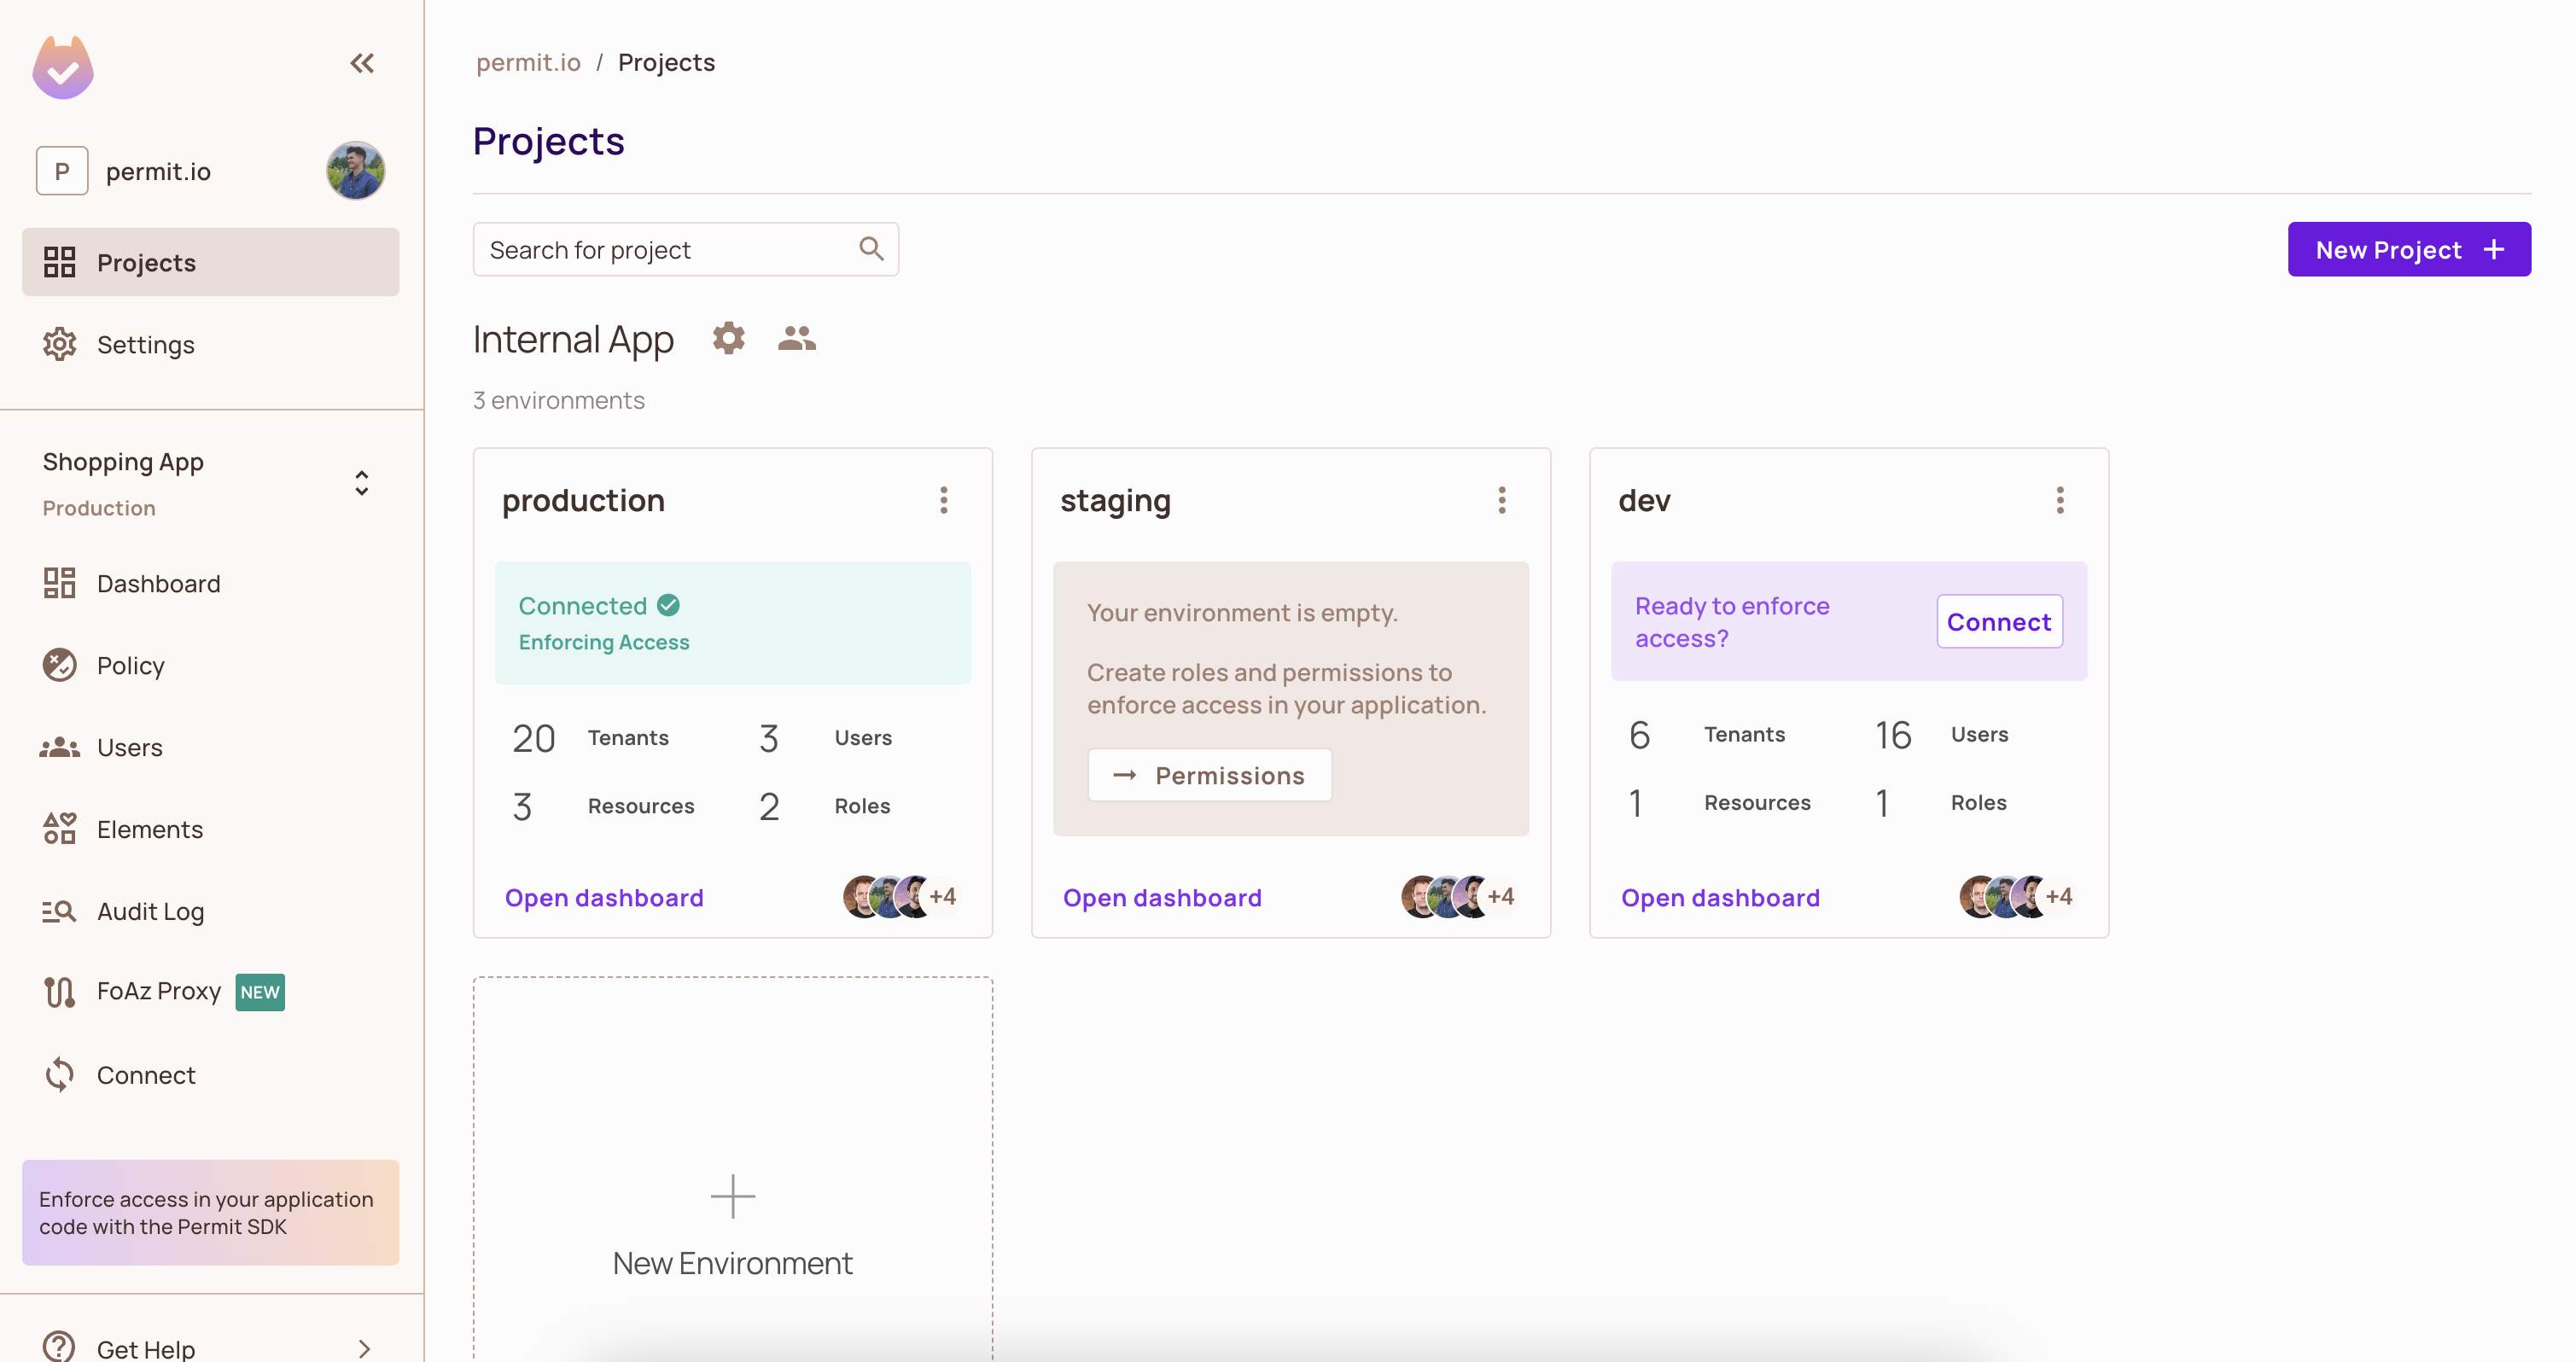
Manage projects from the Projects screen of the Permit dashboard.
Create a project
Create a project for each application or service that needs its own policy.
- On the Projects screen, click New Project.
- Enter a name, and optionally a description.
- Click Create Project.
The project appears on the Projects screen with a Development environment and a Production environment. To add more environments, use the New Environment tile.
Edit, filter, and delete projects
To find a project, type part of its name in Search for project above the project list.
To edit or delete a project:
- Click the gear icon next to the project name.
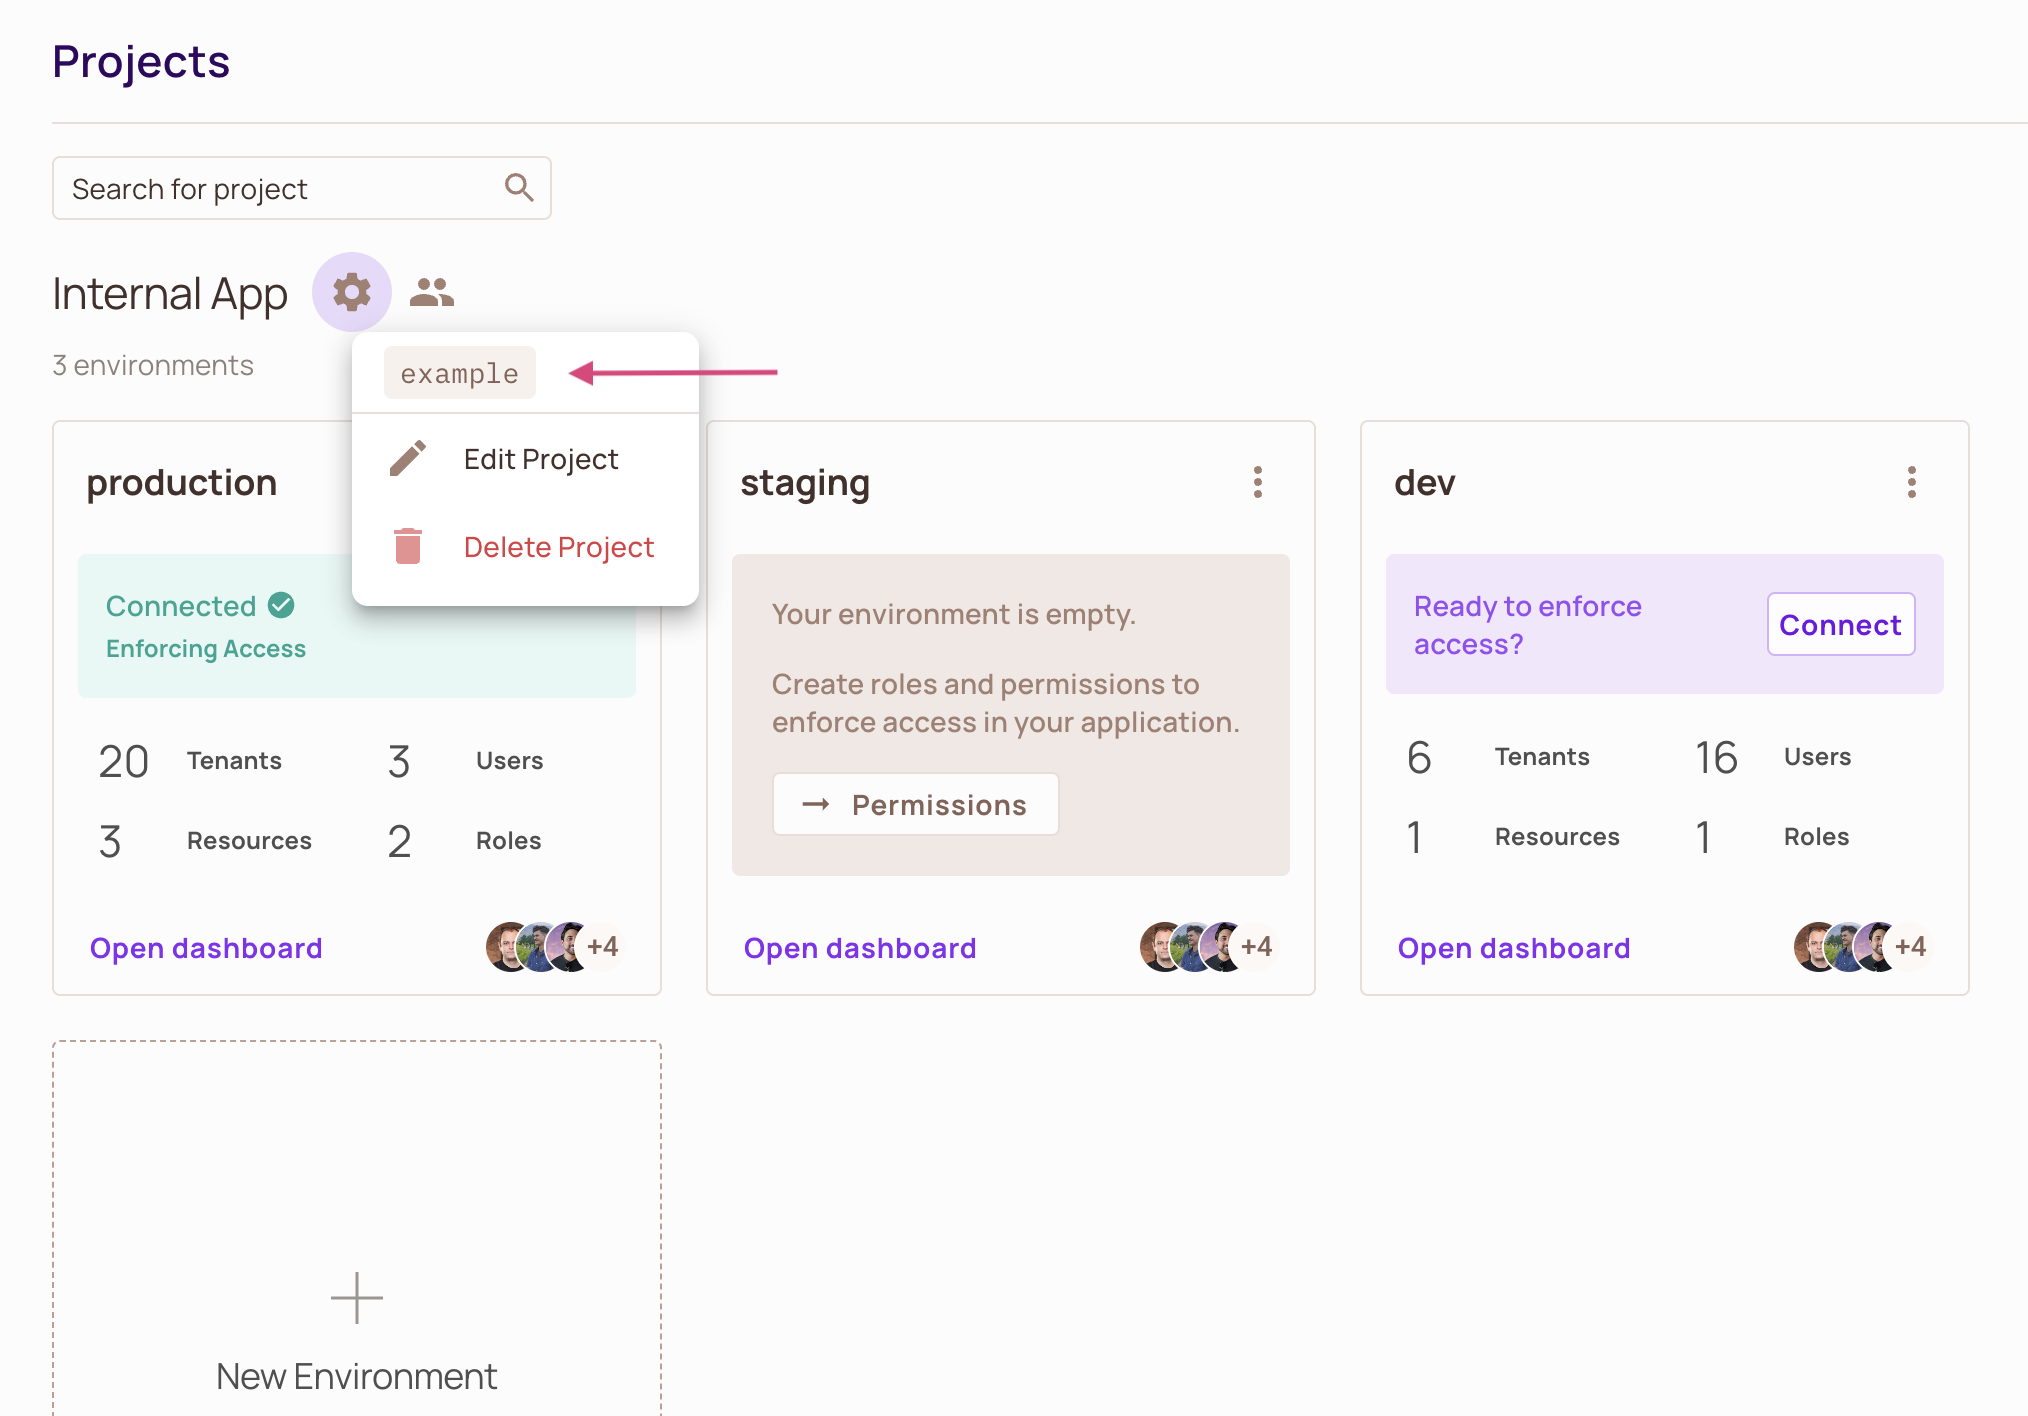
- Click Edit Project to change the name or the description, then click Save. The project list shows the new name.
- Click Delete Project to delete it, then confirm in the dialog.
Deleting a project deletes every object inside it, including its environments, policies, and data. Permission checks that still use an API key of that project are denied from then on, so your users lose the access those checks granted. Deleting a project can't be undone.
Get the project ID
Most calls to the Permit API take a project and an environment in the URL path. Each one accepts either the object's ID or its key, so the key from the dashboard is enough.
- On the Projects screen, click the gear icon next to the project name.
- Copy the key at the top of the menu, shown in a grey box (
examplein the following screenshot).
To read the project ID itself, or to read both values from your code, see Get the project ID and environment ID.
Manage access to a project
Invite a member to one project to give the member access to that project only.
- On the Projects screen, click the members icon next to the project name. The <project name> Access window opens and lists the members who can reach the project, each with the role that grants the access.
- Enter the email address of the member you invite.
- Select Owner or Editor in Assign role.
- Click Send Invite. The member appears in the list as a project owner or project editor.
For what each member role can do, see Member management.
Environments
Within a project, create the environments you need, such as dev, staging, and production.
When you switch the active environment in the dashboard, the Policy Editor shows the policy of the newly active environment. Switching the active environment doesn't affect API calls.
Every environment has its own API key. Your SDK, the Permit API, and your policy decision point (PDP) use the environment API key to check permissions in that environment. From the dashboard you can copy and rotate the environment API key, edit or delete the environment, and switch the active environment.
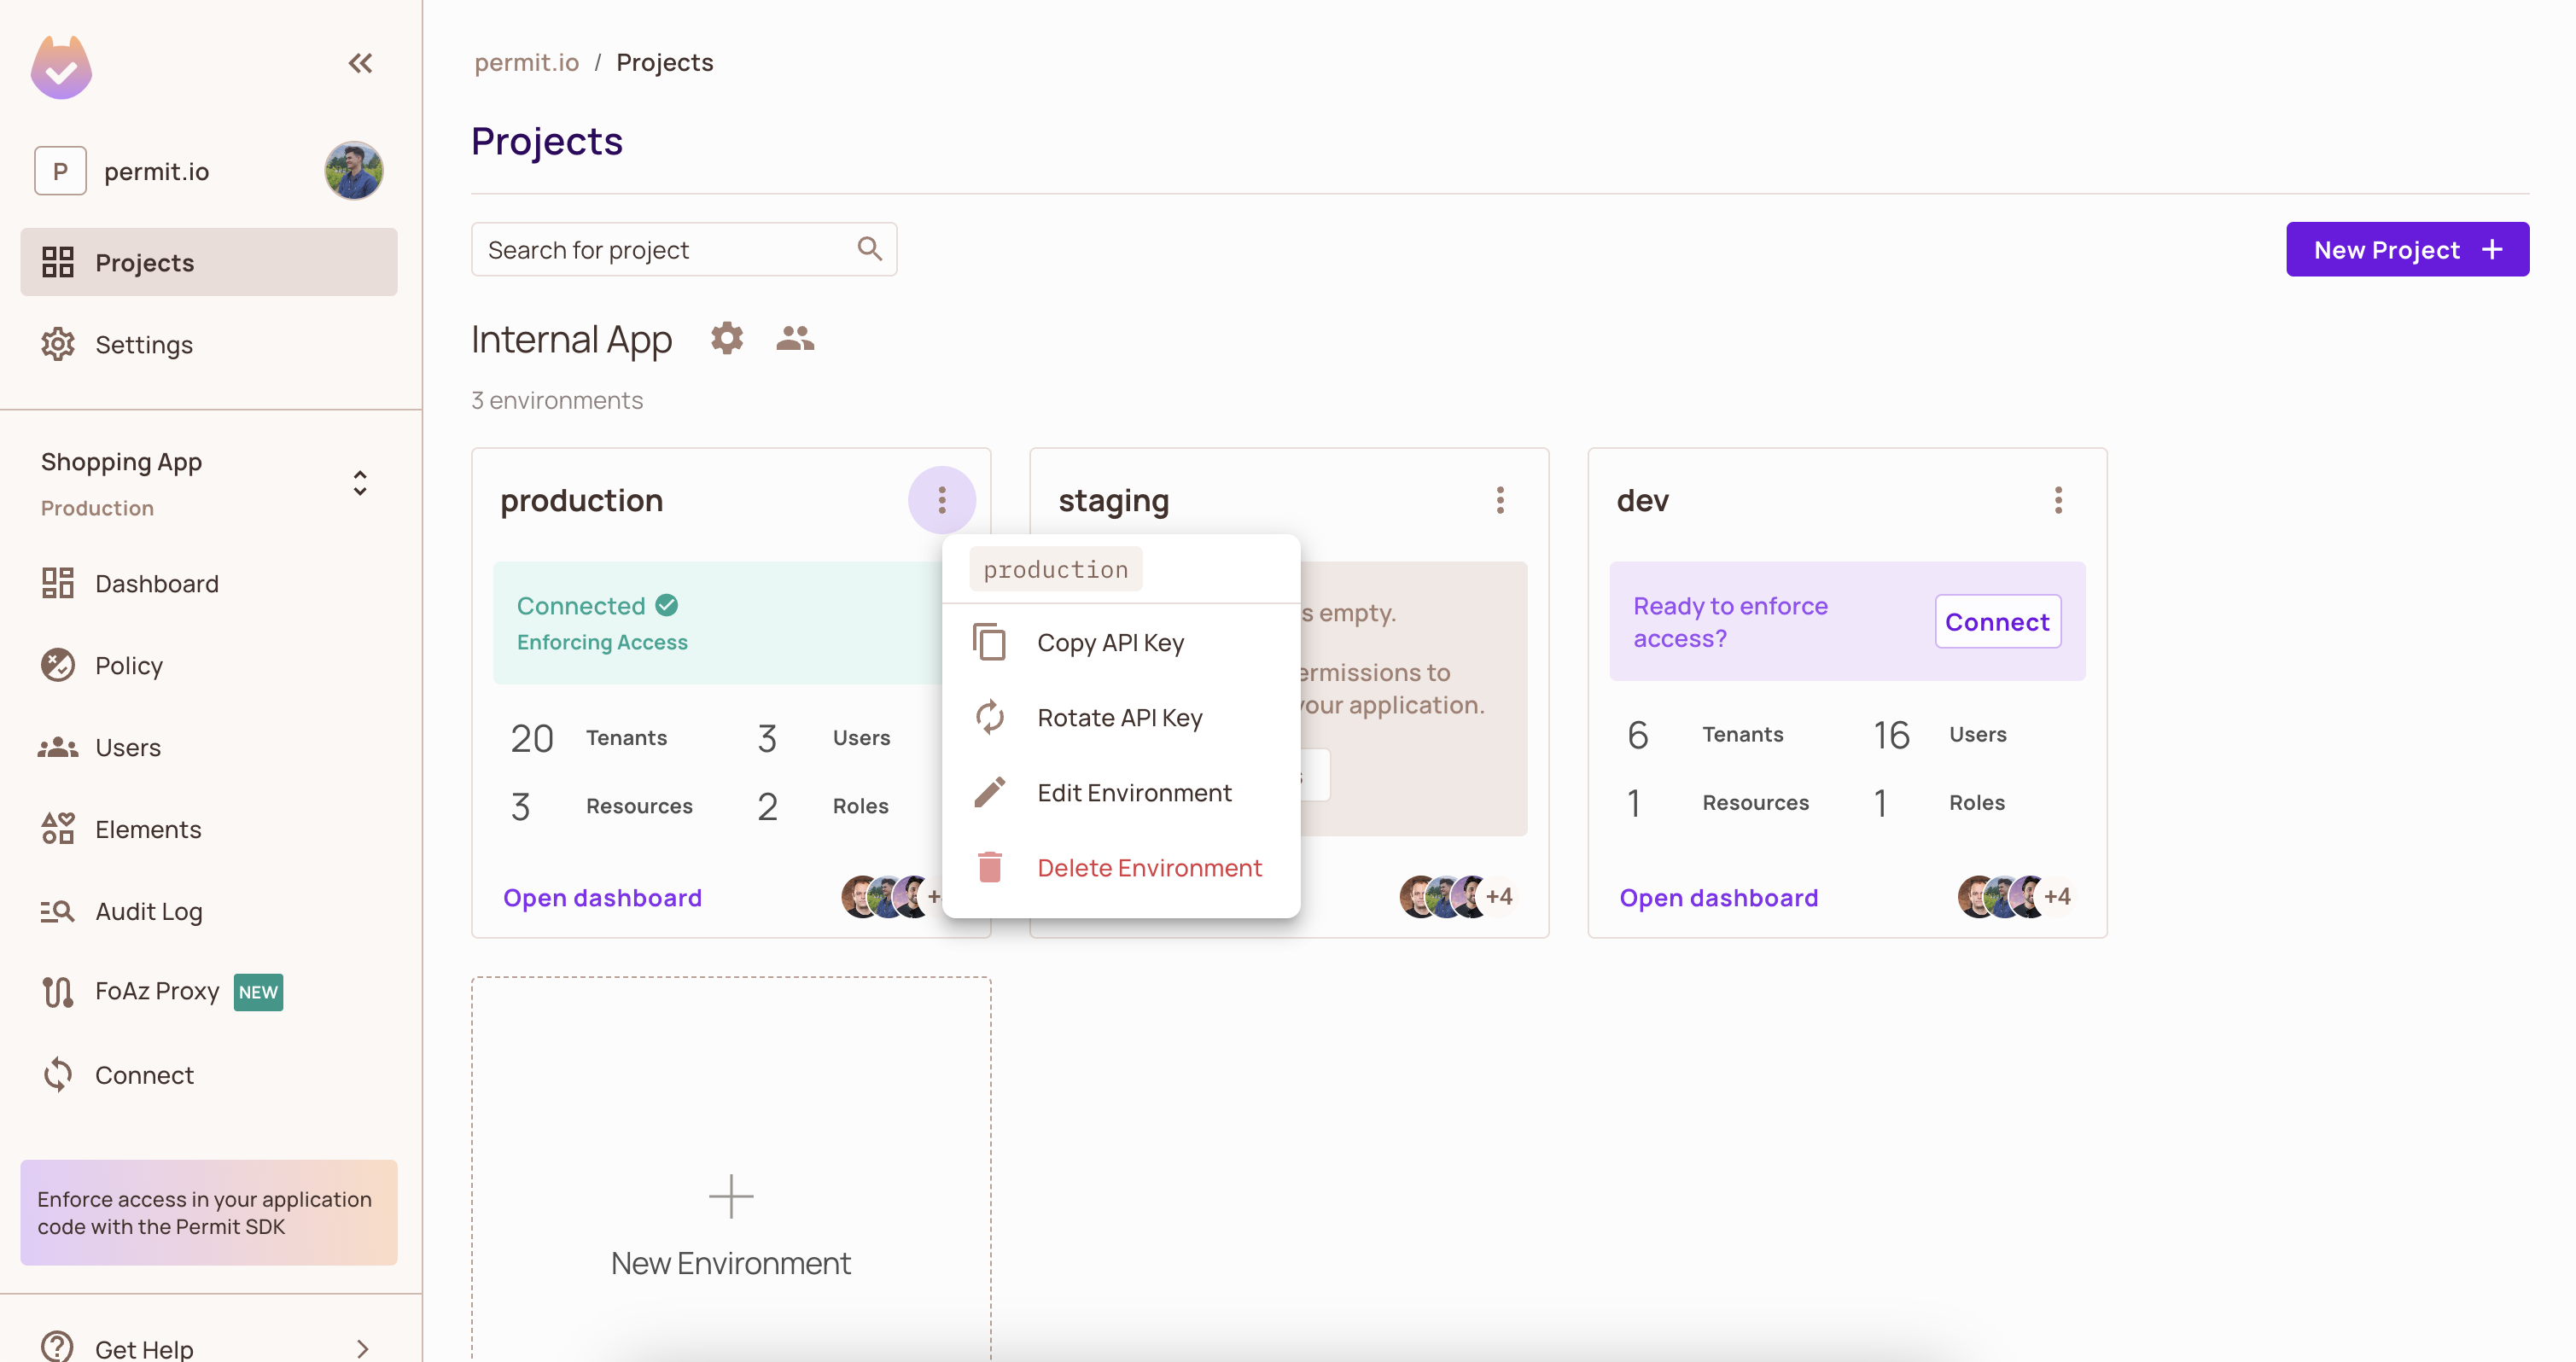
Manage environments on the Projects screen, where each project lists its environments as cards. Every card carries a three-dot menu with the environment key and its actions.
Create an environment
Create an environment from scratch in the dashboard or with the API, or copy an existing environment. See Create, copy, and merge environments.
Get the environment ID
As with projects, the Permit API accepts either the environment ID or the environment key in the URL path.
- On the environment card, click the three dots.
- Copy the key at the top of the menu, shown in a grey box.
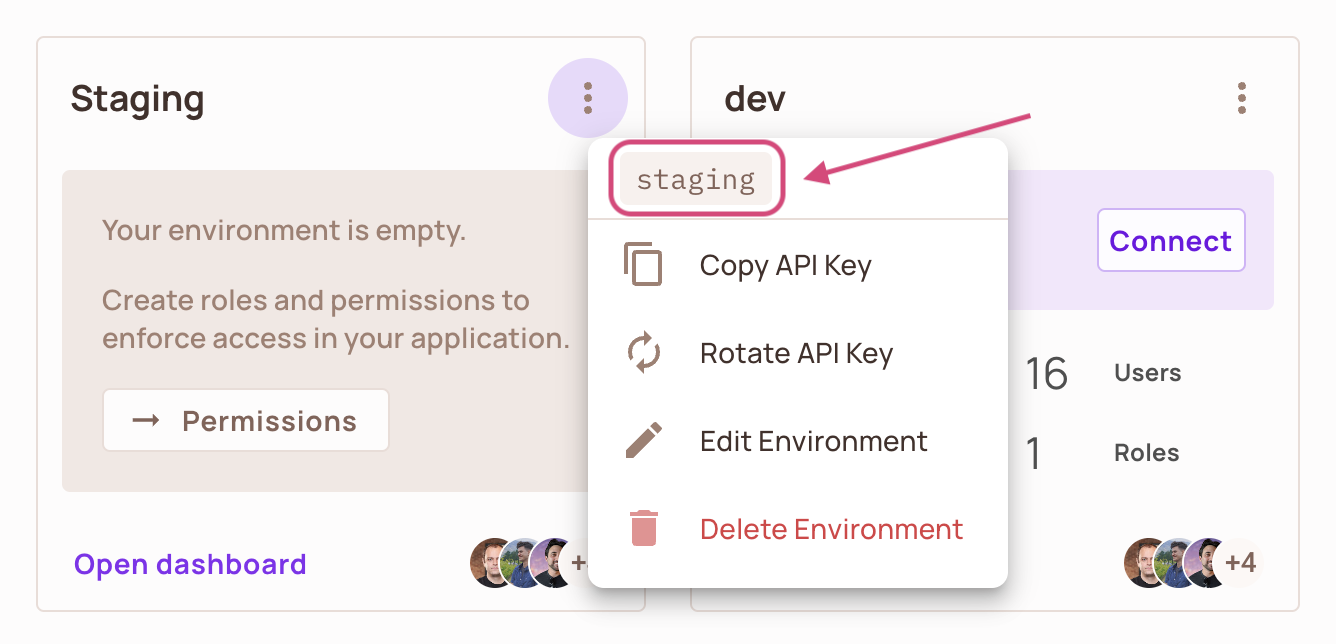
To read the environment ID itself, or to read both values from your code, see Get the project ID and environment ID.
Copy and rotate the environment API key
- On the environment card, click the three dots.
- Click Copy API Key to copy the environment API key, or Rotate API Key to replace the key with a new one.
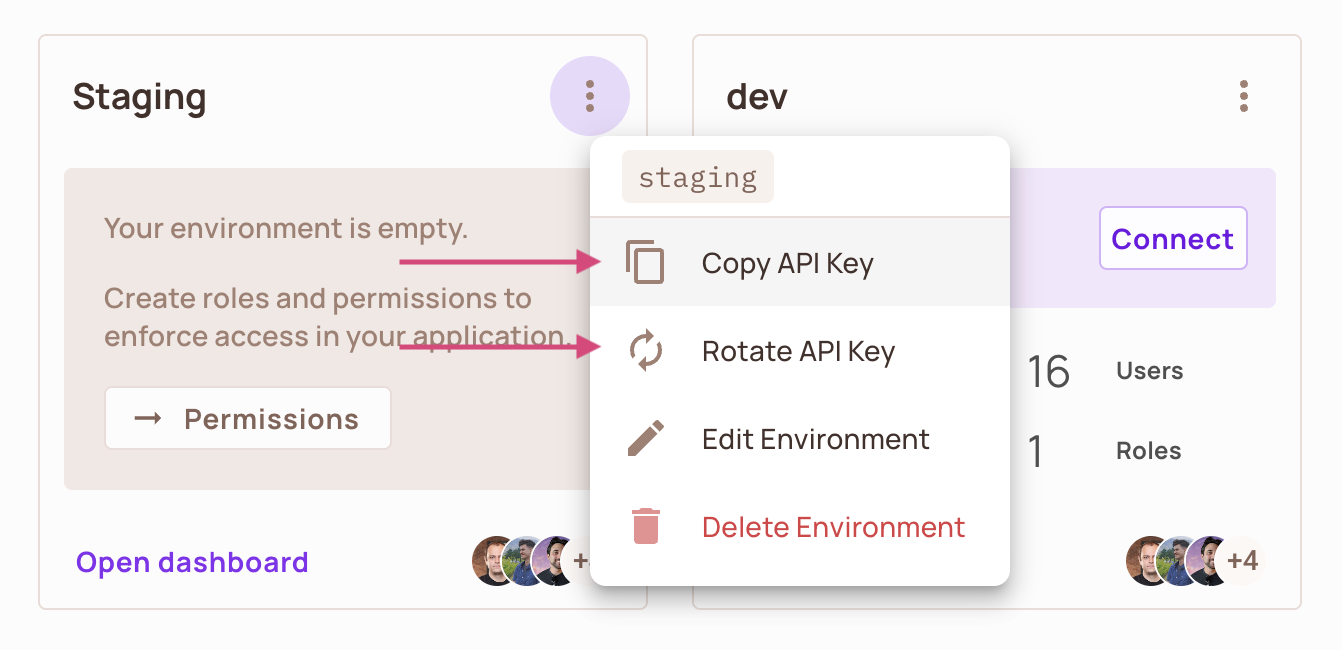
After you rotate an environment API key, the old key stops authenticating. SDK clients and PDPs that still use the old key can't reach Permit until you configure them with the new key.
For more on API keys, see Get your API key.
Edit and delete environments
To rename an environment:
- On the environment card, click the three dots.
- Click Edit Environment.
- Enter the new name and click Save. The environment card shows the new name.
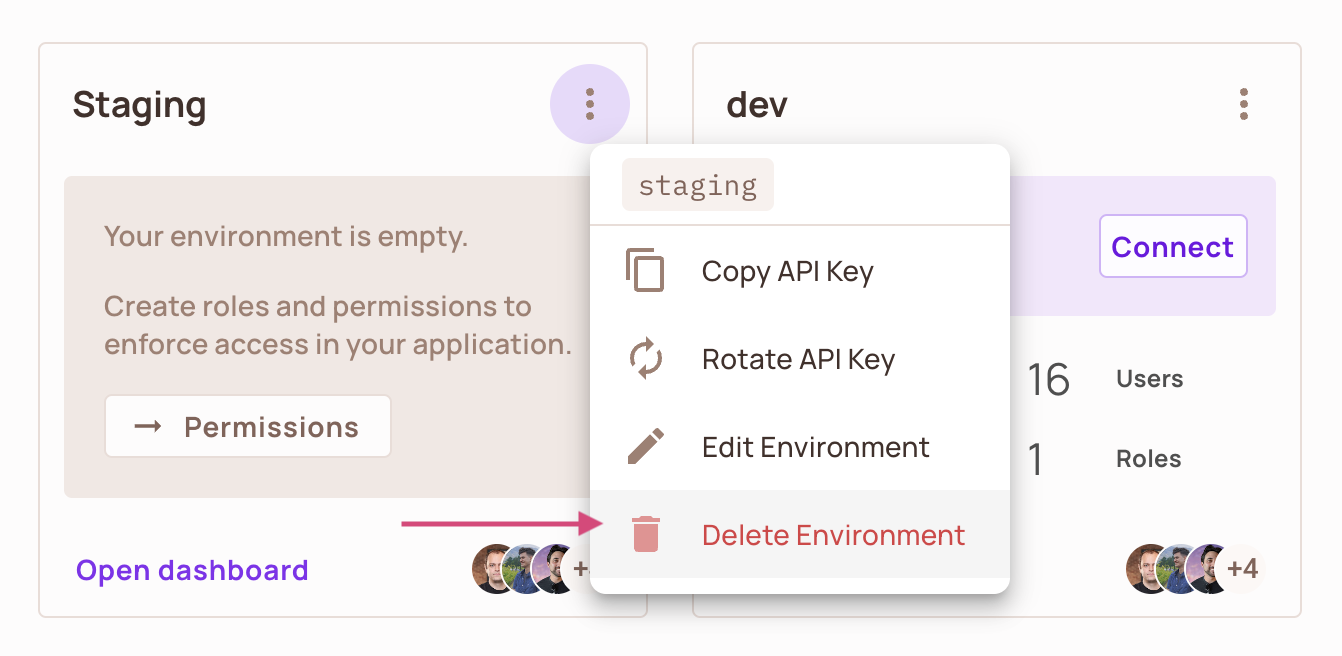
To delete an environment, click Delete Environment in the same menu and confirm.
Deleting an environment removes its roles, resources, condition sets, users, tenants, and role assignments, and its API key stops authenticating. Permission checks that still use that key are denied.
Manage access to an environment
Invite a member to one environment to give the member access to that environment only.
- On the environment card, click the group of member avatars in the bottom-right corner. The <project name> / <environment name> Access window opens and lists the members who can reach the environment, each with the role that grants the access.
- Enter the email address of the member you invite.
- Select Owner or Editor in Assign role.
- Click Send Invite. The member appears in the list as an environment owner or environment editor.
For what each member role can do, see Member management.