Workspace Settings
Manage who can access your Permit.io workspace, which API keys can call the Permit API, and your data processing terms. This page is for workspace owners who administer a Permit workspace.
Members are the people on your team who use the Permit dashboard or API. Members are different from users, the identities your application checks permissions for.
Member management
Member roles control which members can change policies, in the Permit dashboard or through the API, and in which projects and environments.
To manage members:
- In the Permit dashboard sidebar, open Settings.
- Select the Members tab.
The tab lists every member and pending invitation, with the scope of the access in the Allow Access To column and the role in the Access Level column. Use the search box to find a member by email address.
Member roles
When you invite a member to your workspace, you assign the member one of these workspace roles:
| Workspace role | Create roles, resources, and policies | Change workspace settings | Invite members and change their access |
|---|---|---|---|
| Workspace Owner | Yes | Yes | Yes |
| Workspace Editor | Yes | No | No |
| Workspace Viewer | No (view only) | No | No |
A member can have access to the entire workspace, or only to specific projects and environments:
- To give a member different permissions in one project or environment, invite the member directly into that project or environment with a role there, such as Project Owner or Environment Editor. The member's workspace role stays the same everywhere else.
- If you invite a member only into specific projects or environments, and not into the workspace, the member has access to those projects and environments only. When those roles differ in access level, the Access Level column of the Members tab shows
Mixed.
Example: a member with mixed access
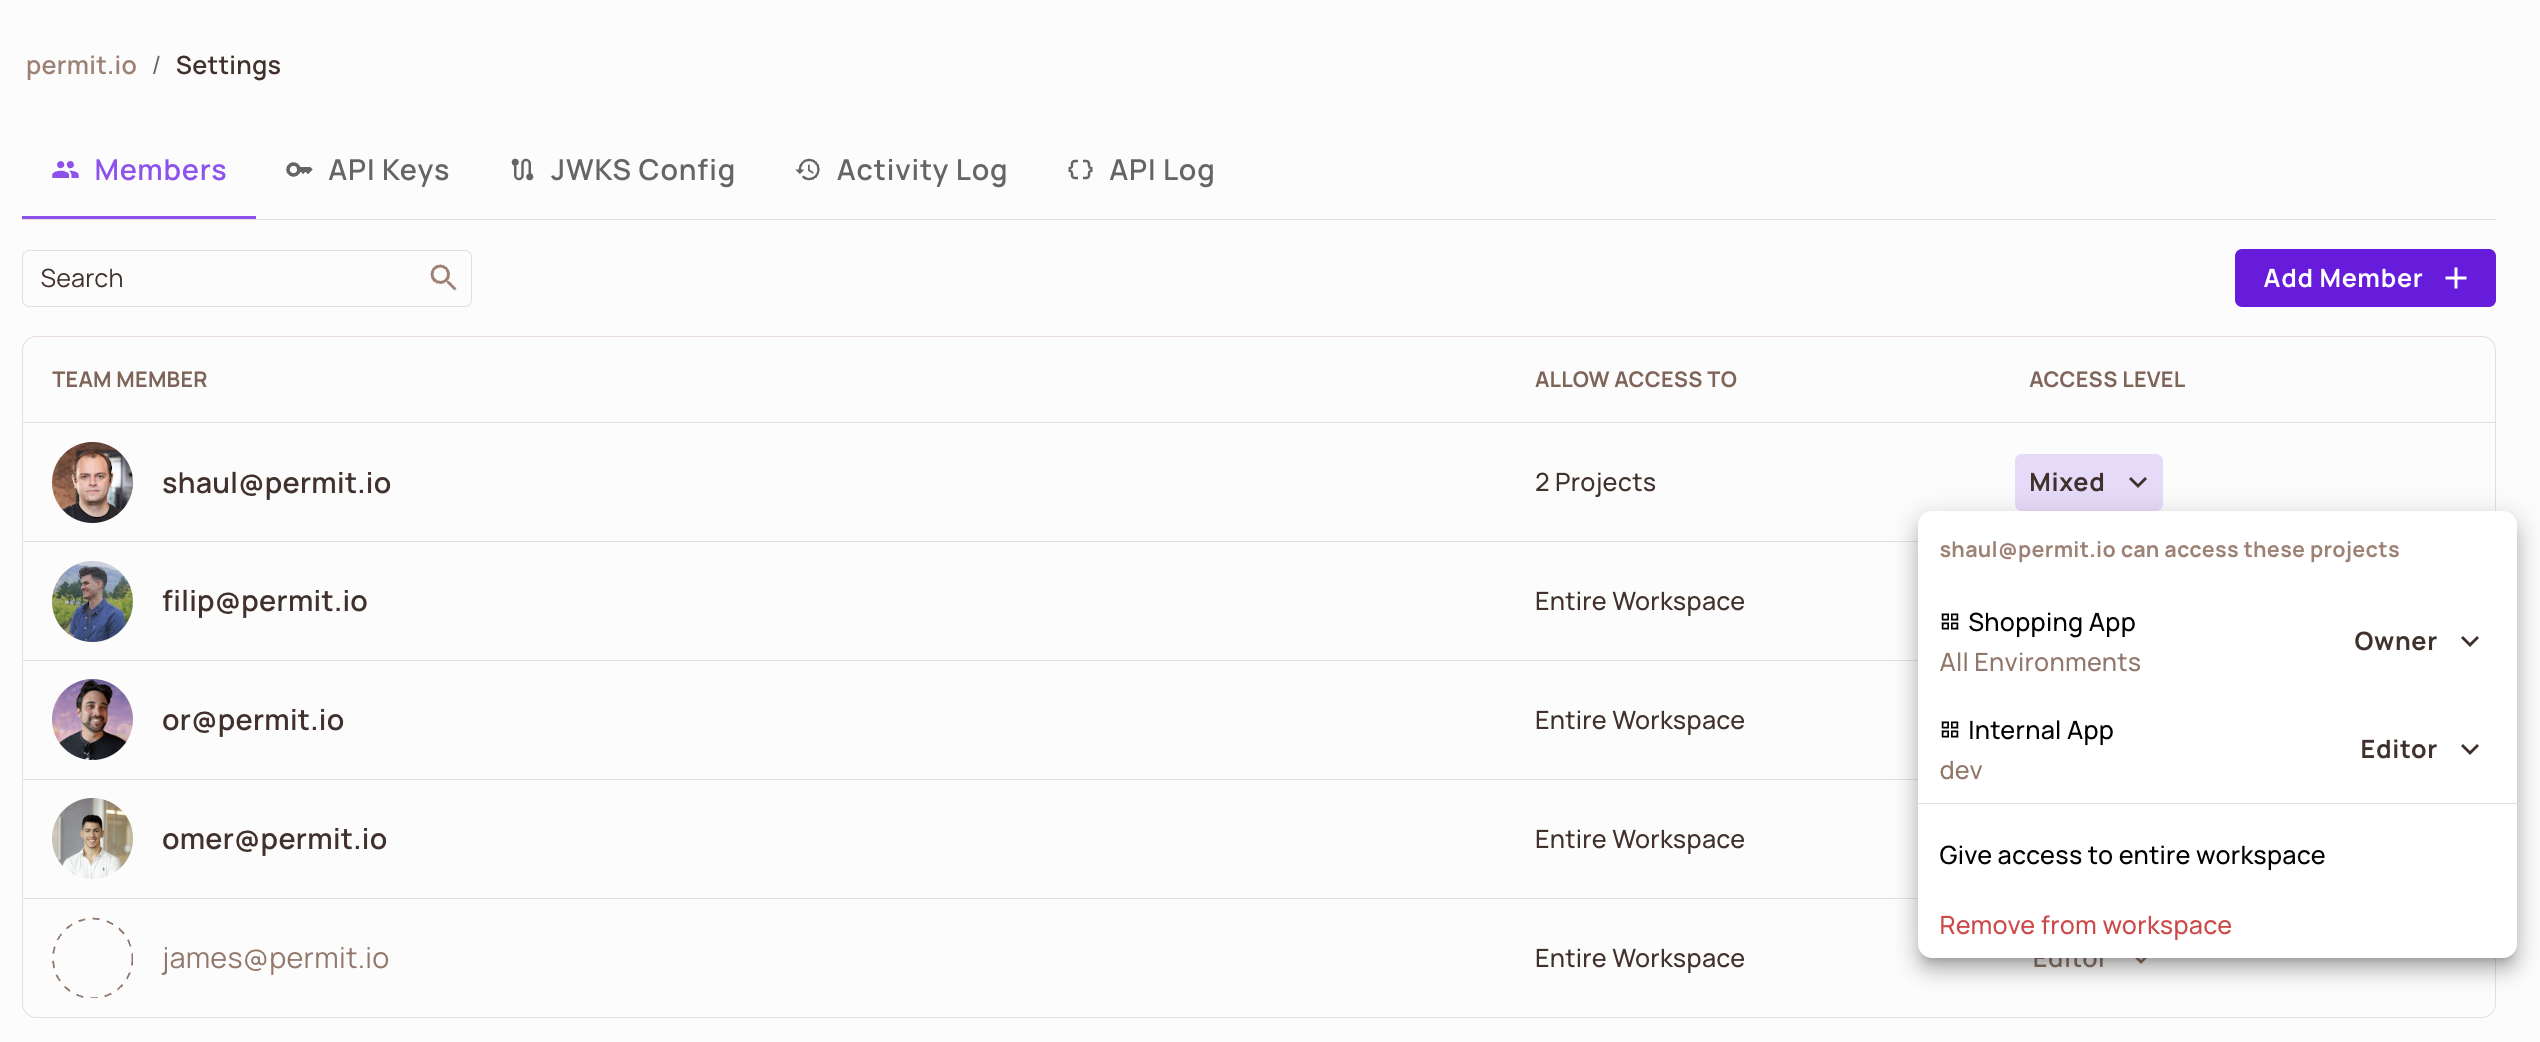
In this example, a member has no workspace role. The member has two roles scoped to projects:
- Owner of the
Shopping Appproject, in all of its environments - Editor of the
devenvironment of theInternal Appproject
The Members tab shows 2 Projects in the Allow Access To column and Mixed in the Access Level column. Click Mixed to see the role in each project.
Add members
- On the Members tab, click Add Member.
- Enter the email addresses of the members you invite, separated by commas.
- Select the Workspace Access Level for the invitation.
- Click Invite users. Each invited member appears on the Members tab with Entire Workspace in the Allow Access To column, and stays a blank user until the member accepts the invitation.
One invitation assigns the same access level to every address in it. To invite some members as owners and others as editors, send one invitation for each level.
Change a member's roles
- On the Members tab, click the value in the Access Level column of the member.
- For a member with workspace access, select the new access level.
- For a member with access to specific projects or environments, select a new role next to each project or environment in the window that opens. To replace those roles with workspace access, click Give access to entire workspace, then select the workspace access level and click Invite users.
The Access Level column shows the new role.
Remove a member
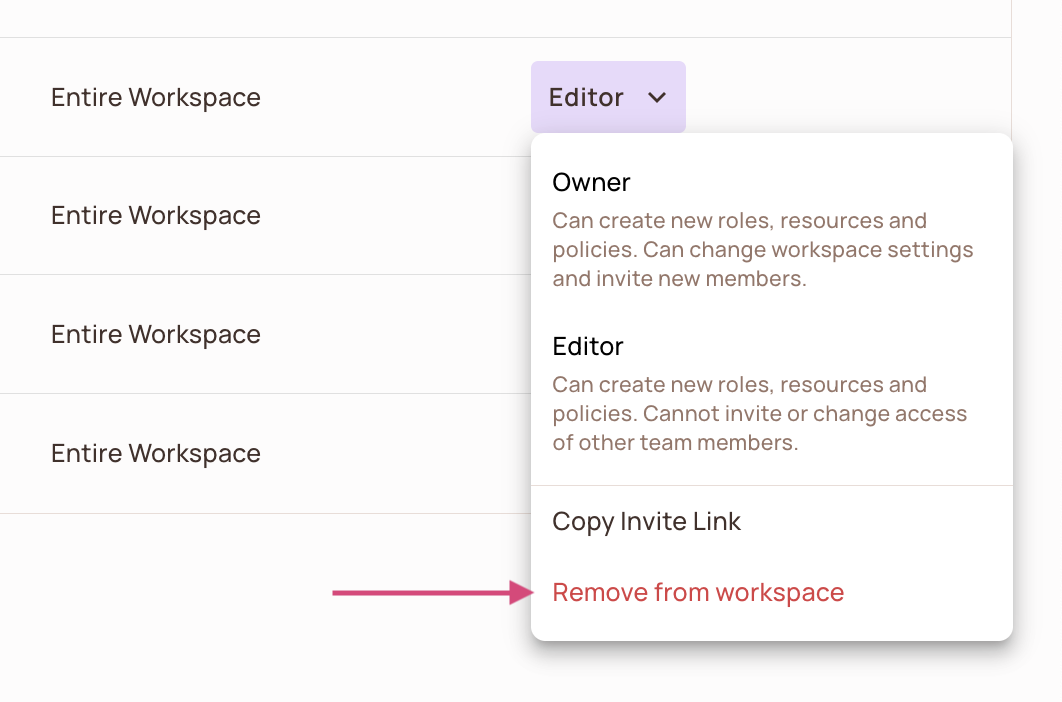
On the Members tab, open the access level menu of the member and click Remove from workspace.
Send an invitation link
When you invite a member, Permit emails the member a link to accept the invitation. Until the member accepts, the Members tab shows the member as a blank user.

If the member didn't receive the email, copy the invitation link and send the link to the member yourself:
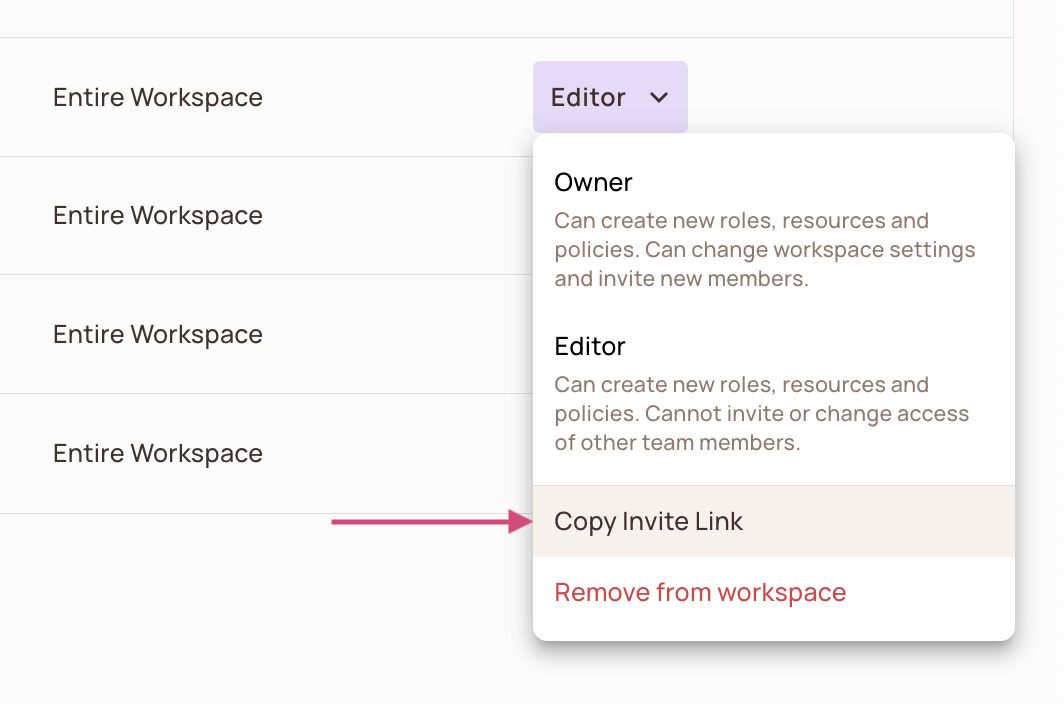
- On the Members tab, open the access level menu of the member.
- Click Copy Invite Link.
Each invitation link is unique to one invited member.
API keys
API keys authenticate calls to the Permit REST API at the organization (workspace), project, or environment level.
To manage API keys:
- In the Permit dashboard sidebar, open Settings.
- Select the API Keys tab.
The tab has one section per level: Organization API Keys, Project API Keys, and Environments API Keys. Each row shows the key's name, who created it, when it was created, and when it was last used. Click Reveal Key to show the secret.
API key levels
| API key level | Scope | Use it for |
|---|---|---|
| Organization API key | The entire workspace: all projects and environments | Workspace-level actions, such as creating projects |
| Project API key | One project and all of its environments | Project-level actions, such as creating environments |
| Environment API key | One environment | Your application, SDKs, and policy decision point (PDP). Only an environment API key works with the PDP container. |
Give each system the lowest level of API key that covers its tasks. Anyone with an organization API key can change every project and environment in your workspace through the Permit API.
Permit creates an environment API key for every new environment.
For how to get an API key and call the Permit API, see Get your API key and Use the Permit API.
Create an API key
- On the API Keys tab, click Create Key in the section of the level you need.
- In the New API Key window, select the project, and the environment for an environment key.
- Enter a name in API Key Name. The name is required.
- Click Create. The dashboard confirms that a new key was created, and the key appears in the section with your name in the Created By column.
Rotate or delete an API key
- On the API Keys tab, click the three dots at the end of the key's row.
- Click Rotate Key to replace the secret with a new one, or Delete Key to remove the key.
After you rotate or delete an API key, the old key stops authenticating. Every application, SDK client, PDP, and script that uses the old key fails to call Permit until you configure the new key.
Data Processing Addendum (DPA)
Permit publishes a standard Data Processing Addendum that you can review and adopt. To ask for a tailored addendum, contact Permit support or your customer success manager. For what each plan includes, see the Permit.io pricing page.
Permit doesn't require personally identifiable information (PII) in its control plane. The only required field of a user is the user key, so you can use opaque user identifiers as user keys and omit email addresses and names.