Building Your First ABAC Policy
Build an attribute-based access control (ABAC) policy in the Permit.io dashboard, then confirm it with a permit.check() call. This tutorial is for developers who have built a role-based policy in Permit and need rules based on user and resource attributes.
Prerequisites
- A Permit.io account with a project and an environment. See the Quickstart.
- To run the check at the end: your environment API key (Get your API key), the Permit Node.js SDK (
npm install permitio), and a container policy decision point (PDP) running athttp://localhost:7766. The Cloud PDP doesn't evaluate ABAC policies. See Cloud PDP capabilities. - Familiarity with user sets and resource sets. See the ABAC overview.
Example scenario
The tutorial builds this policy:
"Only full-time students at Stanford University can rent university bicycles after 5pm."
The policy uses these names, attributes, and actions. The steps use the same names throughout:
| Part | Name | Type |
|---|---|---|
| User attribute | university | String |
| User attribute | is_full_time | Boolean |
| Resource attribute | time (hour of the day) | Number |
| Resource | bicycle | |
| Actions | rent, ride | |
| User set | Full-time Stanford Student | |
| Resource set | Bicycle available after 5pm |
Build the policy in the dashboard
Create the attributes first, then the user set and the resource set, then the permissions that connect them.
1. Create the university and is_full_time user attributes
User attributes describe your users, such as their university or employment status.
- Open the Directory screen.
- Click Settings.
- Select User Attributes, then click Add Attribute.
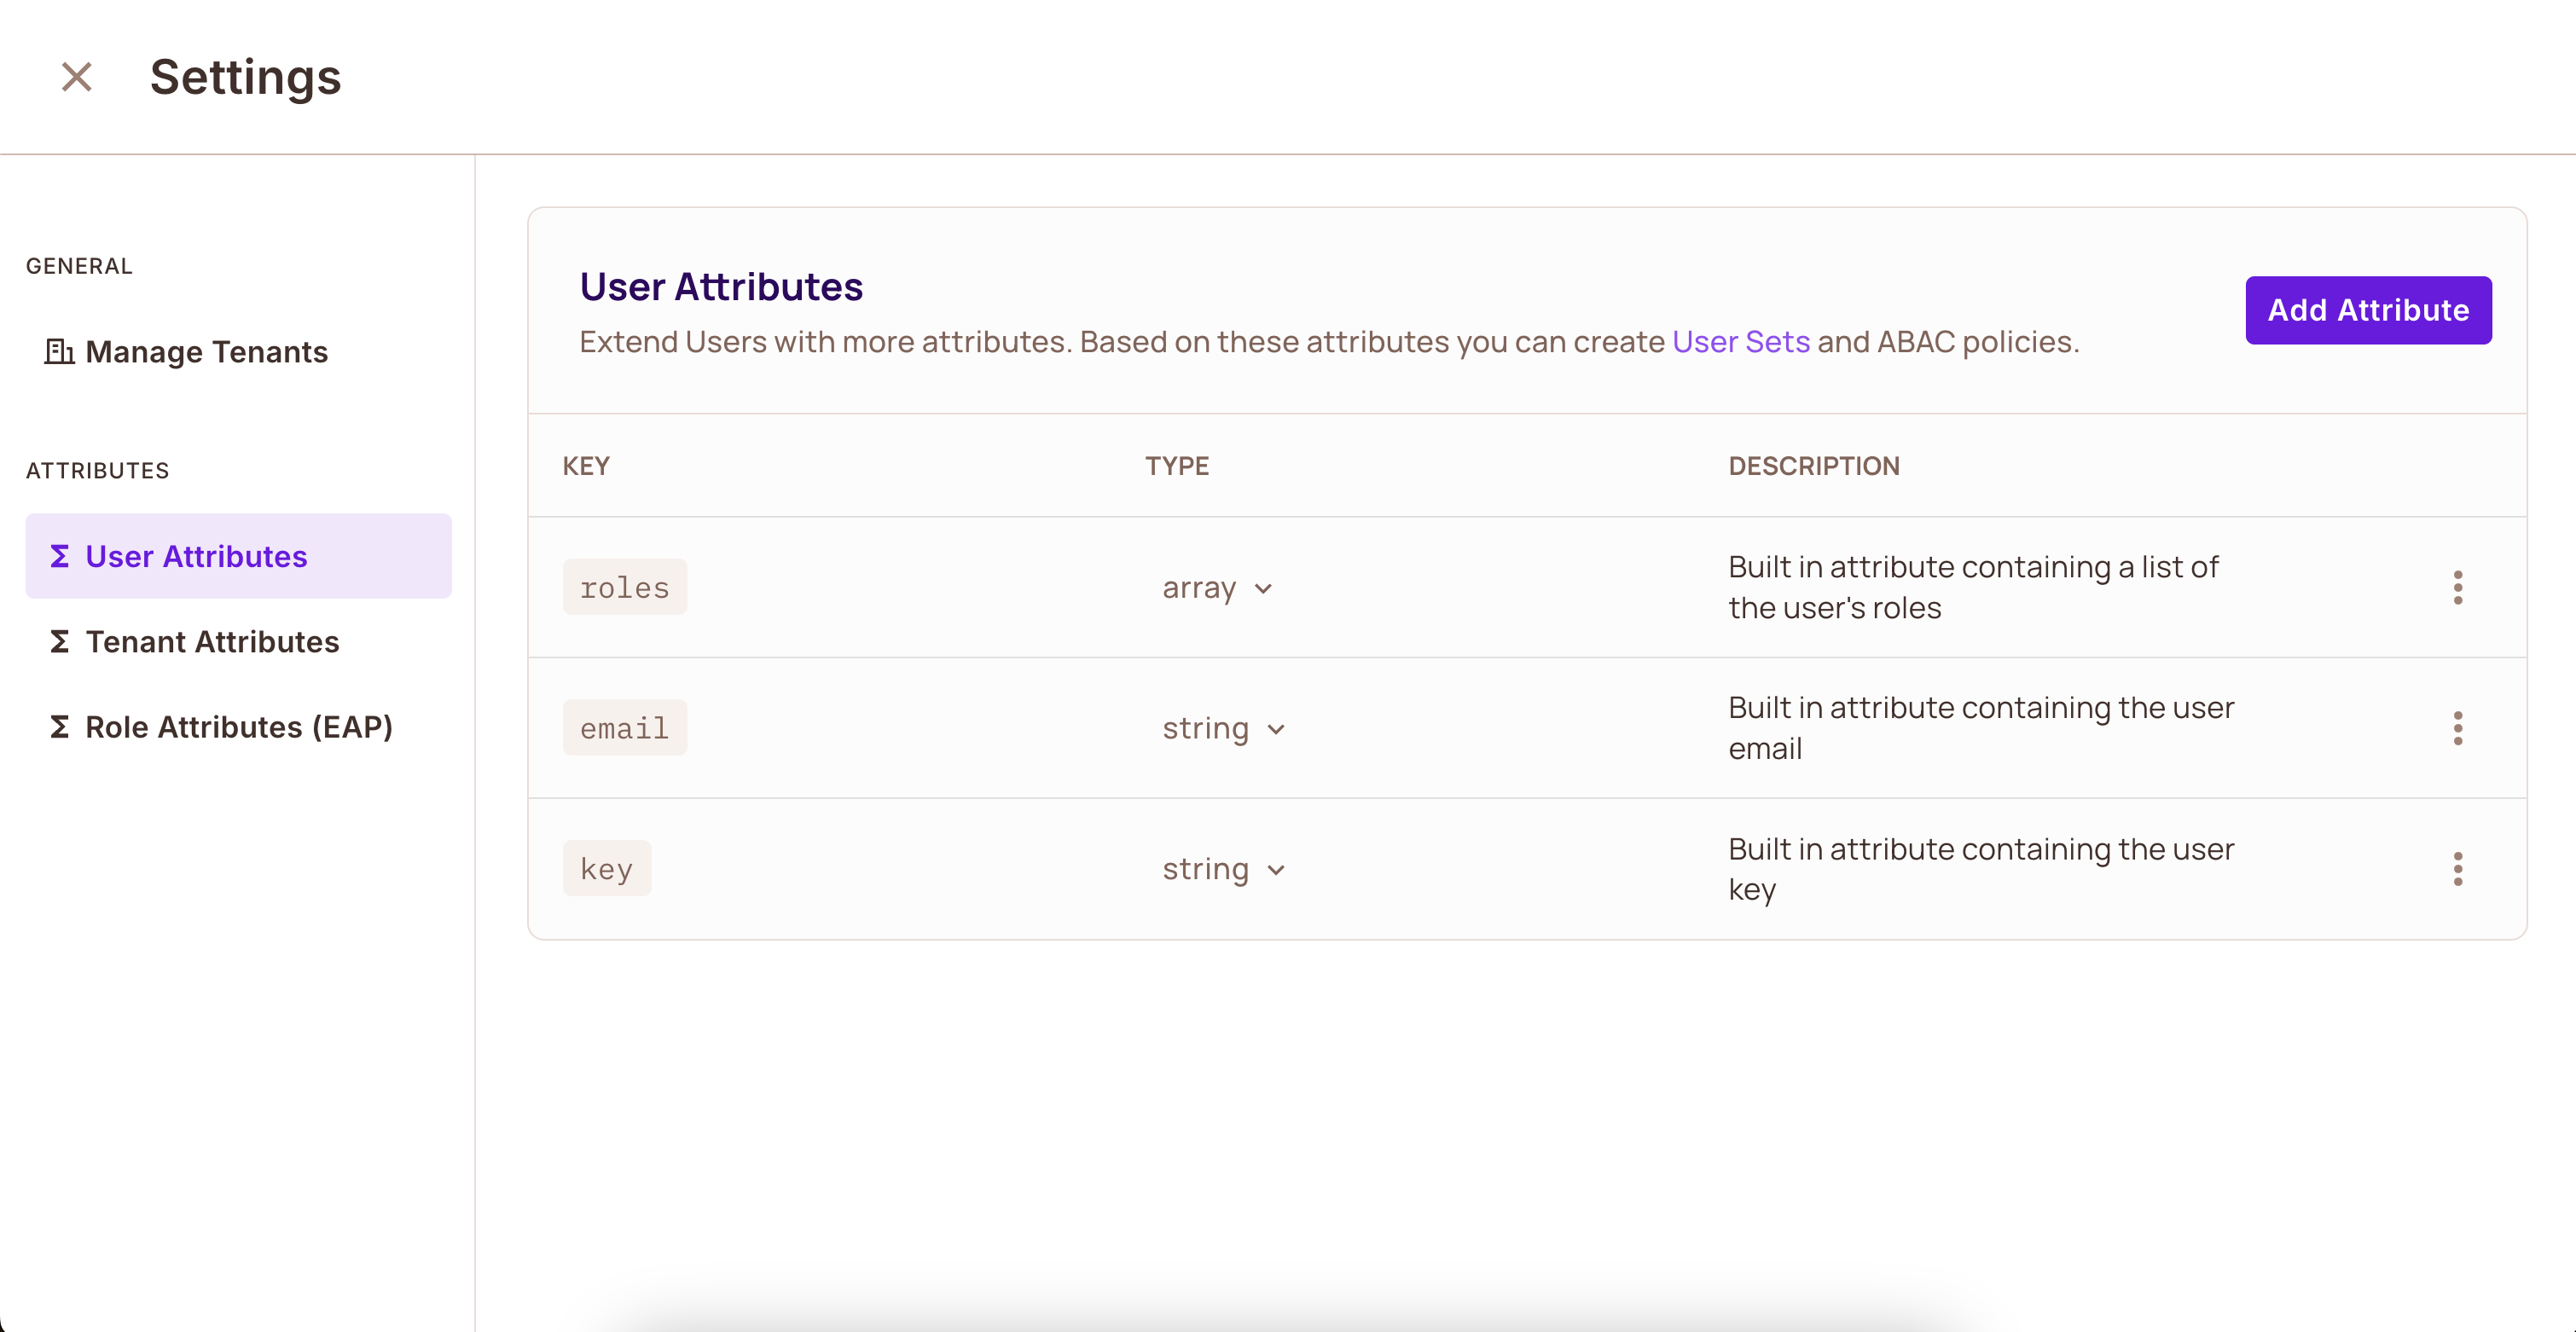
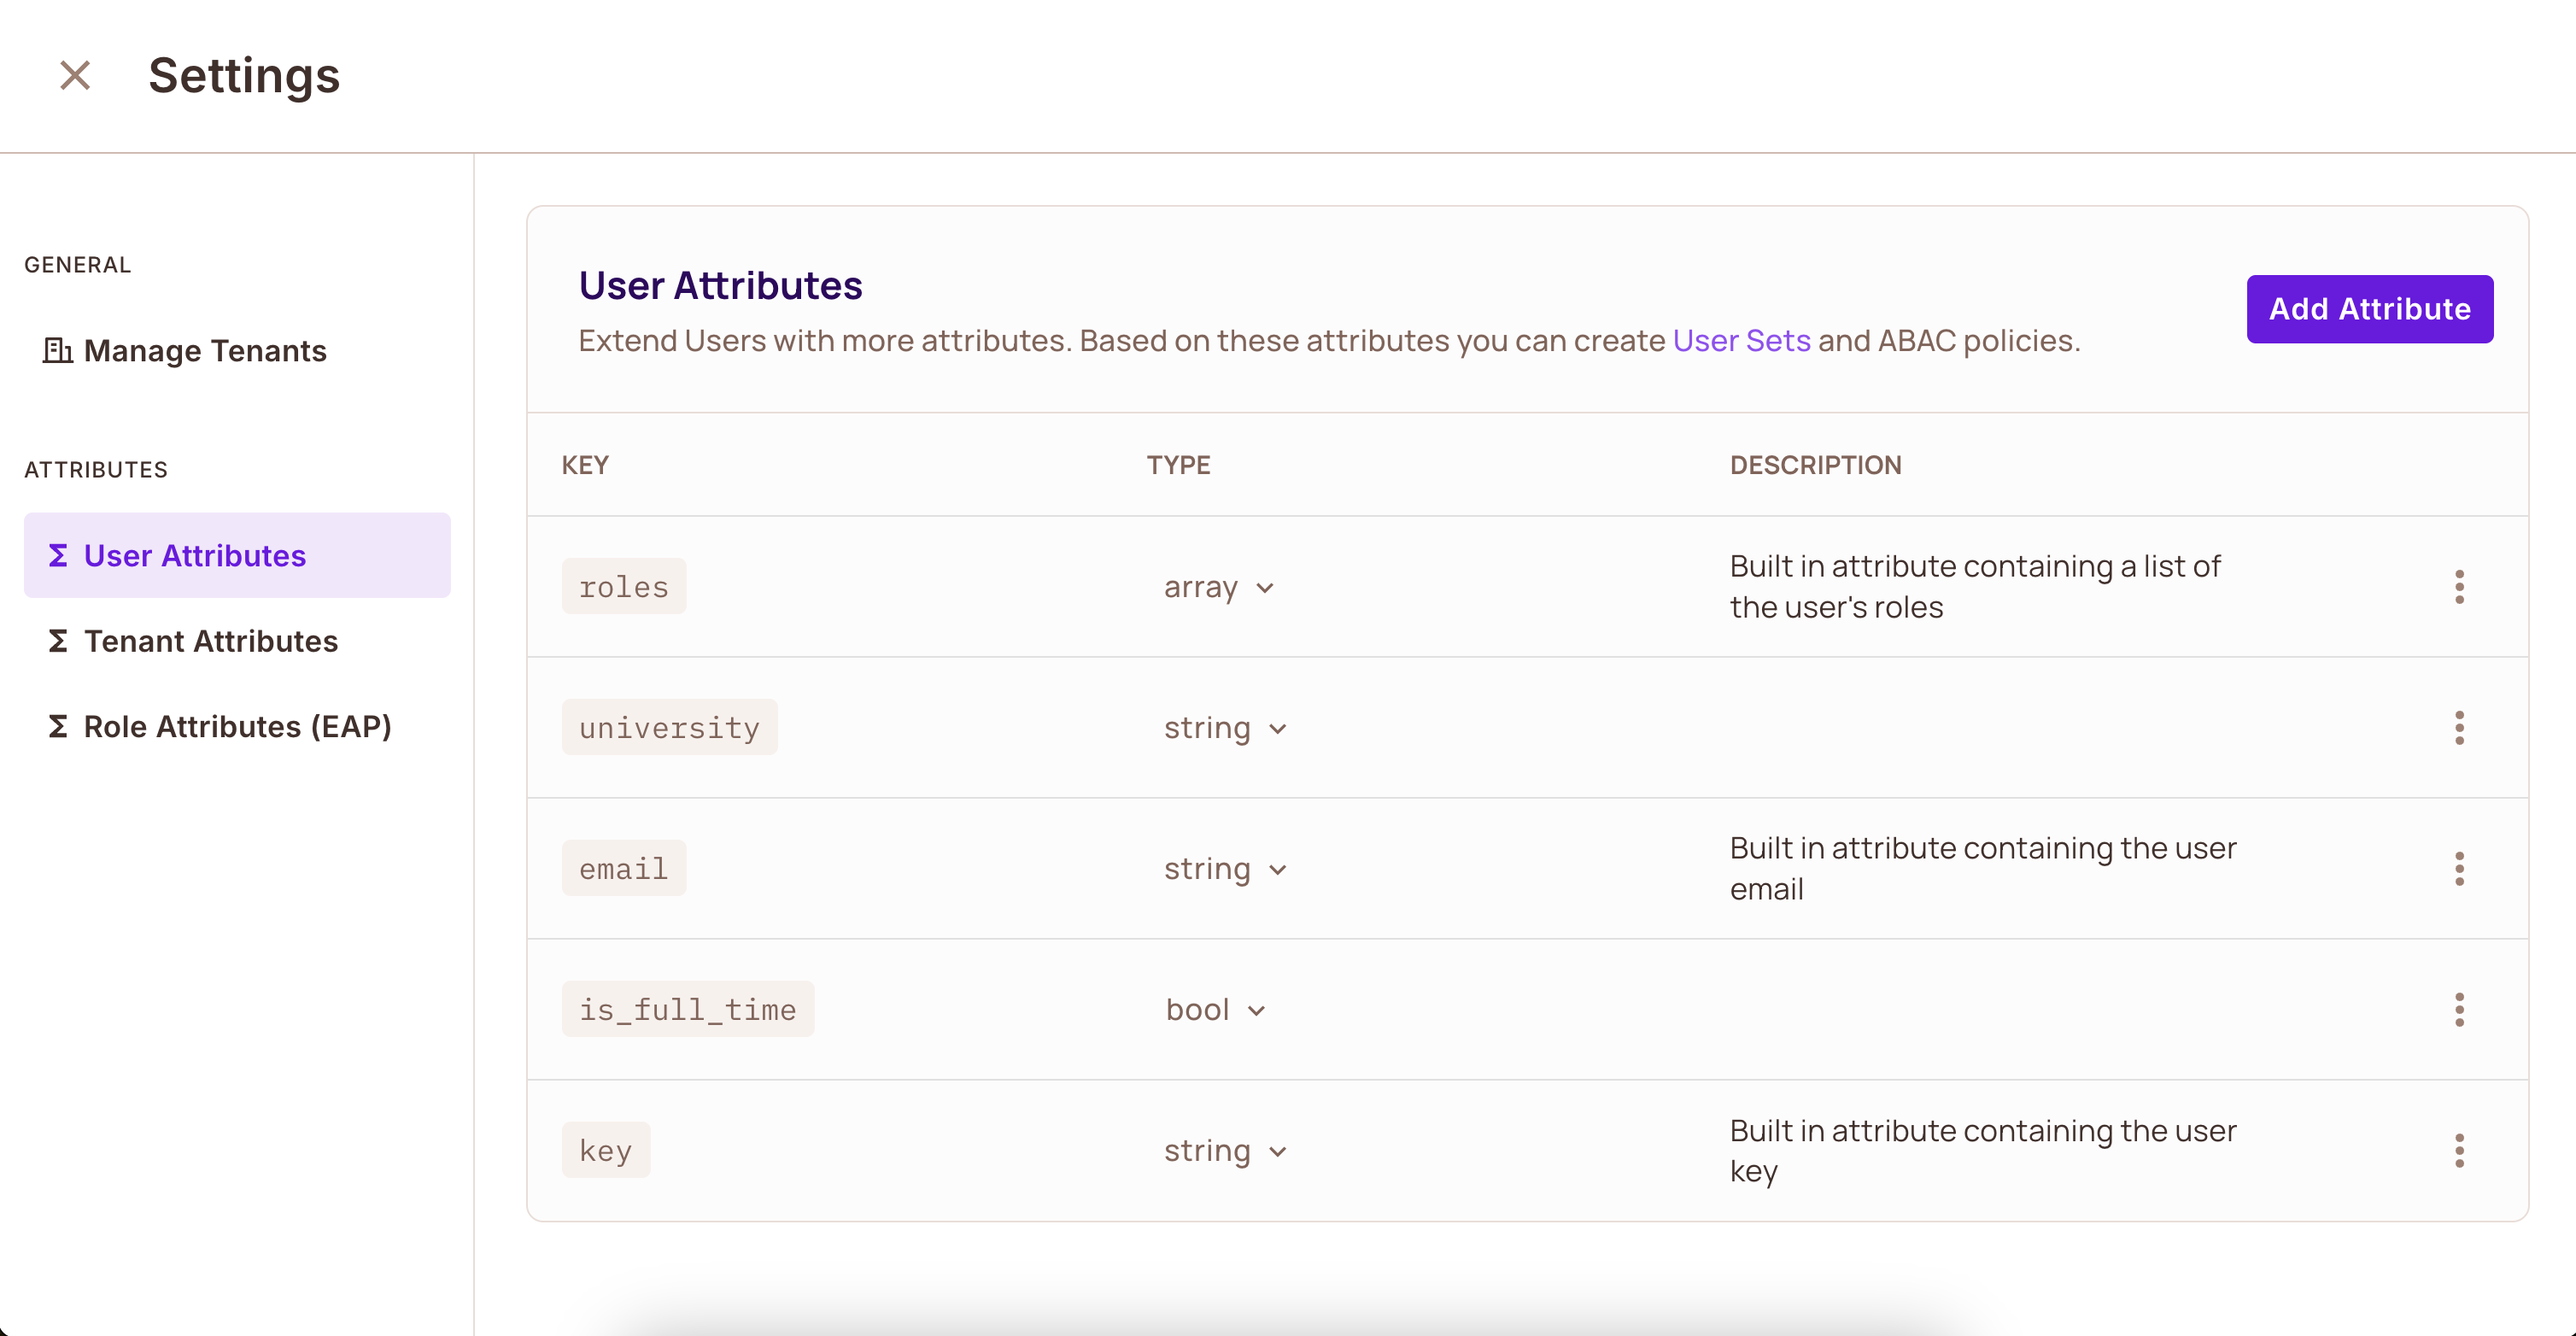
- Add the two user attributes for the bicycle rental example:
university(string): the university the student attends.is_full_time(bool): whether the student is enrolled full-time.
- Click Save.
2. Create tenant attributes (optional)
Tenant attributes describe a whole tenant, such as a customer organization. The bicycle policy doesn't need tenant attributes. Add them when your rules depend on the tenant, for example on its subscription plan.
- On the Directory screen, click Settings.
- Select Tenant Attributes, then click Add Attribute.
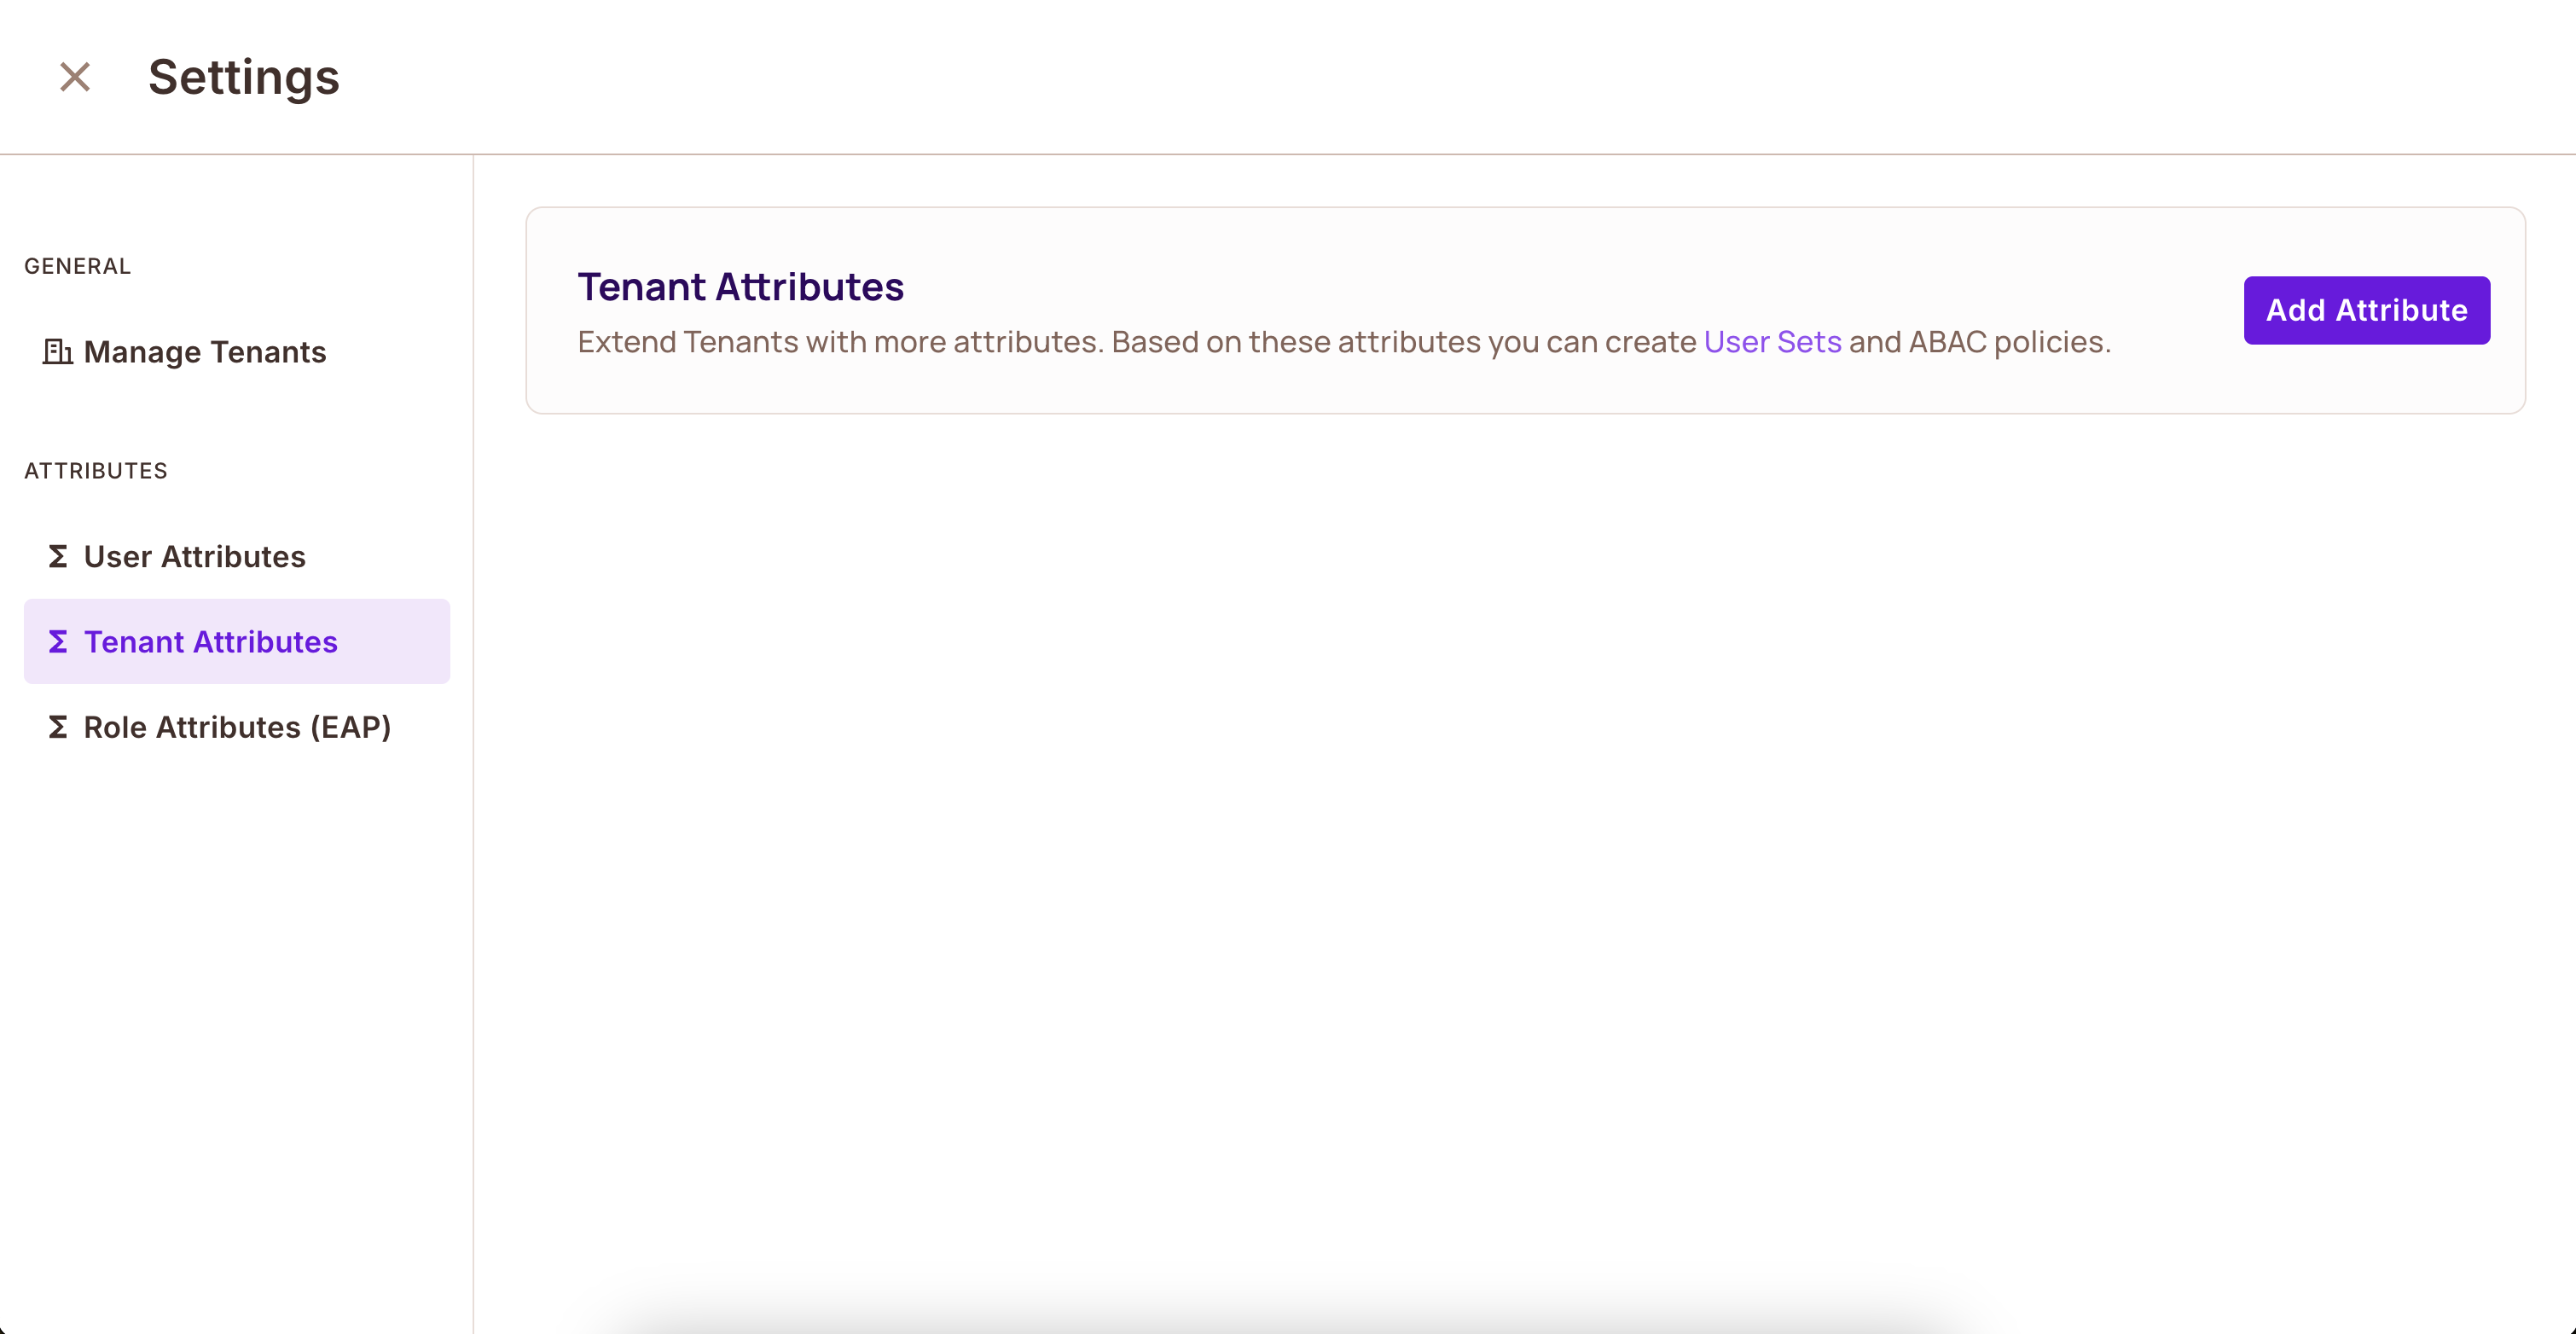
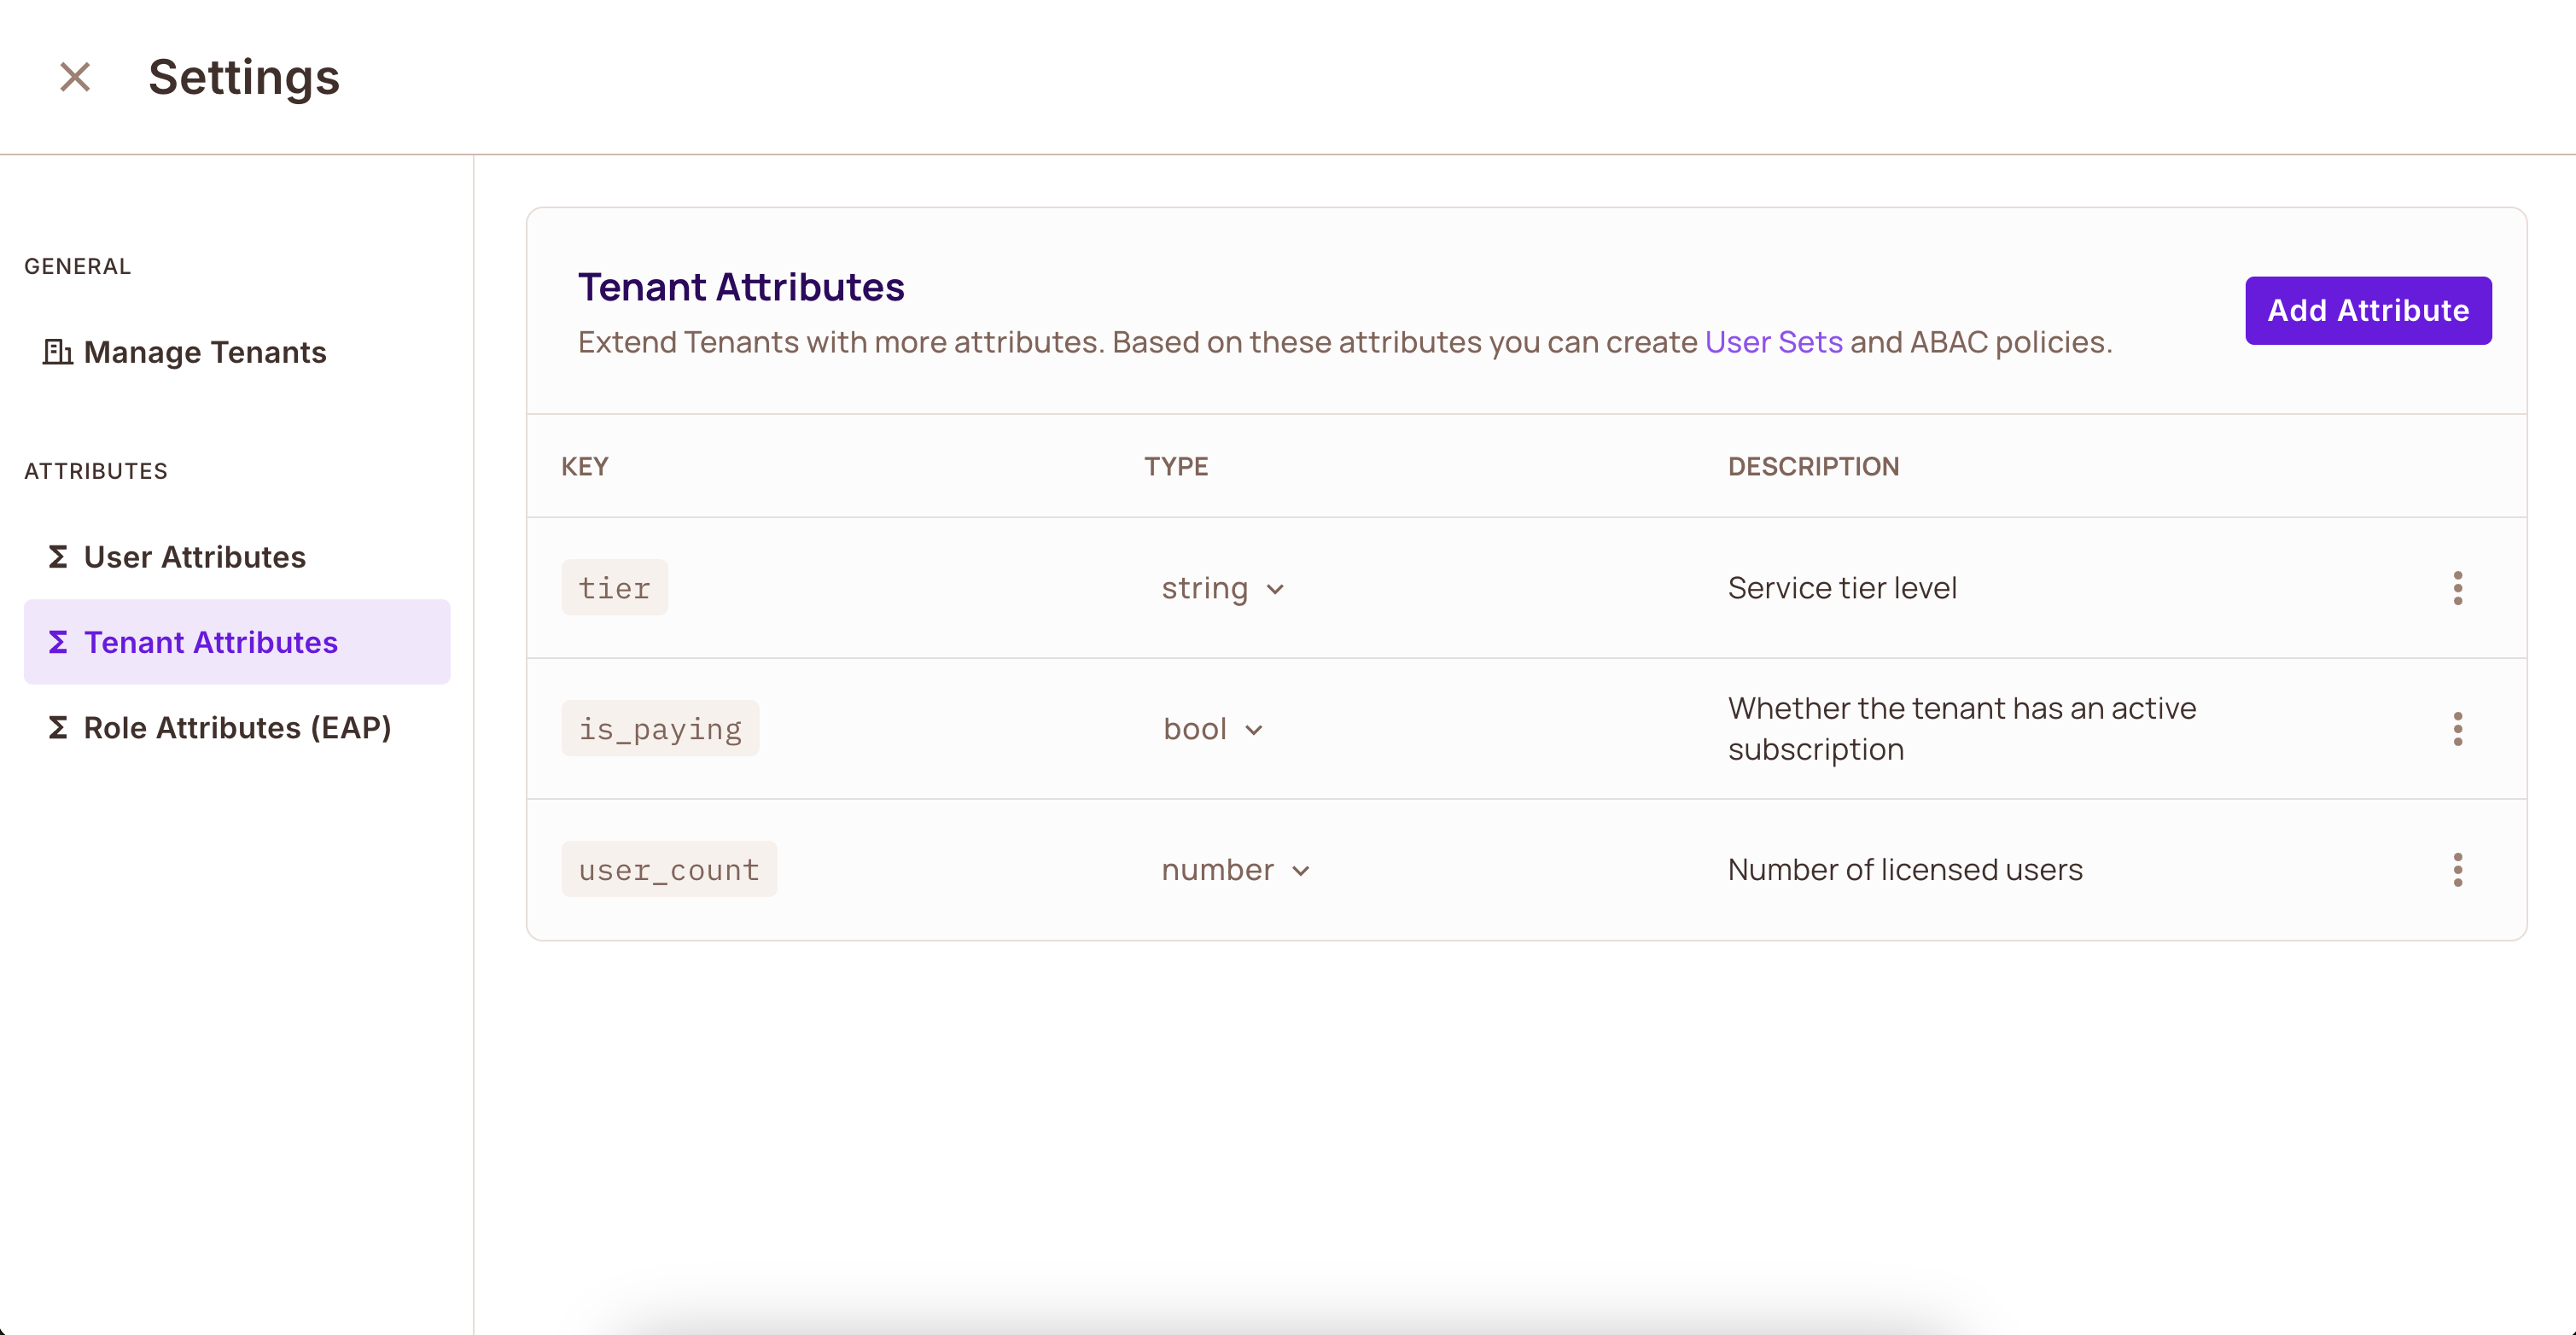
- Add the tenant attributes your rules need. For example:
is_paying: whether the tenant has an active subscription.tier: the service tier.user_count: the number of licensed users.
- Click Save.
3. Create the Full-time Stanford Student user set
A dynamic role (user set) is a group of users whose attributes match a set of conditions. A user joins or leaves the user set when their attribute values change.
- Open the Policy screen and select the ABAC Rules tab.
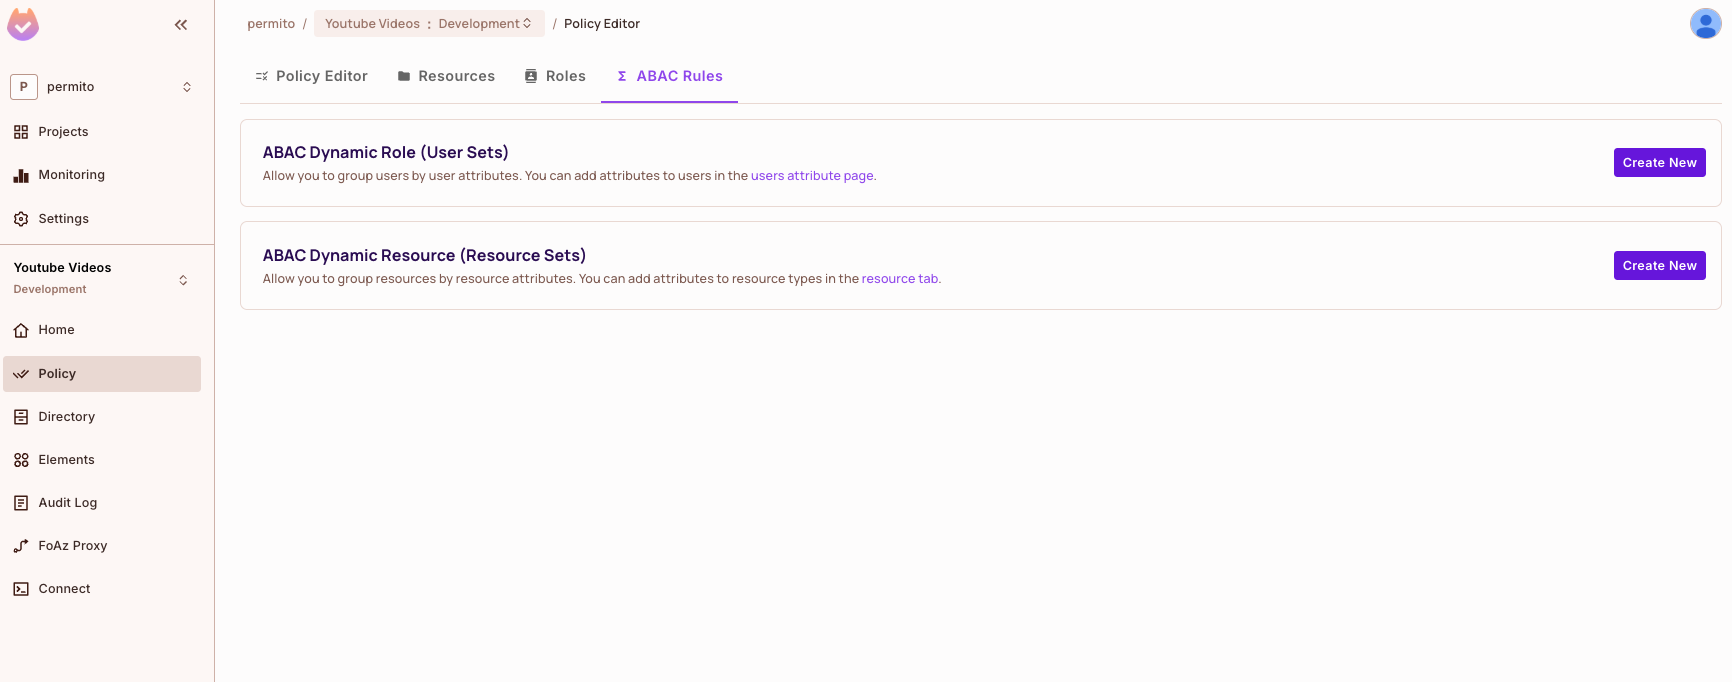
- In ABAC Dynamic Role (User Sets), click Create New.
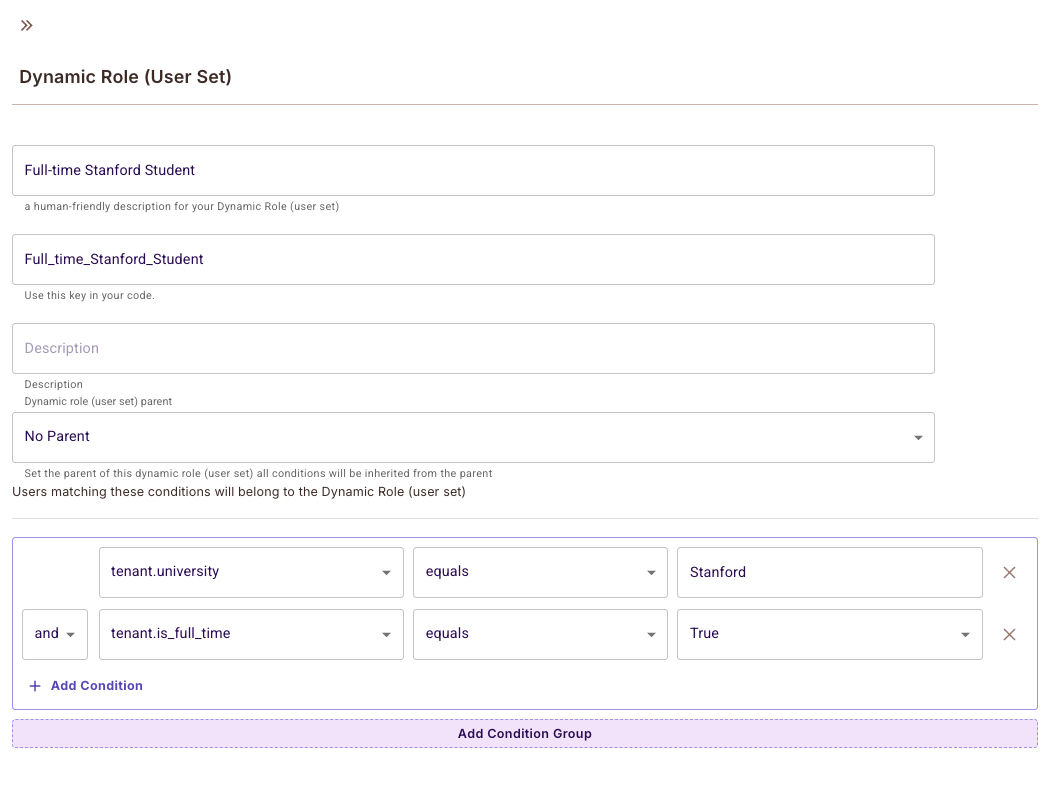
- Name the user set
Full-time Stanford Student. - Click Add Condition and add these conditions:
user.universityequalsStanforduser.is_full_timeequalstrue
- Save the user set. The ABAC Rules tab lists
Full-time Stanford Studentunder ABAC Dynamic Role (User Sets).
Permit doesn't enforce tenant boundaries for user sets. A user who matches the conditions of a user set matches it in every tenant, so the user set grants its permissions on resources in other tenants too. To keep a user set inside a tenant, do one of the following:
- Add a condition on
user.roles. - Use tenant attributes, and compare them with
resource.tenantin the resource set.
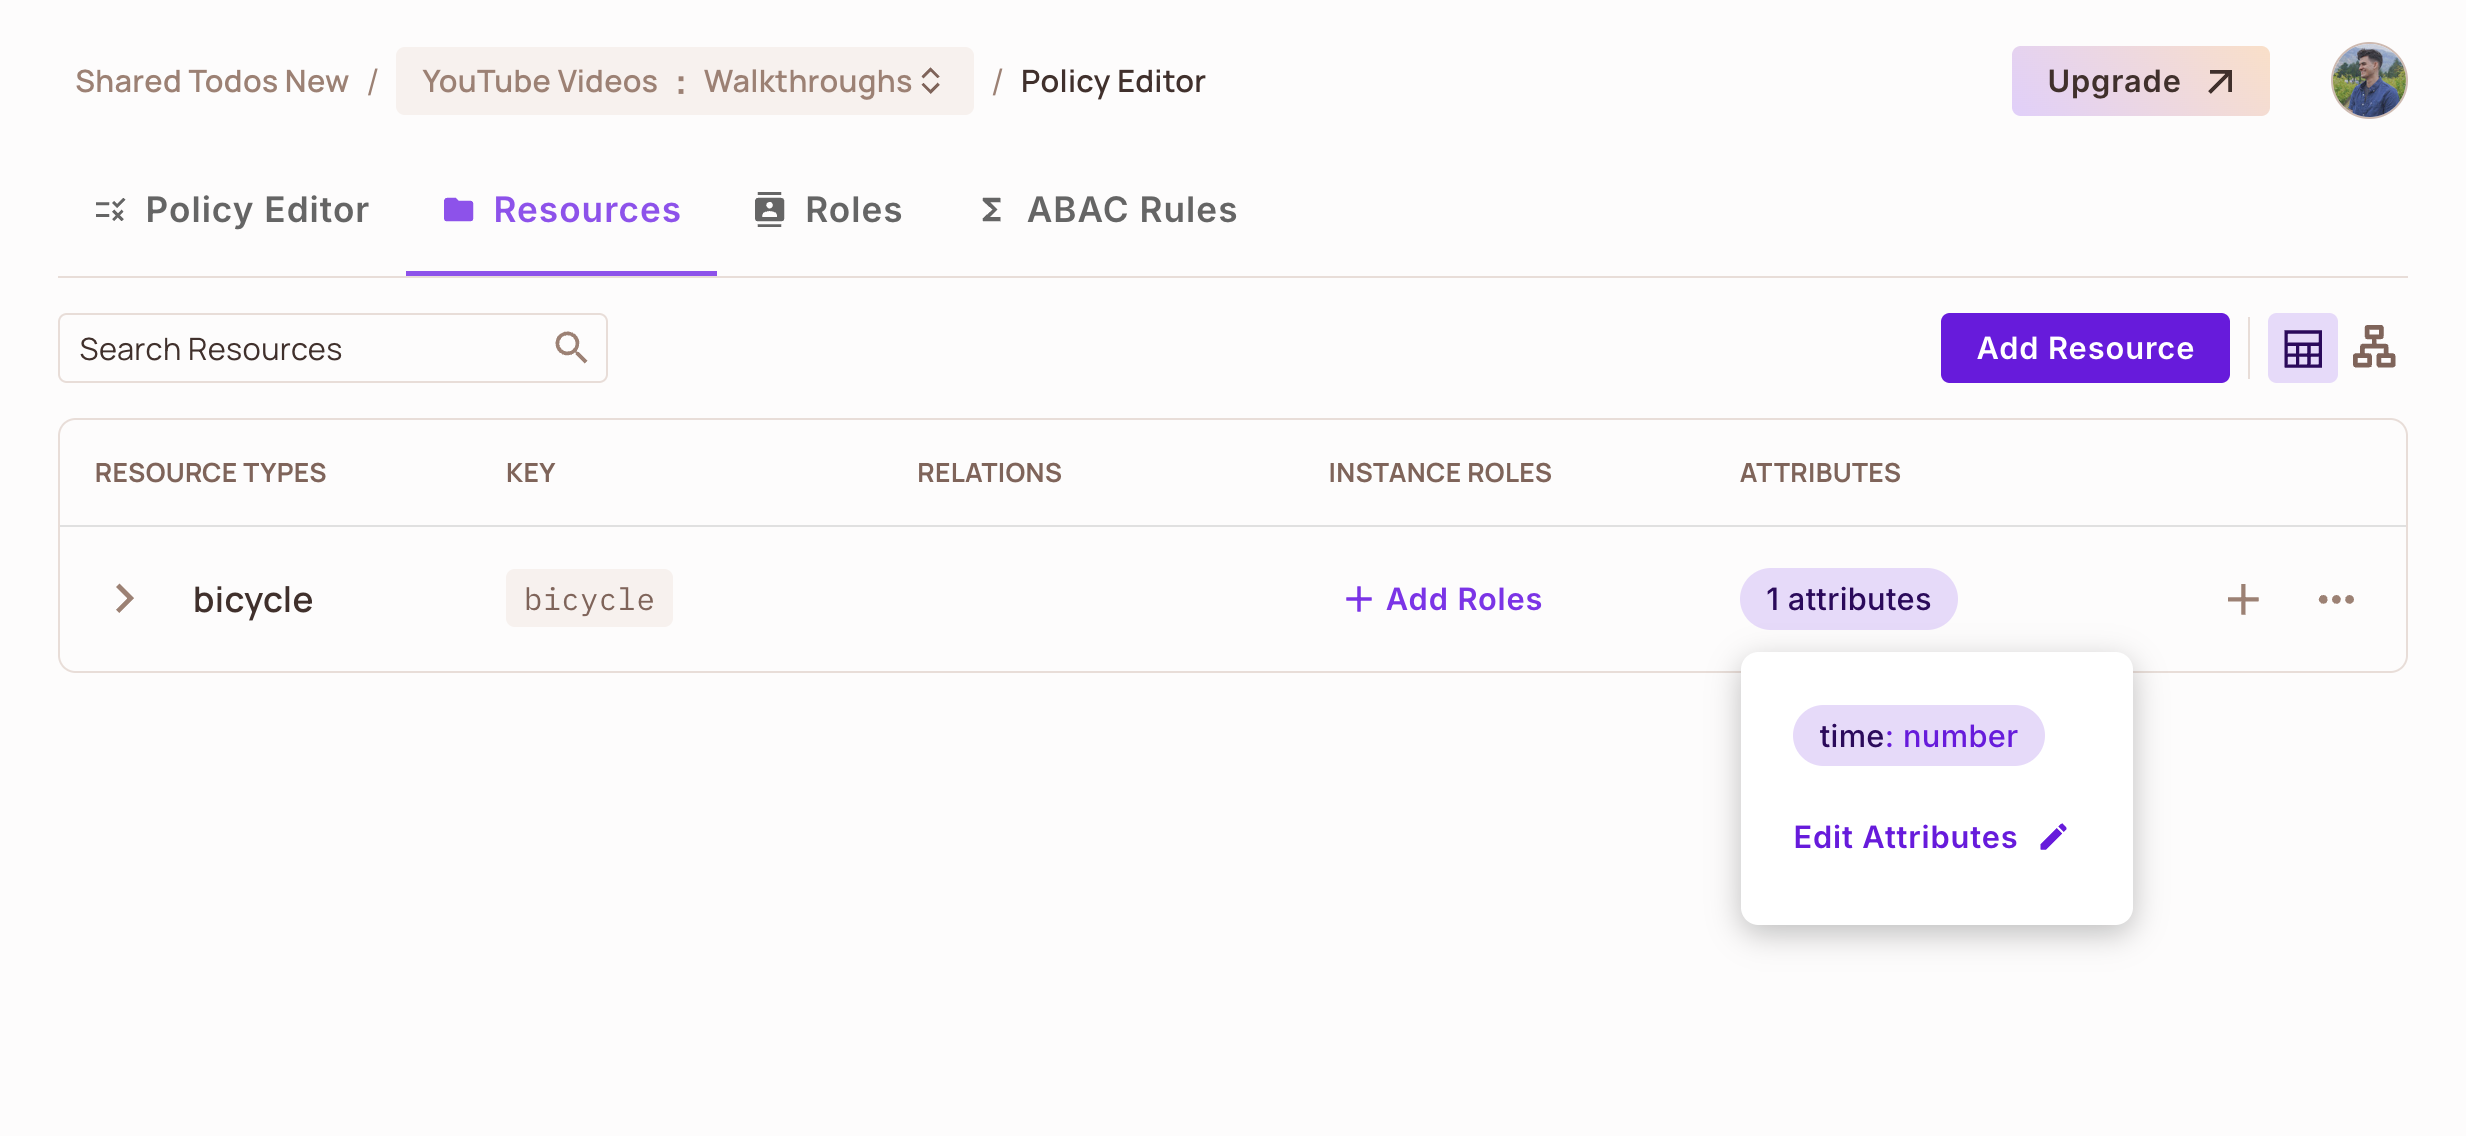
4. Create the bicycle resource
A resource is an object type you want to protect. Each resource has actions and can have attributes.
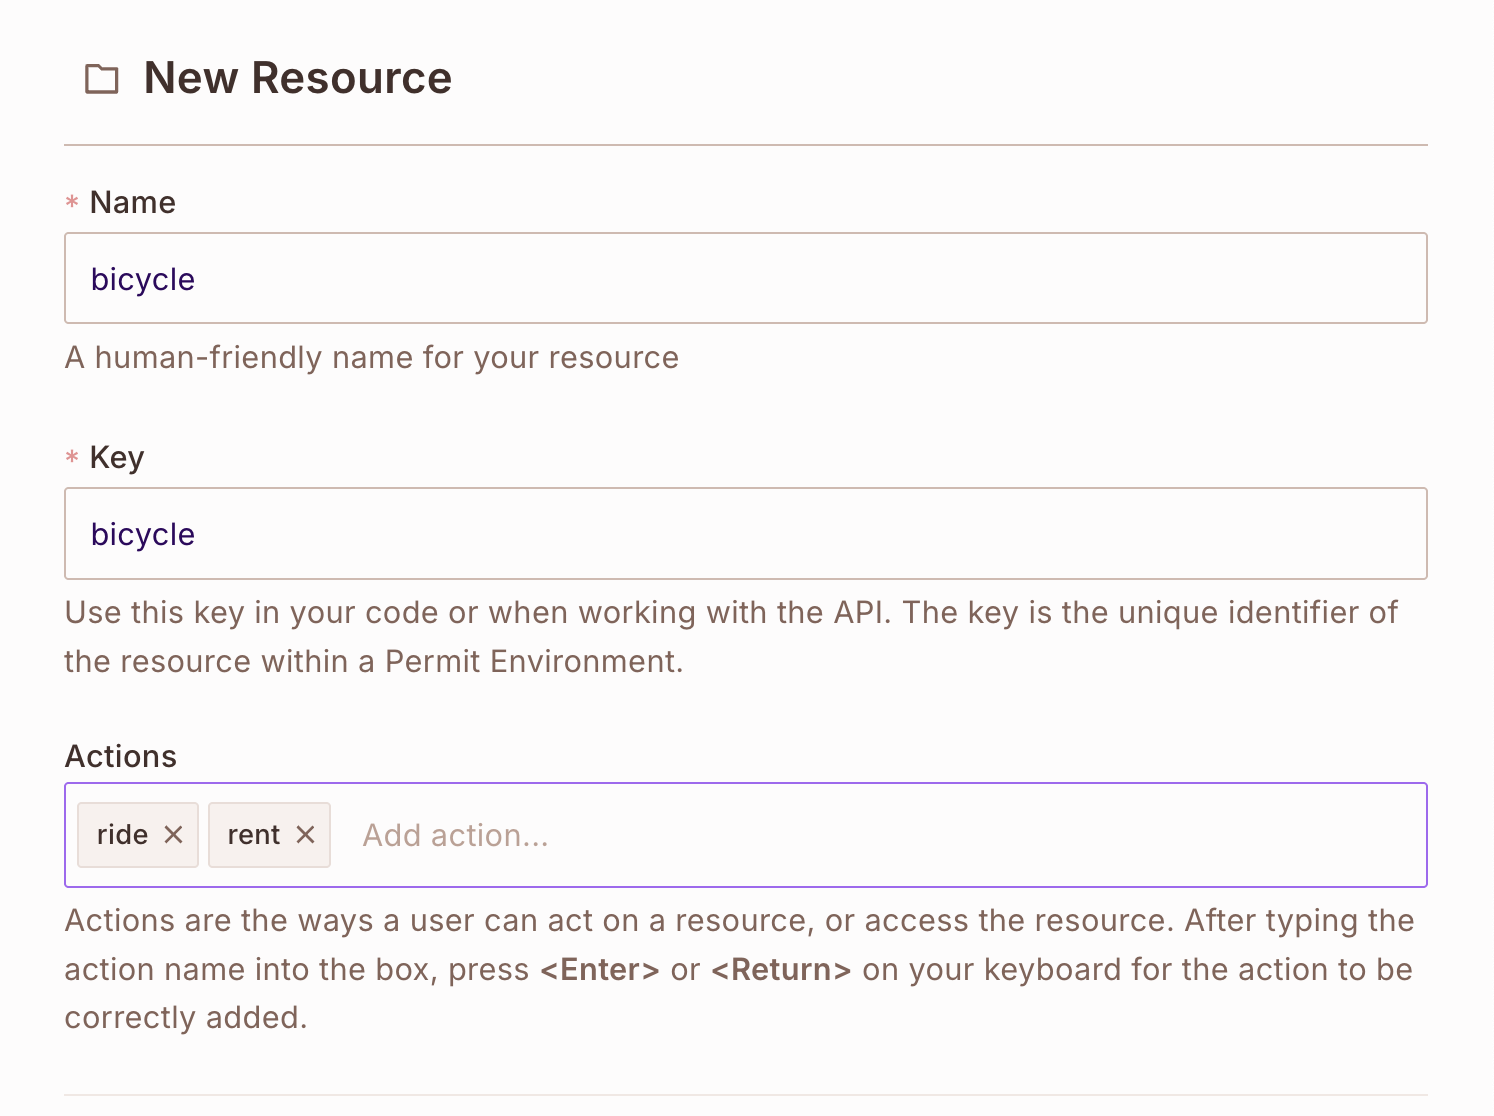
- Open the Policy screen and select the Resources tab.
- Click Add Resource.
- Name the resource
bicycle. - Add the actions
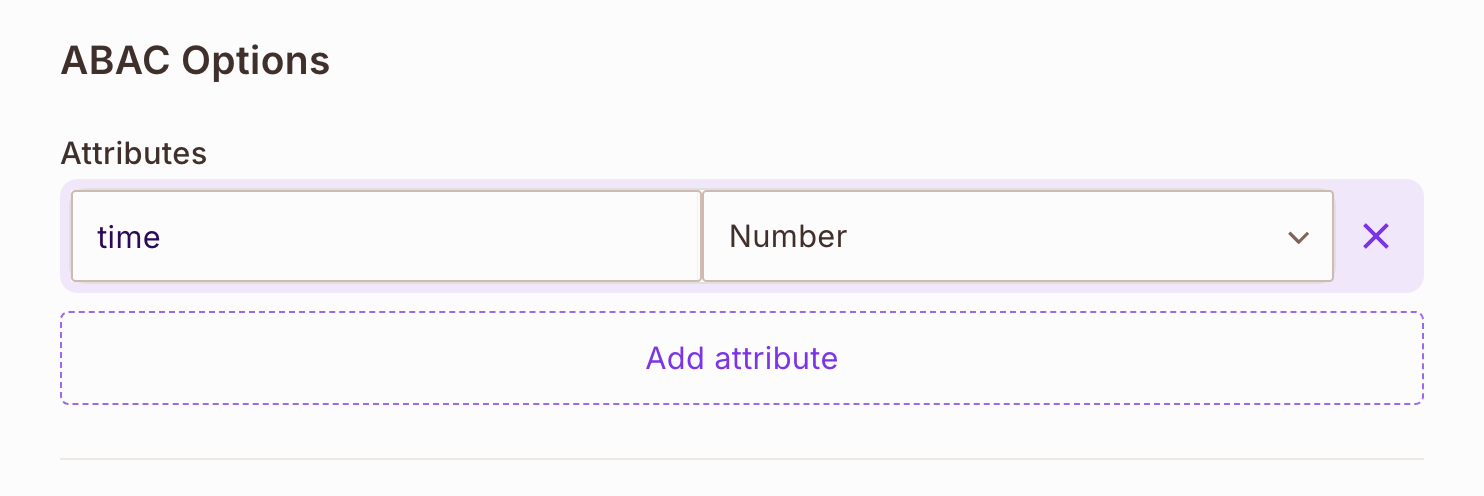
rideandrent. - Under ABAC Options, add the attribute
timewith the type Number. - Click Save.
5. Create the Bicycle available after 5pm resource set
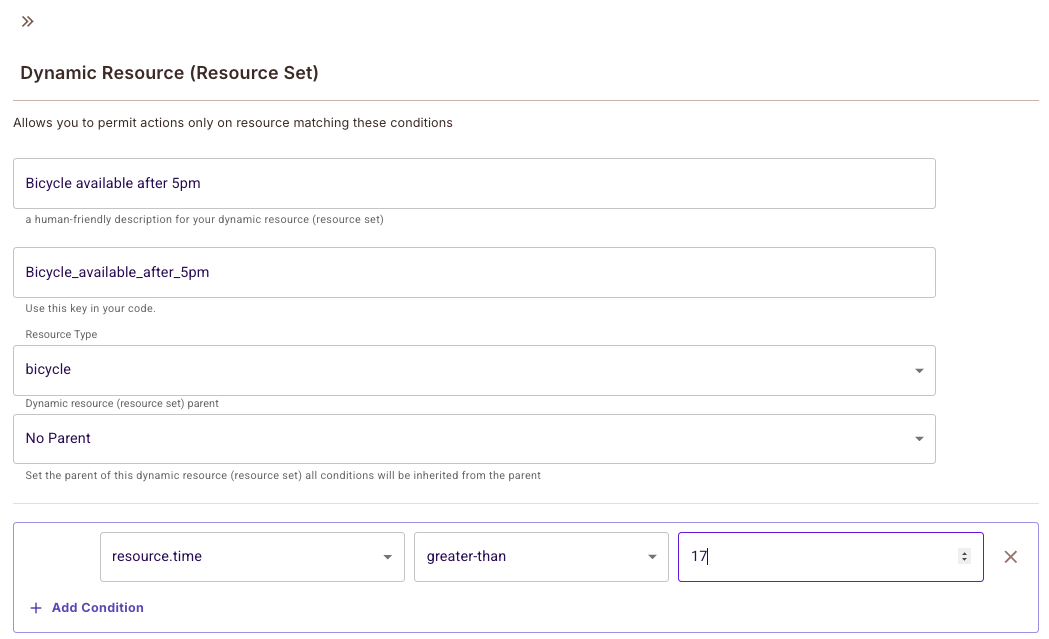
A dynamic resource (resource set) is a group of resources whose attributes match a set of conditions. For the example, create a resource set that matches a bicycle whose time attribute is greater than 17.
- On the ABAC Rules tab, in ABAC Dynamic Resource (Resource Sets), click Create New.
- Name the resource set
Bicycle available after 5pm, and select thebicycleresource type. - Add the condition
resource.timegreater-than17. - Save the resource set.
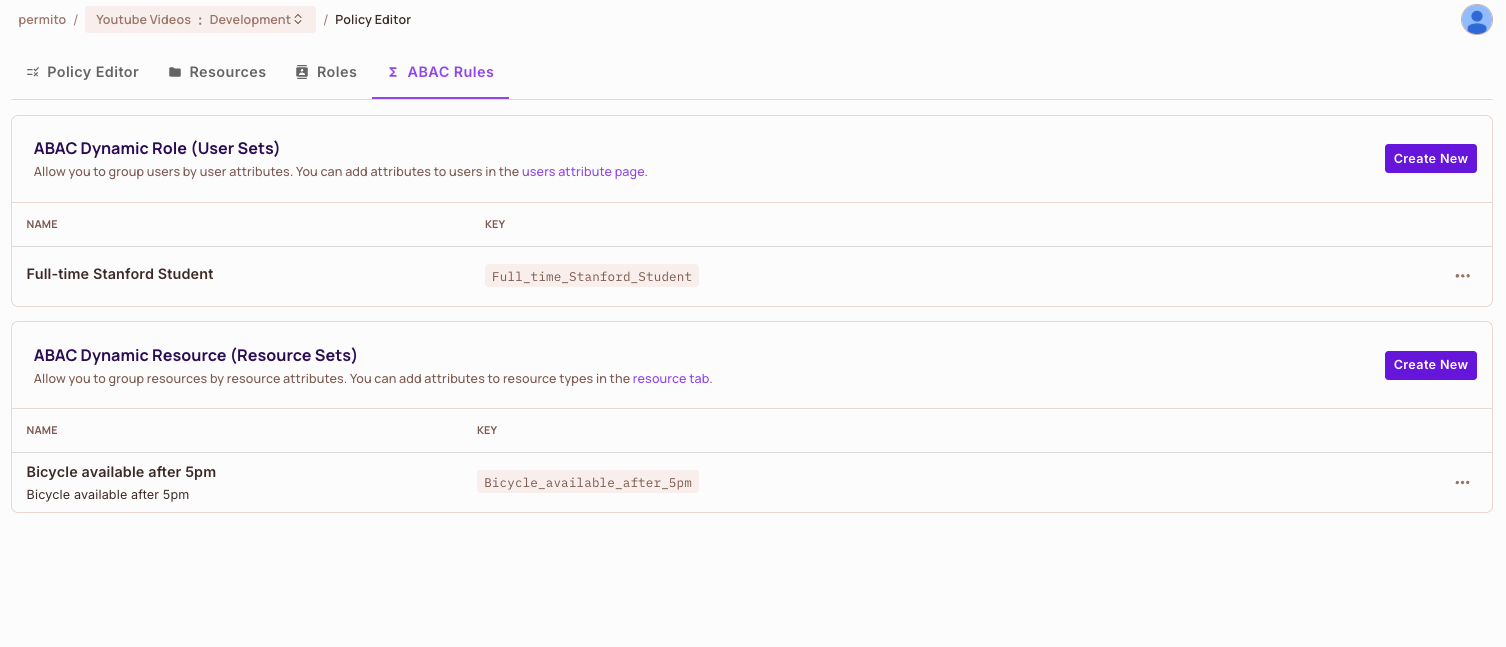
The ABAC Rules tab lists the Full-time Stanford Student user set and the Bicycle available after 5pm resource set:
To compare a resource attribute with a user attribute instead of a fixed value, see Compare a resource attribute with a user attribute. To build a set from several condition groups, see Combine several condition groups.
6. Grant the user set rent and ride on the resource set
Connect the Full-time Stanford Student user set to the Bicycle available after 5pm resource set with permissions.
- Open the Policy screen and select the Policy Editor tab.
- Find the
Full-time Stanford Studentuser set. - In the column of the
Bicycle available after 5pmresource set, selectrentandride. - Save your changes.
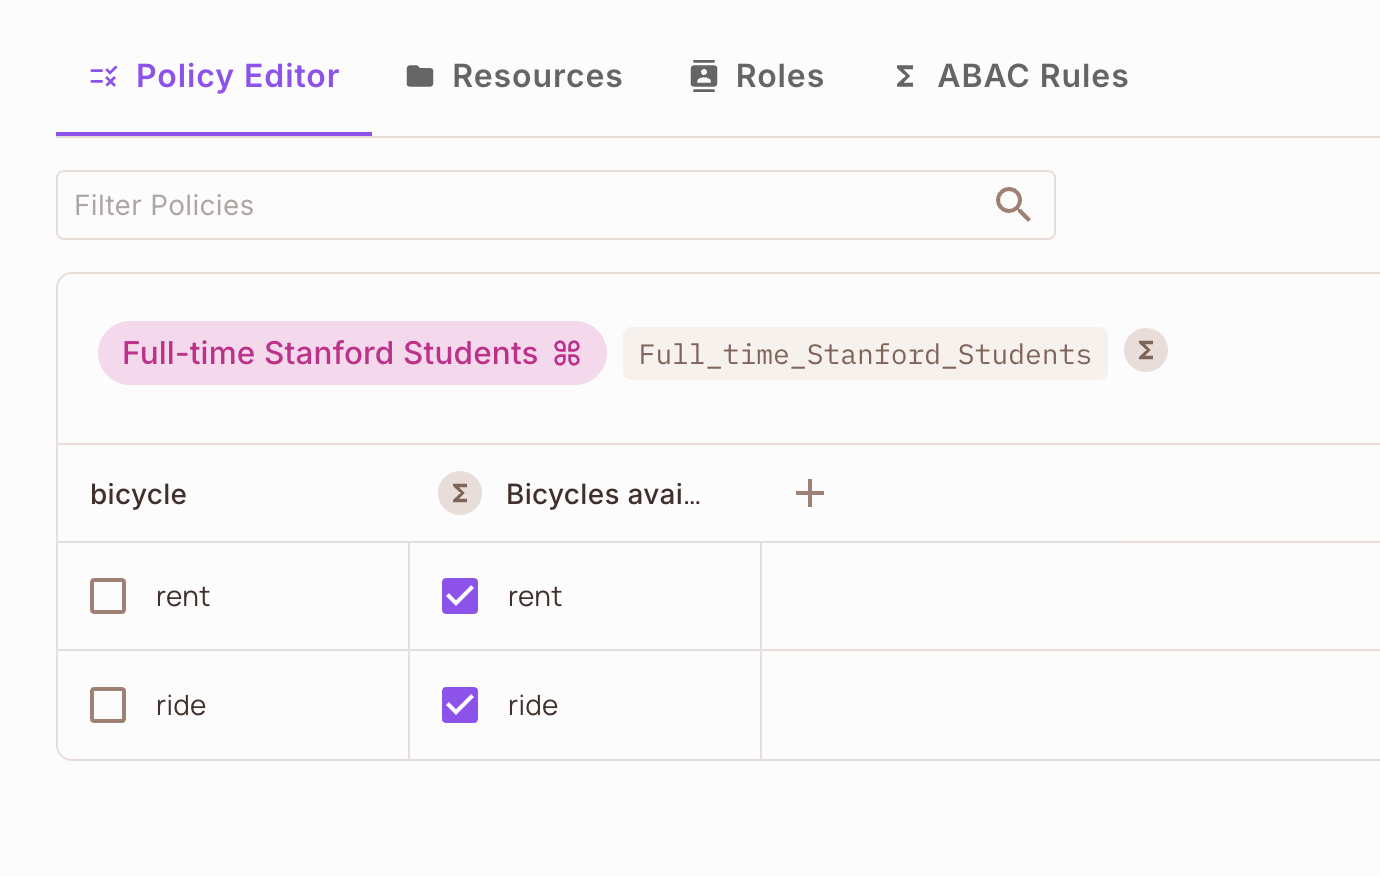
In the screenshot, the two sets are named Full-time Stanford Students and Bicycles available after 5pm. The Policy Editor shows the names you entered when you created the sets.
You can't use type as the key of an attribute, because type is a reserved keyword.
Check the policy
Call permit.check() with the attribute values. The following example passes the user and resource attributes in the call, so you don't need to store attribute values in Permit first. Replace <YOUR_API_KEY> with your environment API key:
import { Permit } from "permitio";

const permit = new Permit({
  token: "<YOUR_API_KEY>",
  pdp: "http://localhost:7766",
});

const permitted = await permit.check(
  {
    key: "john@permit.io",
    attributes: { university: "Stanford", is_full_time: true },
  },
  "rent",
  {
    type: "bicycle",
    tenant: "default",
    attributes: { time: 18 },
  }
);

console.log(permitted);
The script prints true:
true
Change the attribute values to check the other cases:
| User attributes | Resource attributes | Action | Result |
|---|---|---|---|
university: "Stanford", is_full_time: true | time: 18 | rent | true |
university: "Stanford", is_full_time: false | time: 18 | rent | false |
university: "Stanford", is_full_time: true | time: 12 | rent | false |
To store attribute values on users and resources instead, see Defining attributes. For more on passing attributes in a check, see Check permissions with permit.check().
Next steps
- Defining attributes: store attribute values on users, tenants, resources, and roles.
- ABAC design patterns: implement ownership and group membership with attributes.
- Time-based role example: grant a role that expires.
- Load custom data: load attribute data from the dashboard, the check call, or OPAL.