Set Up Hosts for Your Organization
This guide is for the admin who deploys Permit MCP Gateway for an organization. You create a host, import the MCP servers your team uses, connect MCP clients to the gateway, and plan how to roll the gateway out to more users and environments.
What is a host?
A host is a named instance of Permit MCP Gateway. Each host gets its own subdomain (for example, acme-brave-coral-37.agent.security) and is isolated from other hosts:
| A host has its own | What that means |
|---|---|
| Subdomain | A unique gateway URL that MCP clients connect to. |
| Permit environment | Policies, roles, and resource definitions are scoped to the host. |
| Users and sessions | Authentication, consent, and audit trails are isolated per host. |
| MCP servers | The host has its own imported upstream servers, each with its own trust level configuration. |
Each host maps 1:1 to a Permit environment. An environment can be linked to only one host. You can't change a host's environment after you create the host. To use a different environment, delete the host and create a new one.
Prerequisites
- A Permit account with permission to create API keys.
- The URL of each upstream MCP server your team uses (for example,
https://mcp.linear.app/mcp), and an account with that provider if the server requires sign-in. - The email addresses of the first users you want to give access.
Set up a host step by step
1. Sign in to the admin dashboard
Go to app.agent.security and sign in, or create an account.
2. Connect your Permit organization
- In Permit, go to Settings > API Keys.
- Create an organization-scoped API key.
- Paste the API key into the Permit MCP Gateway admin dashboard.
After the organization connects, its name appears in the header. You can connect more than one organization and switch between them with the organization selector. See Admin dashboard reference for the layout of the dashboard.
3. Create a host
-
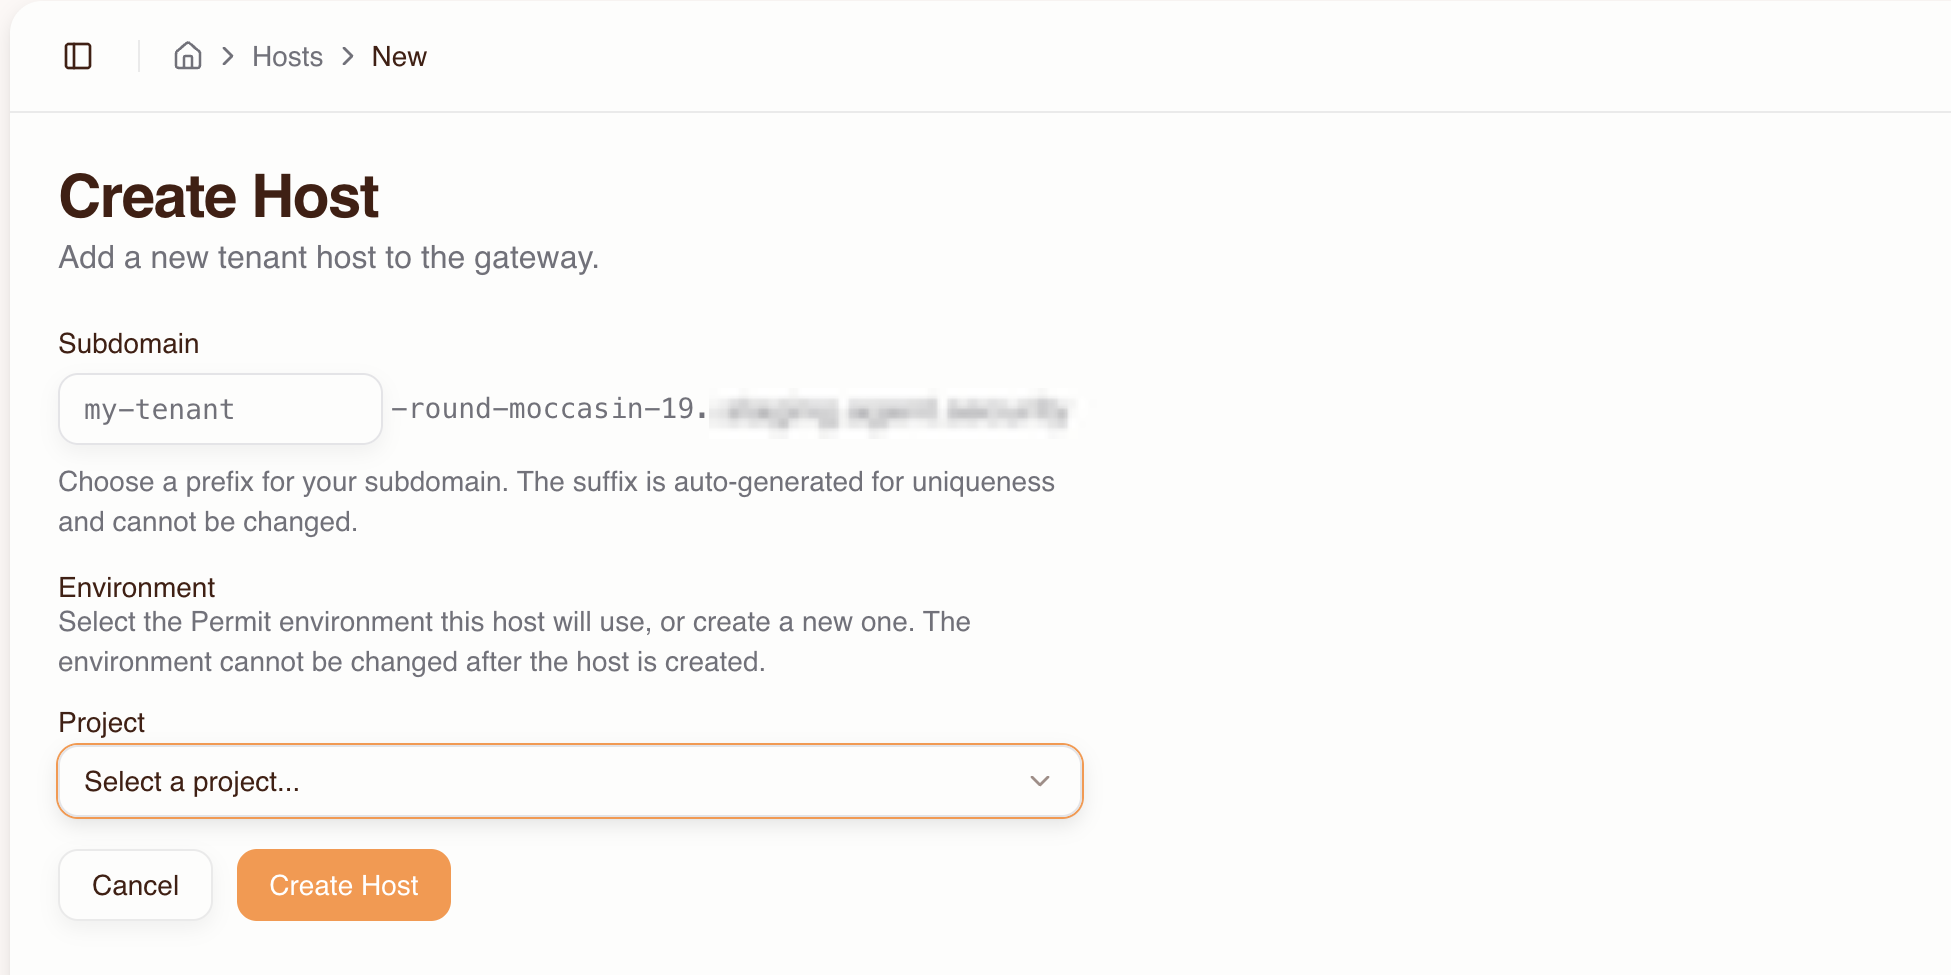
Go to the Dashboard and click Create Host.
-
Fill in the fields:
Field What to enter Subdomain prefix A name that identifies the host's purpose, such as acme,acme-staging, orengineering. The dashboard adds a unique suffix, such asbrave-coral-37, so the subdomain is unique in DNS.Project The Permit project that contains the environment you want to use. Environment The Permit environment for this host. You can't change the environment after the host is created. -
Click Create Host.
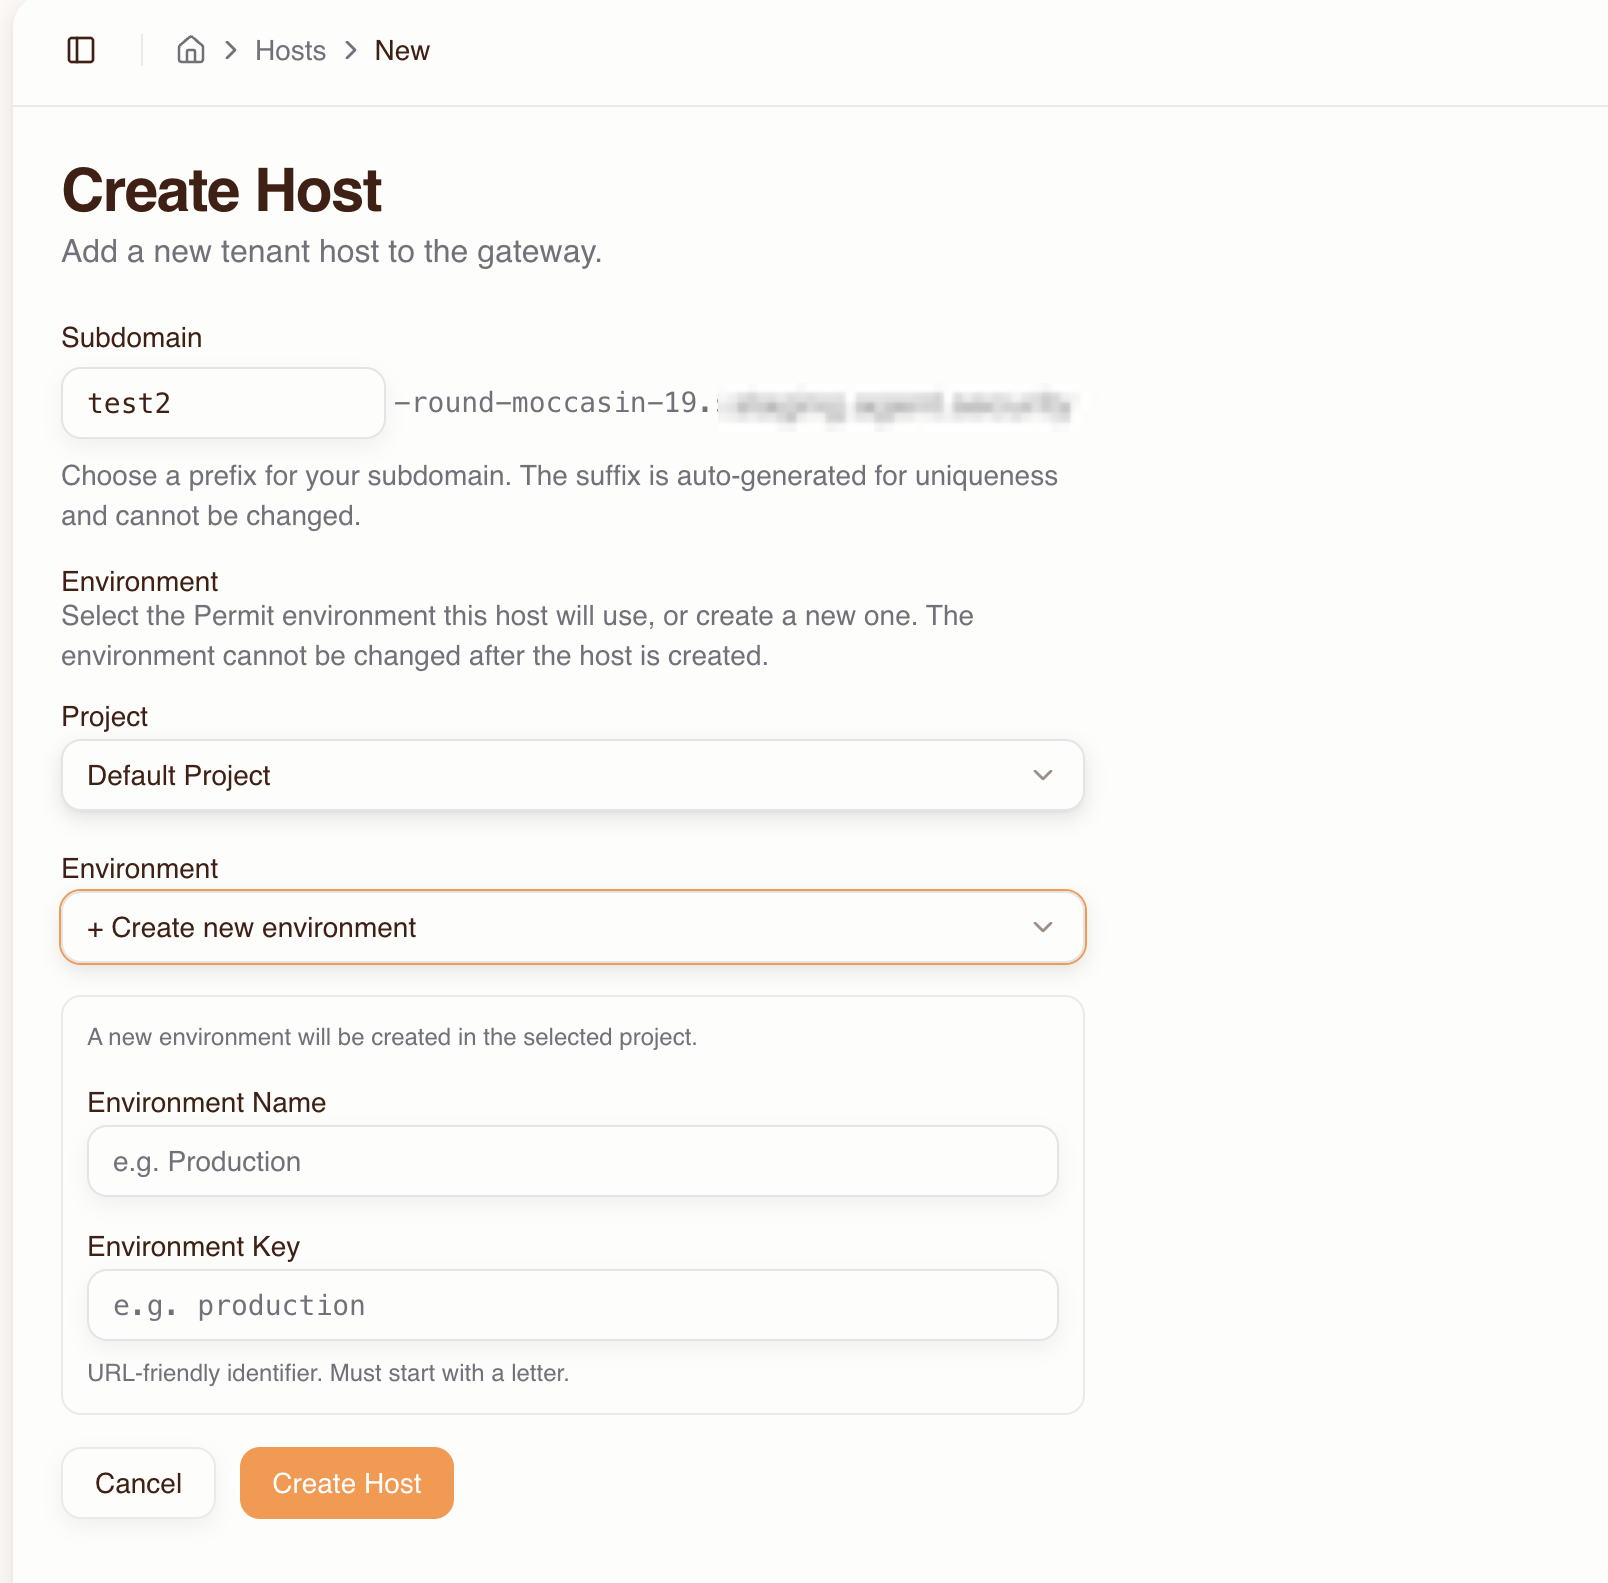
To use a Permit environment that doesn't exist yet, select + Create new environment in the Environment dropdown, then enter the environment name and key.
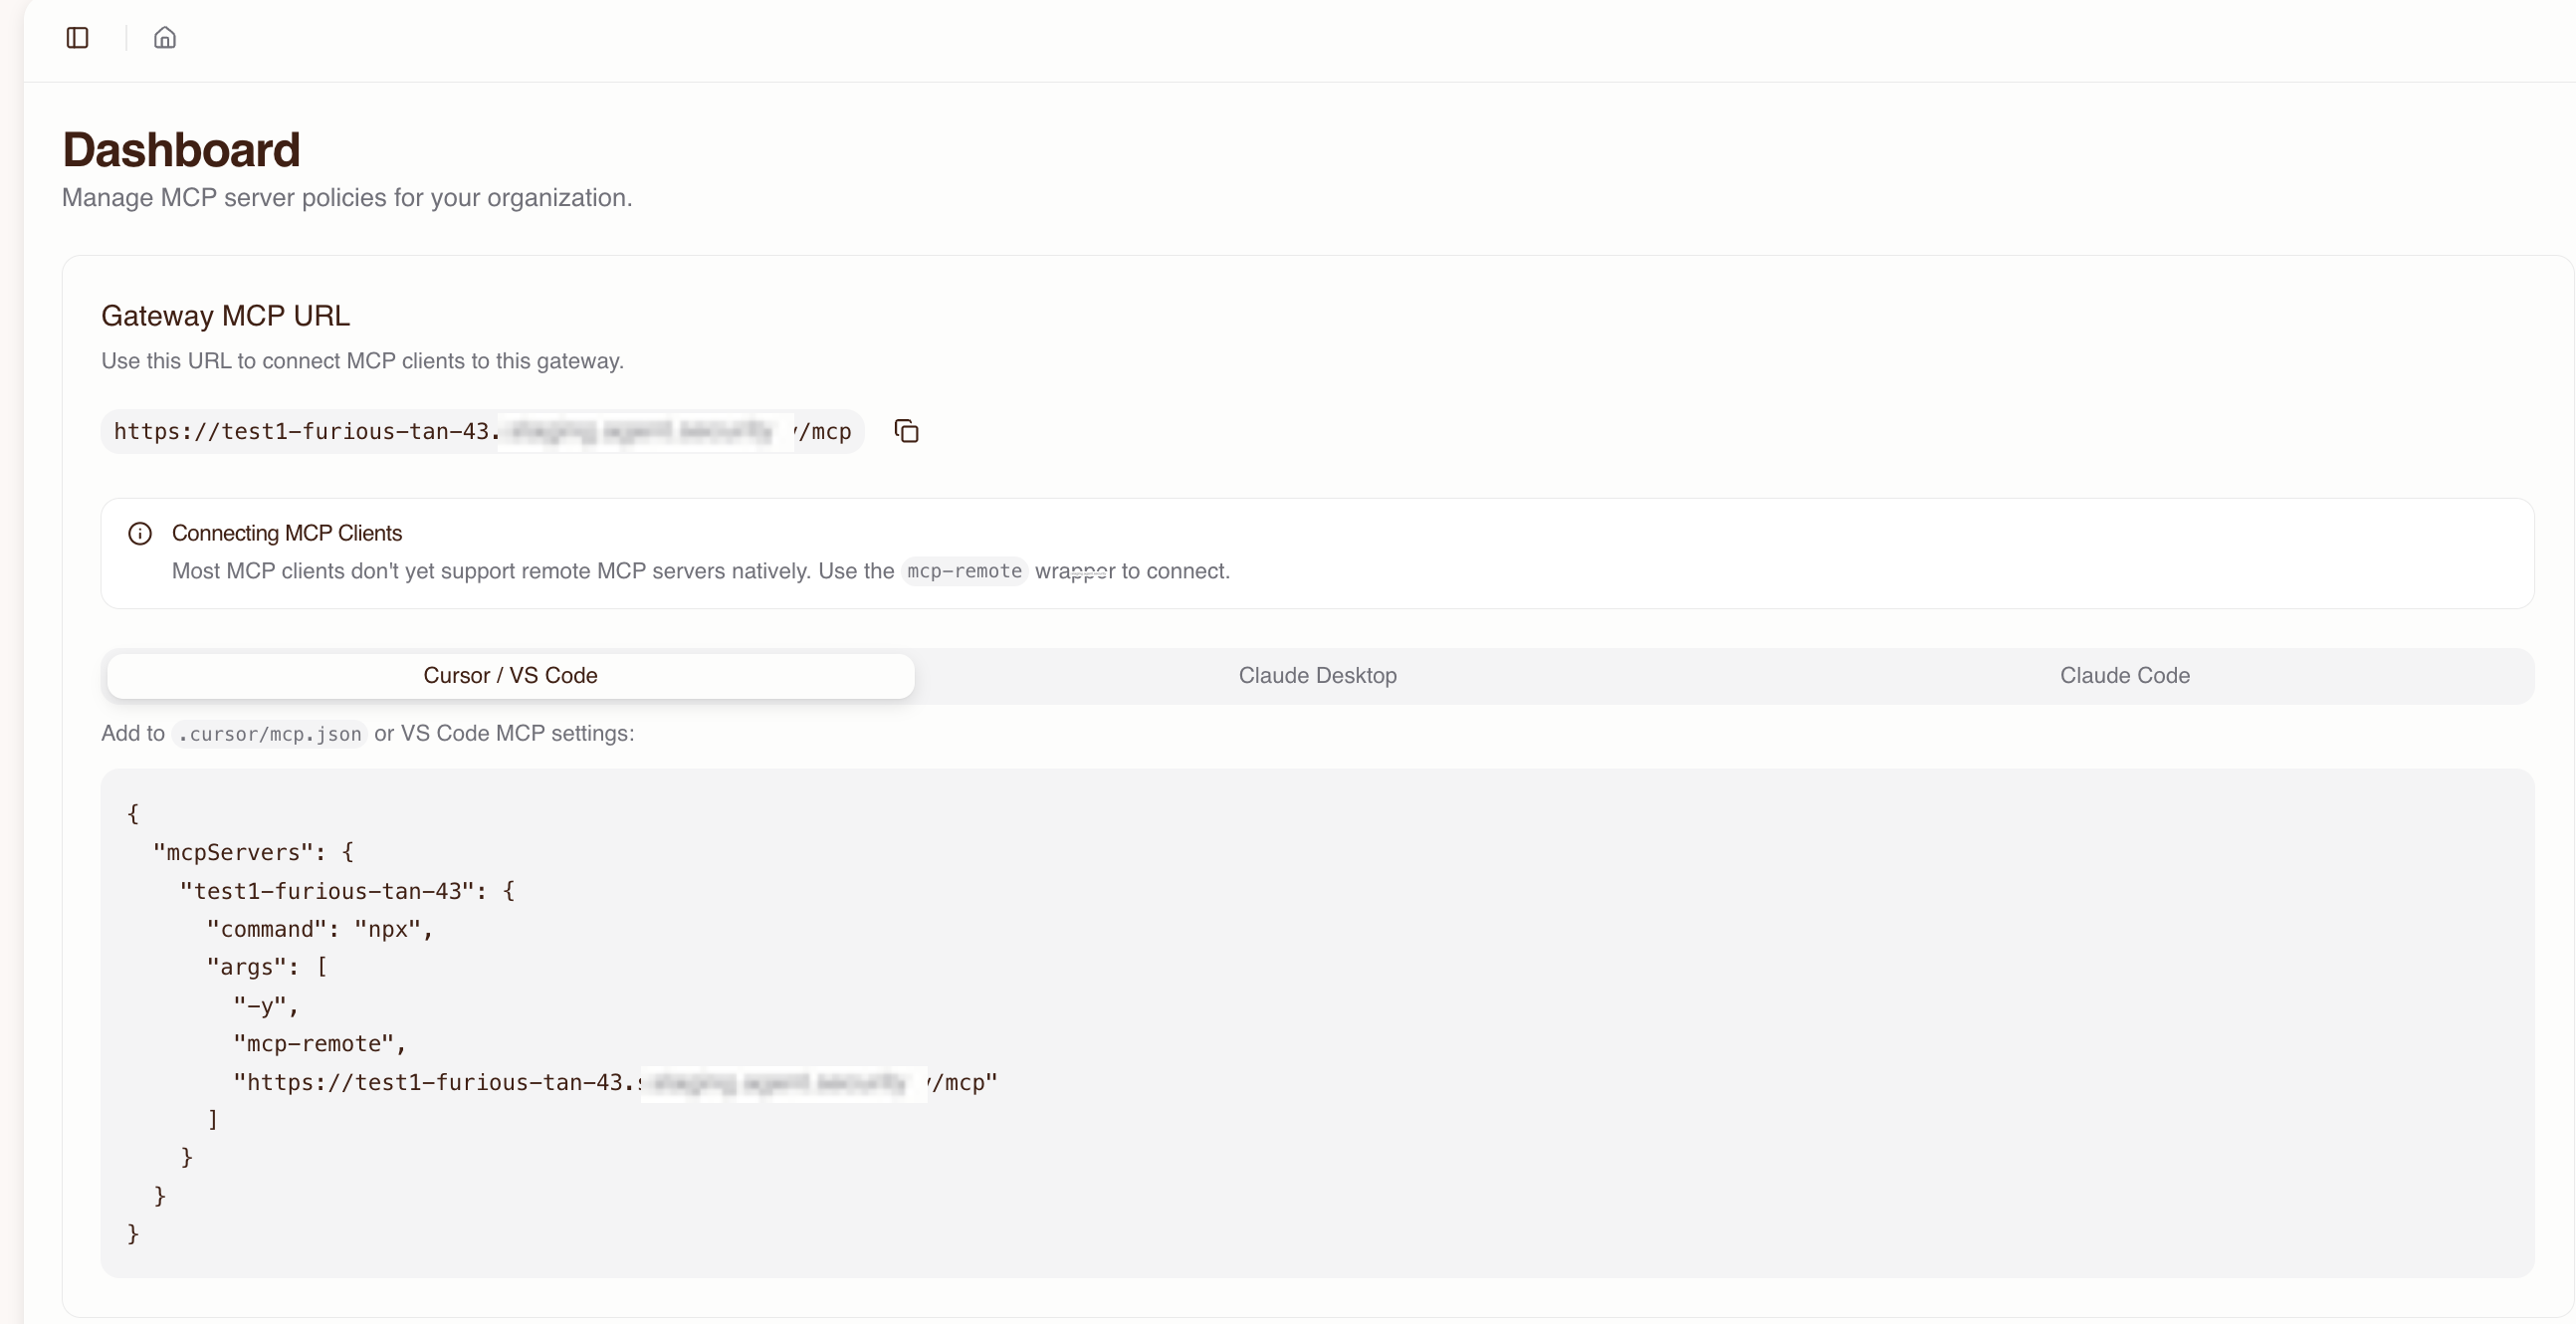
The host's gateway URL has this format:
https://<prefix>-<suffix>.agent.security/mcp
The Dashboard shows the full MCP URL and configuration snippets for each MCP client.
4. Import MCP servers
Import each upstream MCP server your team needs:
-
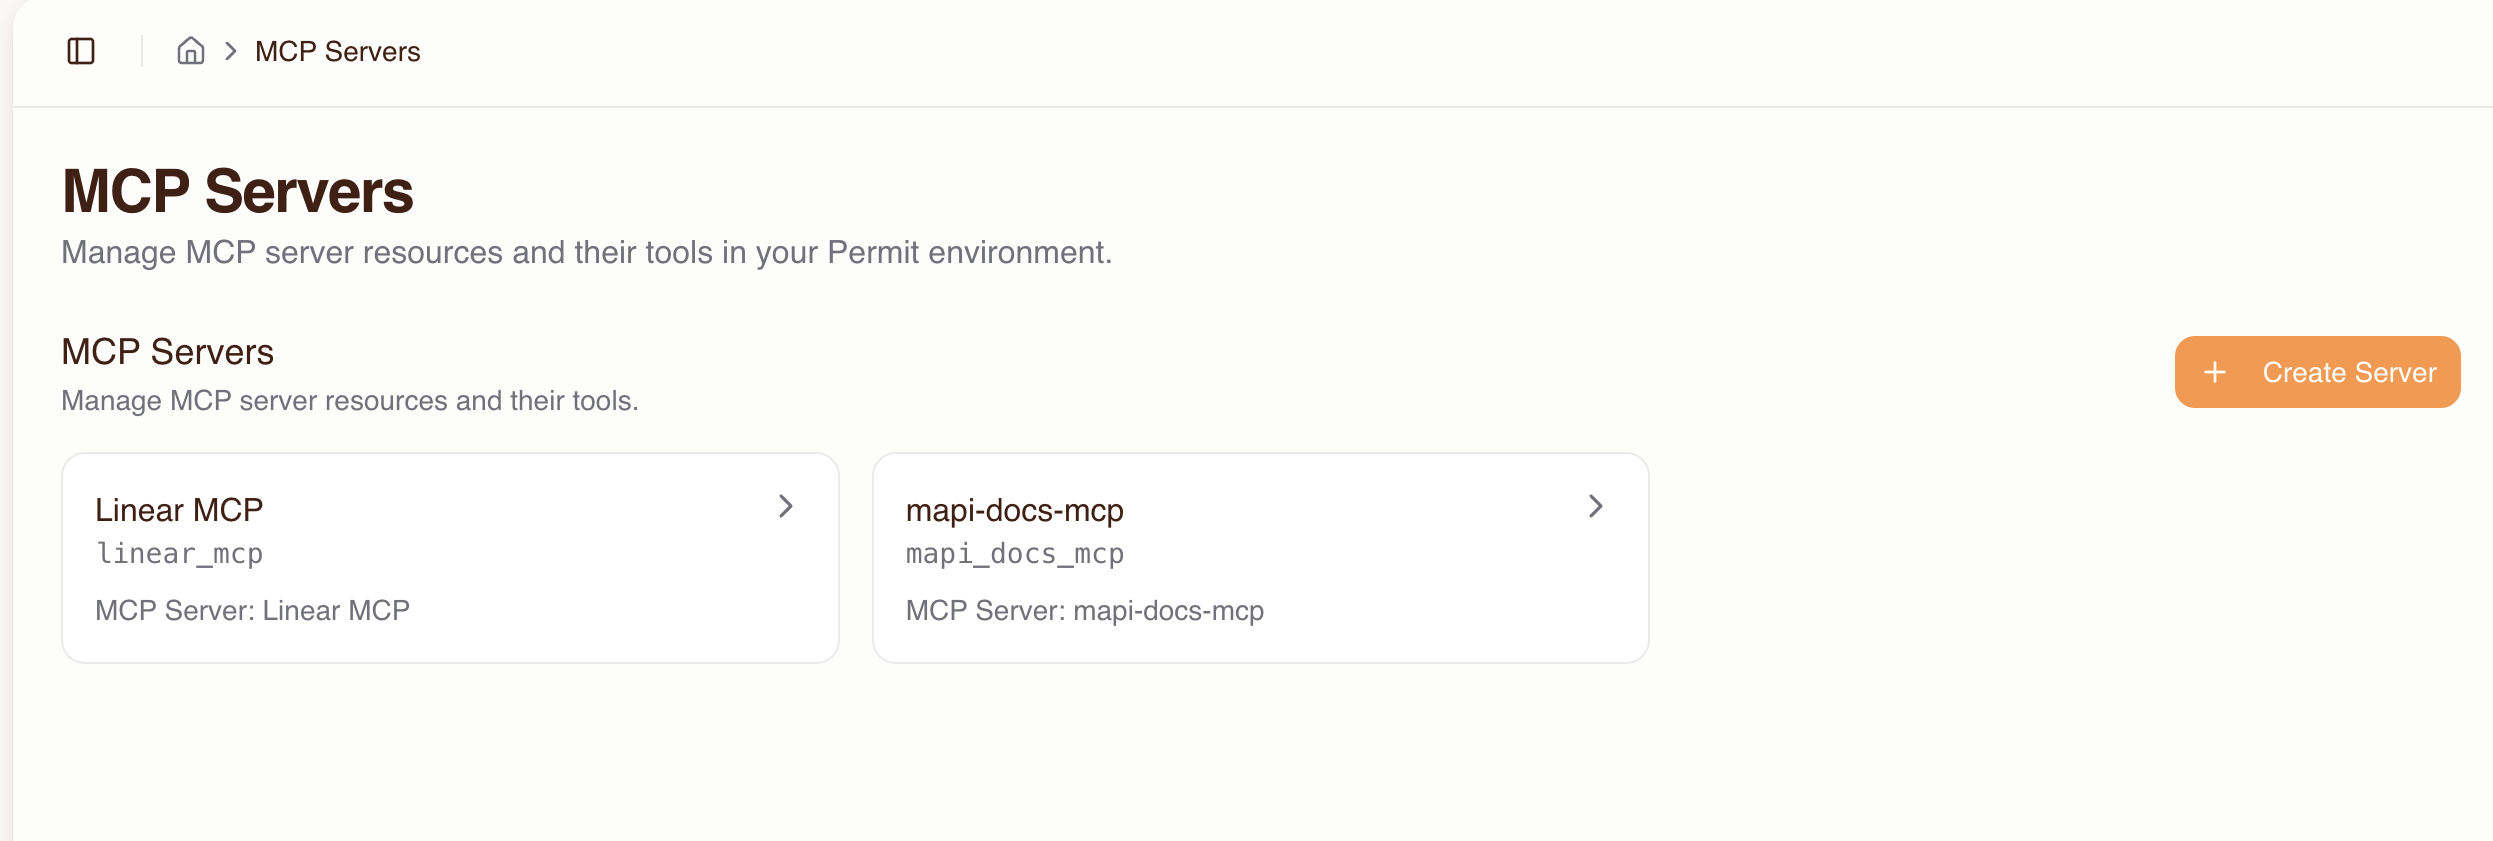
Go to MCP Servers and click Create Server.
-
Enter the upstream MCP server URL (for example,
https://mcp.linear.app/mcp) and click Connect.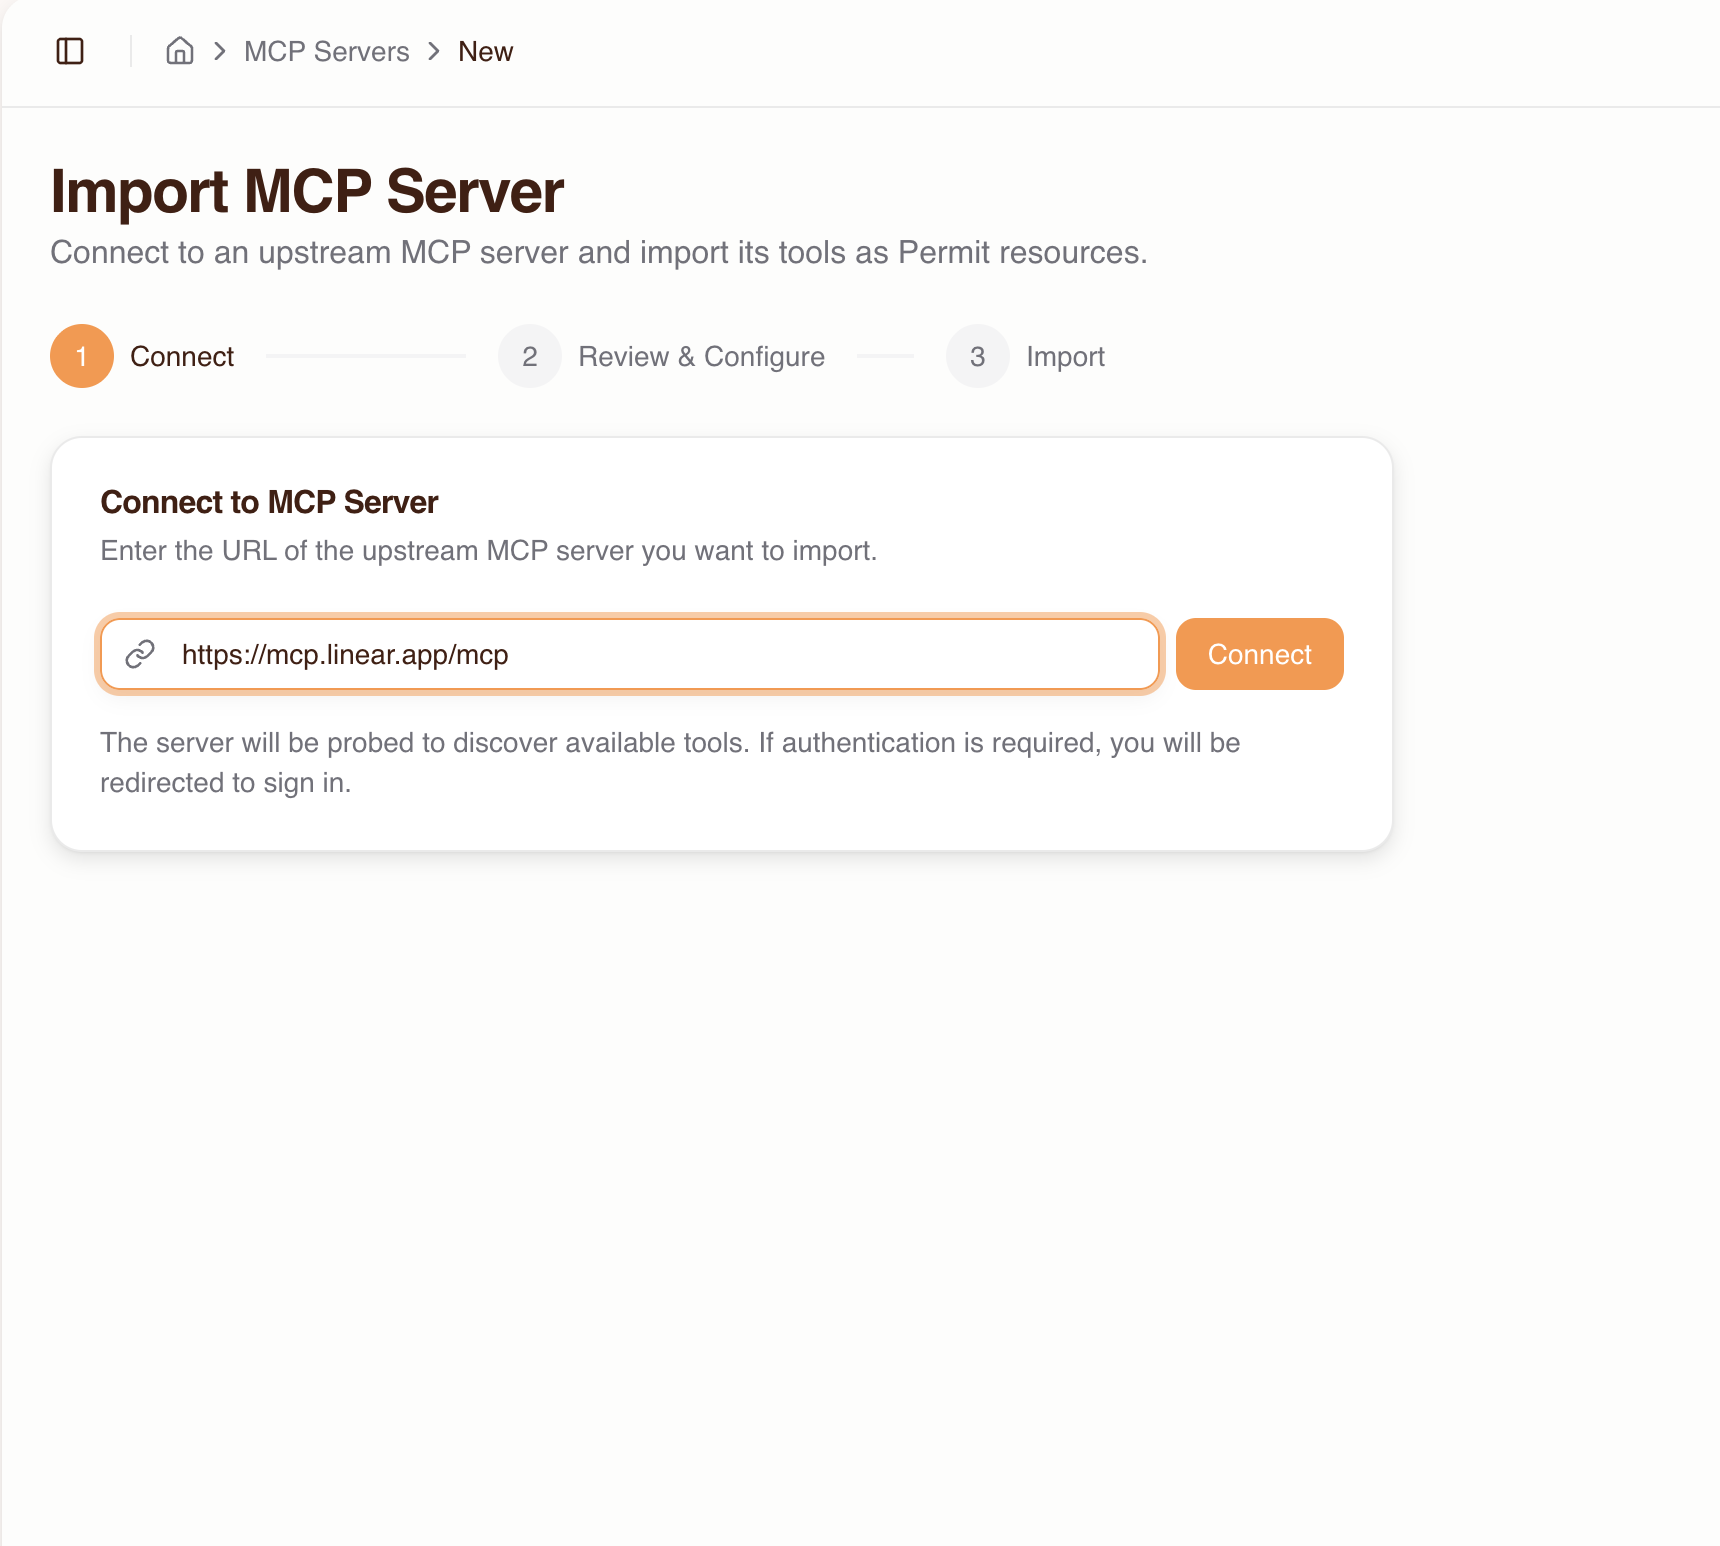
-
If the upstream server requires authentication, the dashboard redirects you to sign in with the upstream provider. If the provider doesn't support automatic client registration, enter the OAuth Client ID and Client Secret manually.
-
Review the discovered tools. The gateway classifies each tool into a trust level based on keywords in the tool name:
Trust level Classification Examples Low Read-only (default) get_issues,list_repos,search_filesMedium Write operations create_issue,update_record,send_messageHigh Destructive operations delete_repo,remove_member,destroy_environmentThe trust level reference lists every keyword the classification uses.
-
Change trust levels and enable or disable tools as needed, then click Import.
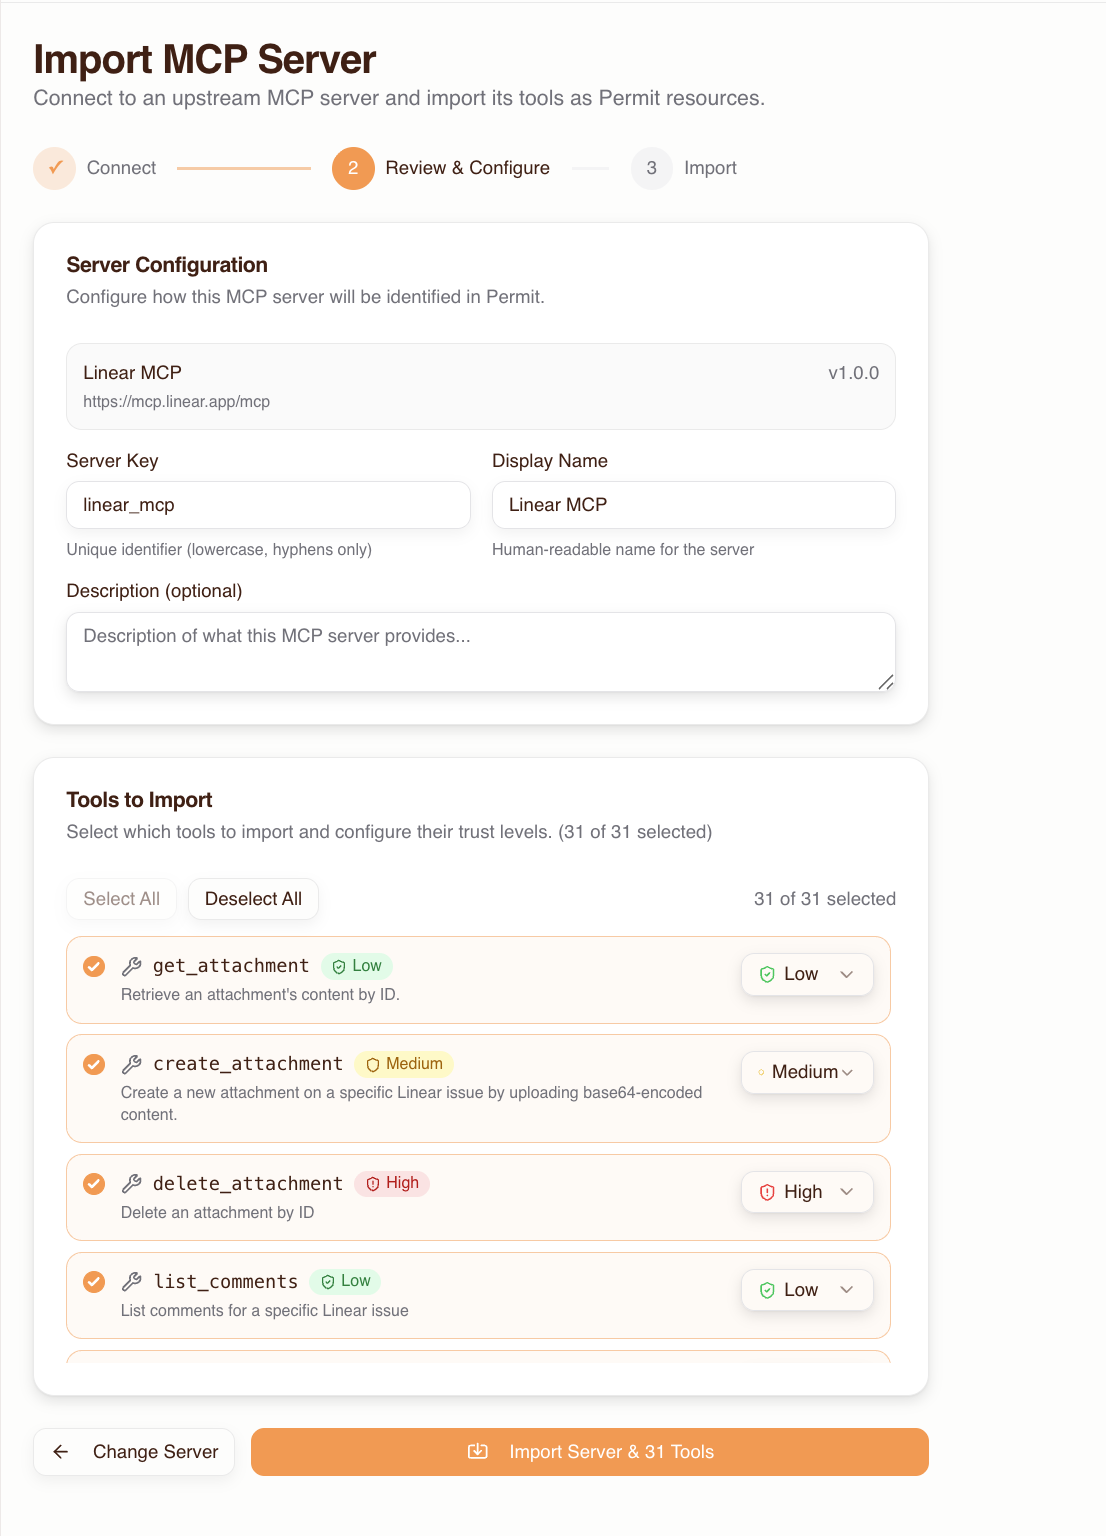
Repeat these steps for each MCP server. To change a tool's trust level after import, see Override trust levels.
5. Configure authentication methods
Each host has its own authentication configuration, which controls how users sign in during the consent flow. Email / Password is enabled by default.
To turn on other methods, such as Google, GitHub, or Microsoft OAuth, email one-time passcodes, passkeys, or SAML 2.0 and OpenID Connect (OIDC) single sign-on (SSO), open the host's Settings from the host selector in the header.
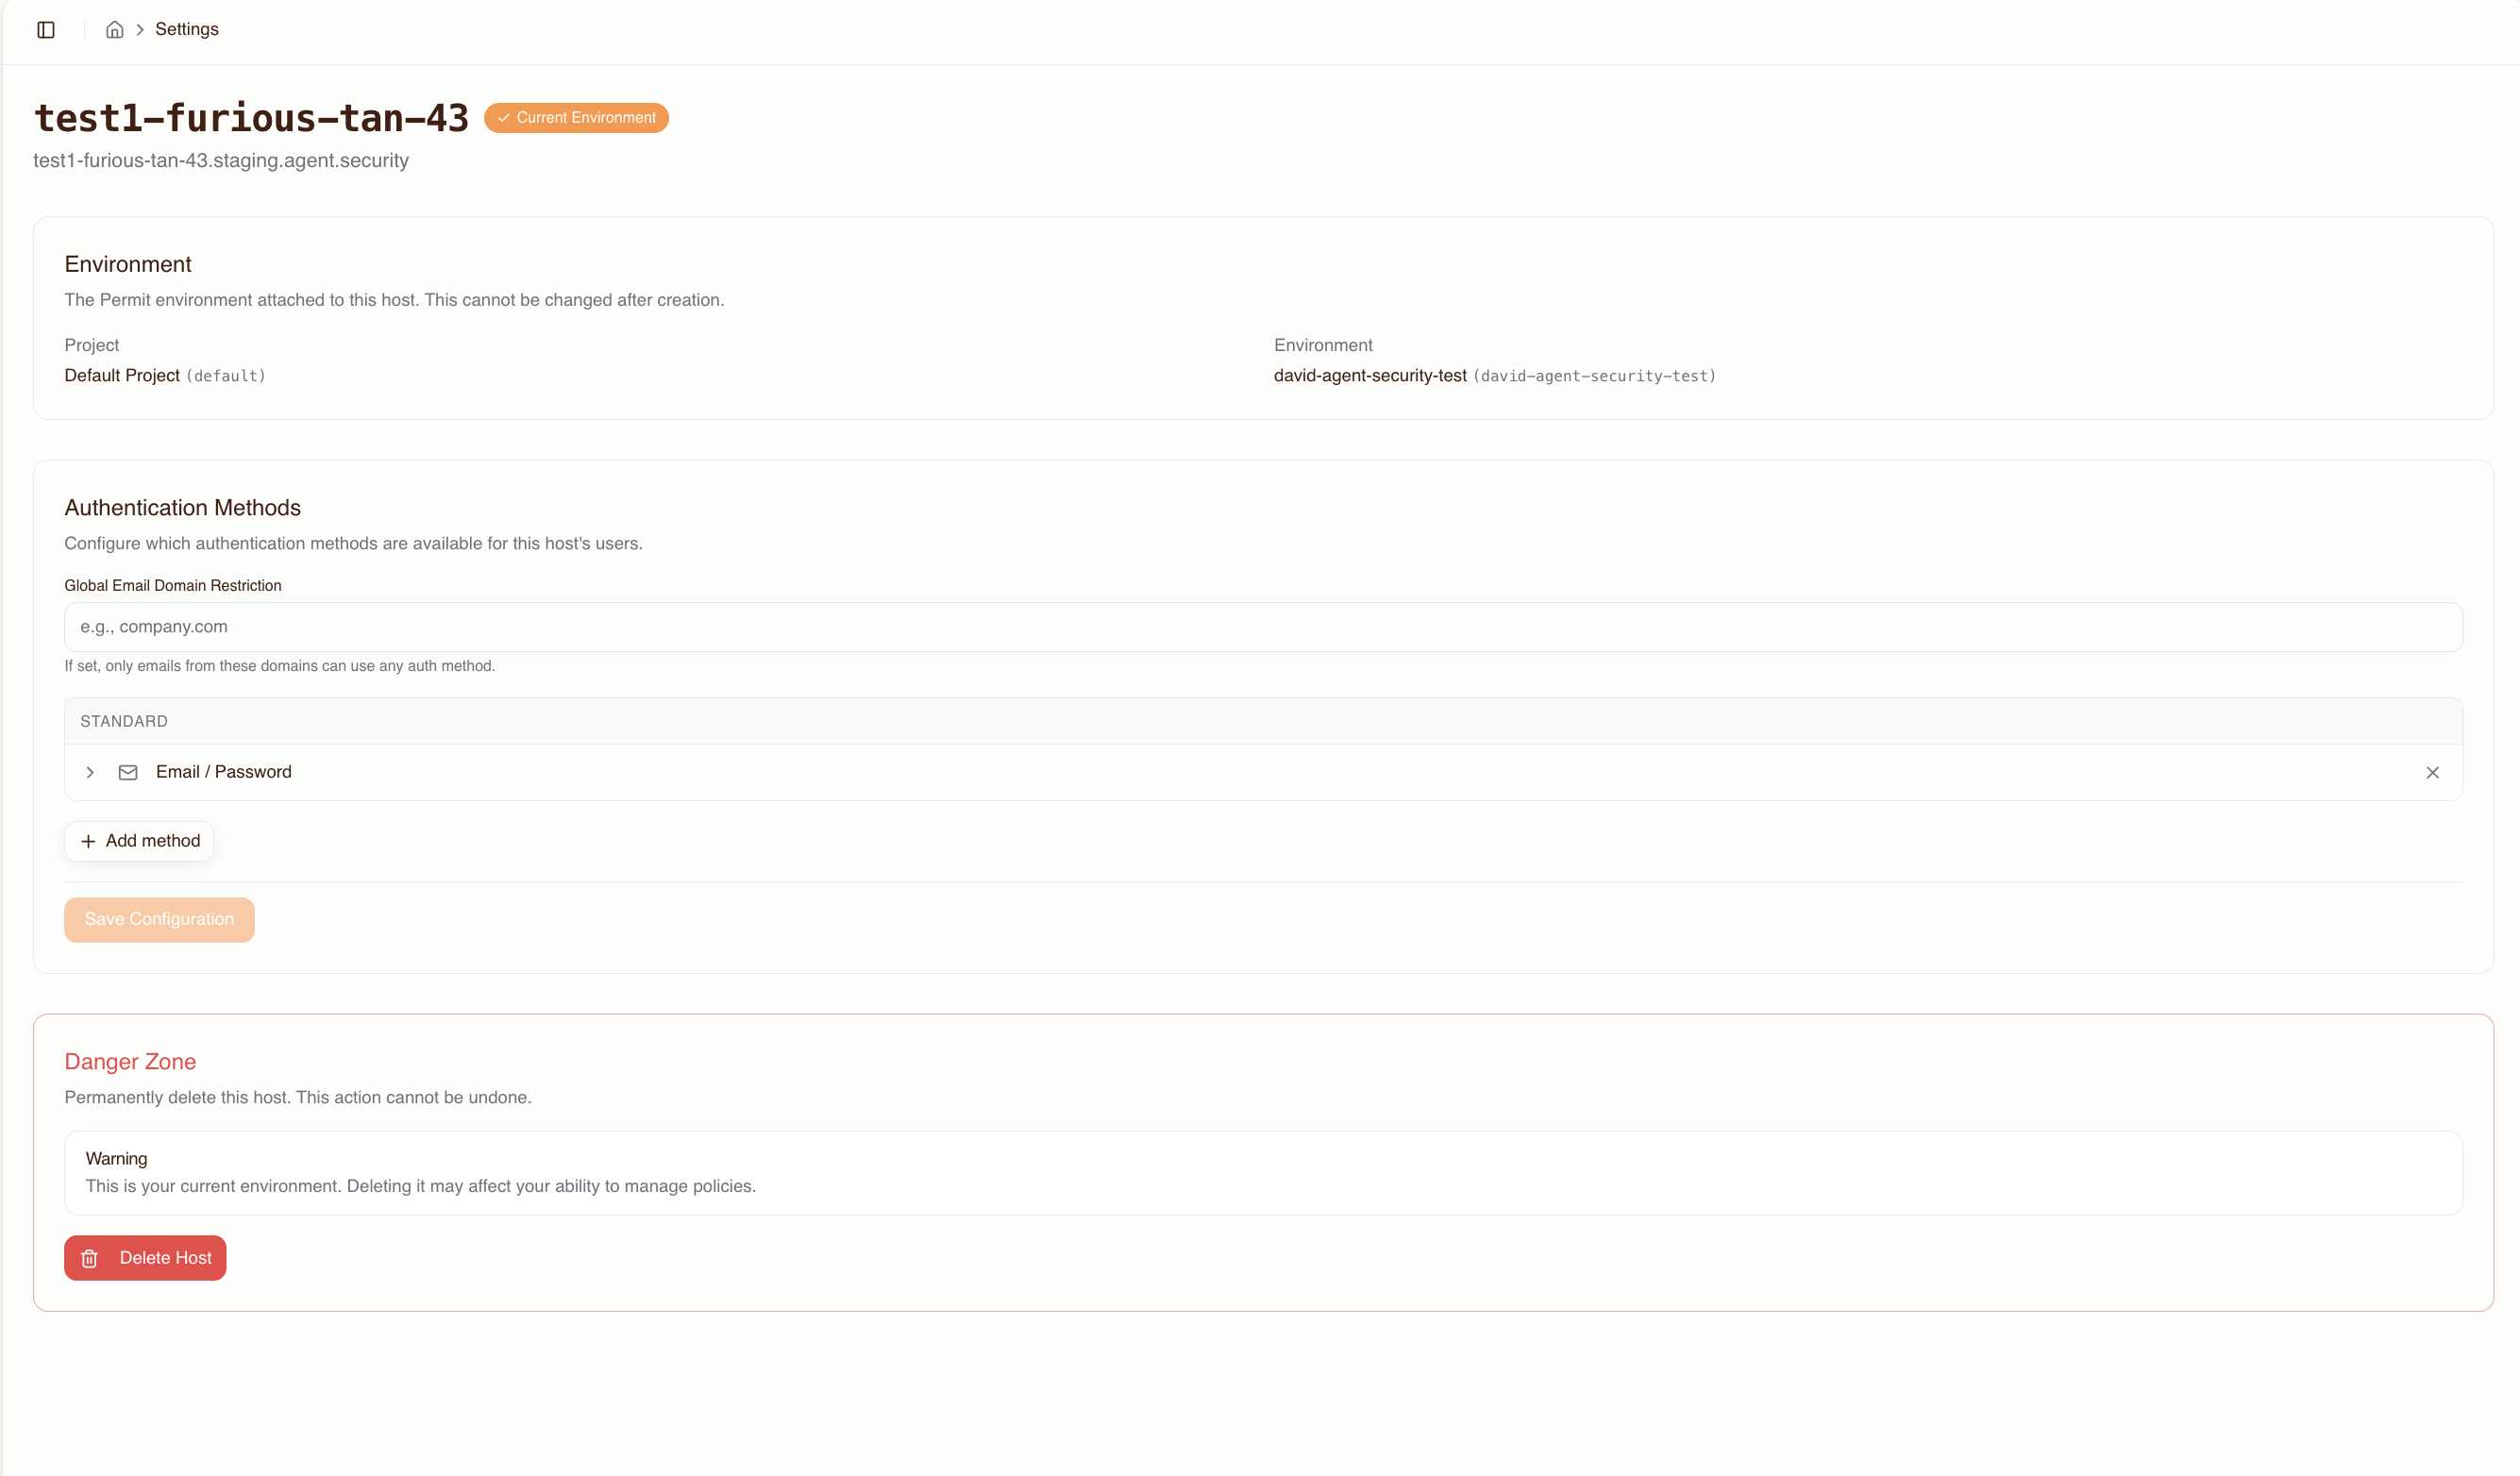
For enterprise teams, configure SAML or OIDC SSO and add a domain restriction so only addresses such as @acme.com can sign in. The Authentication methods reference covers each method, identity provider setup for Okta, Microsoft Entra ID, and Google Workspace, callback URLs, domain restrictions, and force-redirect domains.
6. Grant users access to MCP servers
Users have no access to any MCP server until you grant it. On the Humans page, add each user by email (this works before the user has ever signed in), grant access to MCP servers, and set a max trust level for each server. The max trust level is the highest trust level the user can grant an agent during consent.
For the full procedure and how the max trust level combines with the user's consent, see Grant access to an MCP server.
If a user connects before you grant access, the consent screen shows an empty server list and the user can't continue. Grant access before you share the gateway URL.
7. Share the host URL with your team
Give your users the gateway MCP URL. The Dashboard has a configuration snippet for each client. The Cursor, VS Code, and Claude Desktop snippets use mcp-remote, a community tool that connects stdio-based MCP clients to HTTP MCP endpoints and handles the OAuth sign-in.
Cursor: add the snippet to .cursor/mcp.json.
{
  "mcpServers": {
    "permit-mcp-gateway": {
      "command": "npx",
      "args": ["-y", "mcp-remote", "https://acme-brave-coral-37.agent.security/mcp"]
    }
  }
}
VS Code: add the snippet to .vscode/mcp.json. The dashboard shows one snippet for Cursor and VS Code, but .vscode/mcp.json takes a top-level servers key, not mcpServers, so rename the key when you paste the snippet into VS Code.
{
  "servers": {
    "permit-mcp-gateway": {
      "command": "npx",
      "args": ["-y", "mcp-remote", "https://acme-brave-coral-37.agent.security/mcp"]
    }
  }
}
Claude Desktop: add the snippet to your config file (~/Library/Application Support/Claude/claude_desktop_config.json on macOS).
{
  "mcpServers": {
    "permit-mcp-gateway": {
      "command": "npx",
      "args": ["-y", "mcp-remote", "https://acme-brave-coral-37.agent.security/mcp"]
    }
  }
}
Claude Code: run this command.
claude mcp add permit-mcp-gateway --transport http https://acme-brave-coral-37.agent.security/mcp
In each snippet, replace acme-brave-coral-37 with your host's subdomain.
Pre-selected MCP server URLs
To send users to a specific MCP server, add the upstream server URL as the upstream_mcp query parameter:
https://acme-brave-coral-37.agent.security/mcp?upstream_mcp=https://mcp.linear.app/mcp
The consent screen opens with that server selected. The user still needs access to the server. If the user doesn't have access, the gateway ignores the upstream_mcp parameter.
Use pre-selected URLs to give each team its own link:
- Engineering:
...?upstream_mcp=https://mcp.linear.app/mcp - Marketing:
...?upstream_mcp=https://mcp.hubspot.app/mcp
8. Verify the host works
- Connect an MCP client to the gateway URL with one of the snippets in step 7.
- Sign in and complete the consent flow.
- In the admin dashboard, open the Agents page. The MCP client appears in the list after consent completes.
- Ask the agent to call a read-only tool. The call succeeds.
- Ask the agent to call a tool above the trust level you consented to. The gateway returns a permission denied error.
- Check the audit logs for both calls, with the allowed and denied decisions.
Multi-host patterns
Each host has its own subdomain, Permit environment, users, and policies, so you can use separate hosts to separate environments or teams.
Staging and production hosts
Create separate hosts for staging and production to test configuration changes before they reach your team:
| Host | Subdomain | Permit environment | Purpose |
|---|---|---|---|
| Staging | acme-staging-... | staging | Test MCP server imports, trust levels, and authentication settings before rollout. |
| Production | acme-prod-... | production | The live gateway for your team. |
In the staging host, you can:
- Import MCP servers and check trust level classifications.
- Test authentication changes, such as adding SSO.
- Give a small group of users access for testing.
Team-based hosts
Create a host per team when groups need different MCP servers, trust policies, or authentication methods:
| Host | Subdomain | Teams | MCP servers |
|---|---|---|---|
| Engineering | acme-eng-... | Backend, Frontend, DevOps | GitHub, Linear, Sentry |
| Marketing | acme-mktg-... | Content, Analytics | HubSpot, Google Analytics |
| Security | acme-sec-... | InfoSec, Compliance | AWS, Datadog, PagerDuty |
Each host has its own:
- Imported MCP servers.
- Trust levels per tool.
- Authentication methods (for example, SSO for employees and email and password for contractors).
- Domain restrictions.
Single host for small teams
A small organization can use one host with all MCP servers and all users. You can add hosts later.
Onboard users at scale
Pre-grant access to all users
Add users by email before they sign in. On first connection, each user sees the MCP servers you granted and can finish the consent flow without waiting for you.
To onboard a team:
- Collect user email addresses, for example from your HR system or team roster.
- Add each user on the Humans page.
- Grant access to the relevant MCP servers with a max trust level for each. See Grant access to an MCP server.
- Share the gateway URL.
Filter users with domain restrictions
A domain restriction limits which email addresses can sign in. For example, set the allowed domain @acme.com on all authentication methods. Users with @acme.com addresses can sign in, and the gateway rejects other addresses.
You can set domain restrictions:
- Globally: for all authentication methods on the host.
- Per method: a different domain for each method, for example
@acme.comfor SSO and@contractor.acme.comfor email and password.
With SSO, add a force-redirect domain so users with @acme.com addresses go straight to your identity provider without the sign-in screen. See Domain restrictions for how global and per-method restrictions combine.
Migrate from direct MCP server access
If your team connects MCP clients directly to upstream MCP servers (for example, https://mcp.linear.app/mcp), move them to the gateway:
- Create a host and import the MCP servers your team uses.
- Review trust levels. Check that the classified trust levels match your security requirements, and change the ones that don't.
- Pre-grant access to all current users with the right max trust levels.
- Share pre-selected URLs. Use the
upstream_mcpquery parameter to build a URL for each user's current MCP server:https://acme-prod-xyz.agent.security/mcp?upstream_mcp=https://mcp.linear.app/mcp - Update MCP client configurations. Replace the upstream URL with the gateway URL in each user's config file.
- Have users complete the consent flow. On first connection, each user signs in, selects a trust level, and authorizes the agent.
After the migration, every tool call goes through the gateway, which authenticates the user, authorizes the call, and writes an audit log entry.
Migrate a small pilot group first and confirm the setup works before you move the full team. Direct MCP access can keep running in parallel during the transition.
Plan a phased rollout
A phased rollout lets you find trust level and authentication problems with a few users before they affect the whole organization. The durations below are suggestions.
Phase 1: Pilot (1 to 2 weeks)
Goal: Confirm that the gateway works with your MCP servers and clients, and that the setup meets your security requirements.
- Create one pilot host linked to a non-production Permit environment.
- Import 1 or 2 MCP servers your team already uses, such as GitHub or Linear.
- Grant access to 2 or 3 pilot users with a Low (read-only) max trust level.
- Have pilot users connect their MCP clients through the gateway and complete the consent flow.
- Review the audit logs. Check that tool calls are logged and that allowed and denied decisions match your expectations.
- Test trust level enforcement. Confirm that destructive tools are denied at Low trust, and that raising trust to Medium allows write tools.
Questions to answer during the pilot:
- Did the import discover every tool you expected?
- Do the trust level classifications match your security expectations? Change the ones that don't.
- Does the consent flow work with your authentication method (SSO, OAuth, or email)?
- Do the audit log entries give you the information you need?
Phase 2: Controlled expansion (2 to 4 weeks)
Goal: Add users and servers while keeping risk limited.
- Raise trust levels for pilot users based on Phase 1 results, for example from Low to Medium.
- Import more MCP servers as needed.
- Onboard a larger group of users. Pre-authorize them by email and share the gateway URL.
- Restrict destructive tools. Grant High trust only to the users who need it, and consider human-in-the-loop approvals for sensitive tools.
- Review audit logs regularly for access patterns, unexpected denials, and tools that need a different trust level.
Phase 3: Production rollout
Goal: Move the whole team to the gateway with established security policies.
- Create a production host linked to a production Permit environment, if the pilot used a staging environment.
- Move users by pointing their MCP client configurations at the production gateway URL.
- Remove direct MCP server connections so all MCP traffic goes through the gateway.
- Configure SSO (SAML or OIDC) and domain restrictions.
- Set up monitoring. Decide who reviews audit logs and how your team responds to unexpected access patterns.
Rollout principles
- Start restrictive, then expand. Begin with Low trust and raise it based on observed behavior.
- Pilot before production. Test configuration changes on a separate staging host.
- Review before you broaden access. Read the audit logs after each phase before you add users or servers.
- Record trust level decisions. Write down why each tool has its trust level, especially manual changes.
- Remove direct access. An MCP client that still connects directly to an upstream MCP server bypasses the gateway, so its tool calls aren't authorized or logged by the gateway.
To run the gateway inside your own network for data residency, private MCP servers, or compliance, see Enterprise deployment. You can evaluate with the hosted gateway first.
Next steps
- Manage humans and agents: change max trust levels and revoke access.
- Consent Service: what users see when they connect an MCP client.
- Authentication methods reference: set up SSO and domain restrictions.
- Audit logs: review allowed and denied tool calls.