Add fine-grained authorization to a Flask app
Build a Flask app for a blogging platform that registers users in Permit.io and allows only users with the Author role to create posts. This tutorial is for Python backend developers who want to enforce Permit.io policies from Flask routes.
When you finish, your Flask app has two endpoints:
| Endpoint | What it does |
|---|---|
POST /register | Syncs a user to Permit.io and assigns the user the Reader role in the default tenant |
POST /posts | Calls permit.check() and returns 403 unless the user has permission to create a Post |
Prerequisites
- A Permit.io account. See Create a Permit.io account.
- Python 3 with Flask installed.
- Node.js and npm, to install the Permit CLI.
- Docker, to run the policy decision point (PDP) container.
1. Configure the policy in Permit
Create the blogging platform policy with the Permit CLI. If your environment already has a policy with a Post resource and an Author role that can create posts, skip to 2. Get your API key.
Install the Permit CLI
The Permit CLI creates policies and runs the PDP from your terminal. Install the CLI with npm:
npm install -g @permitio/cli
Run permit to confirm that the CLI is installed.
Sign in with the Permit CLI
Authenticate the CLI with your Permit.io account:
permit login
The command opens a browser window where you sign in. After you sign in, the CLI uses your default environment. To use a different environment, run permit env select and choose the environment.
Apply the blogging platform template
Permit CLI templates create a policy with predefined resources, roles, and rules. To see the available templates, run permit env template list. The template source files are in the Permit CLI repository.
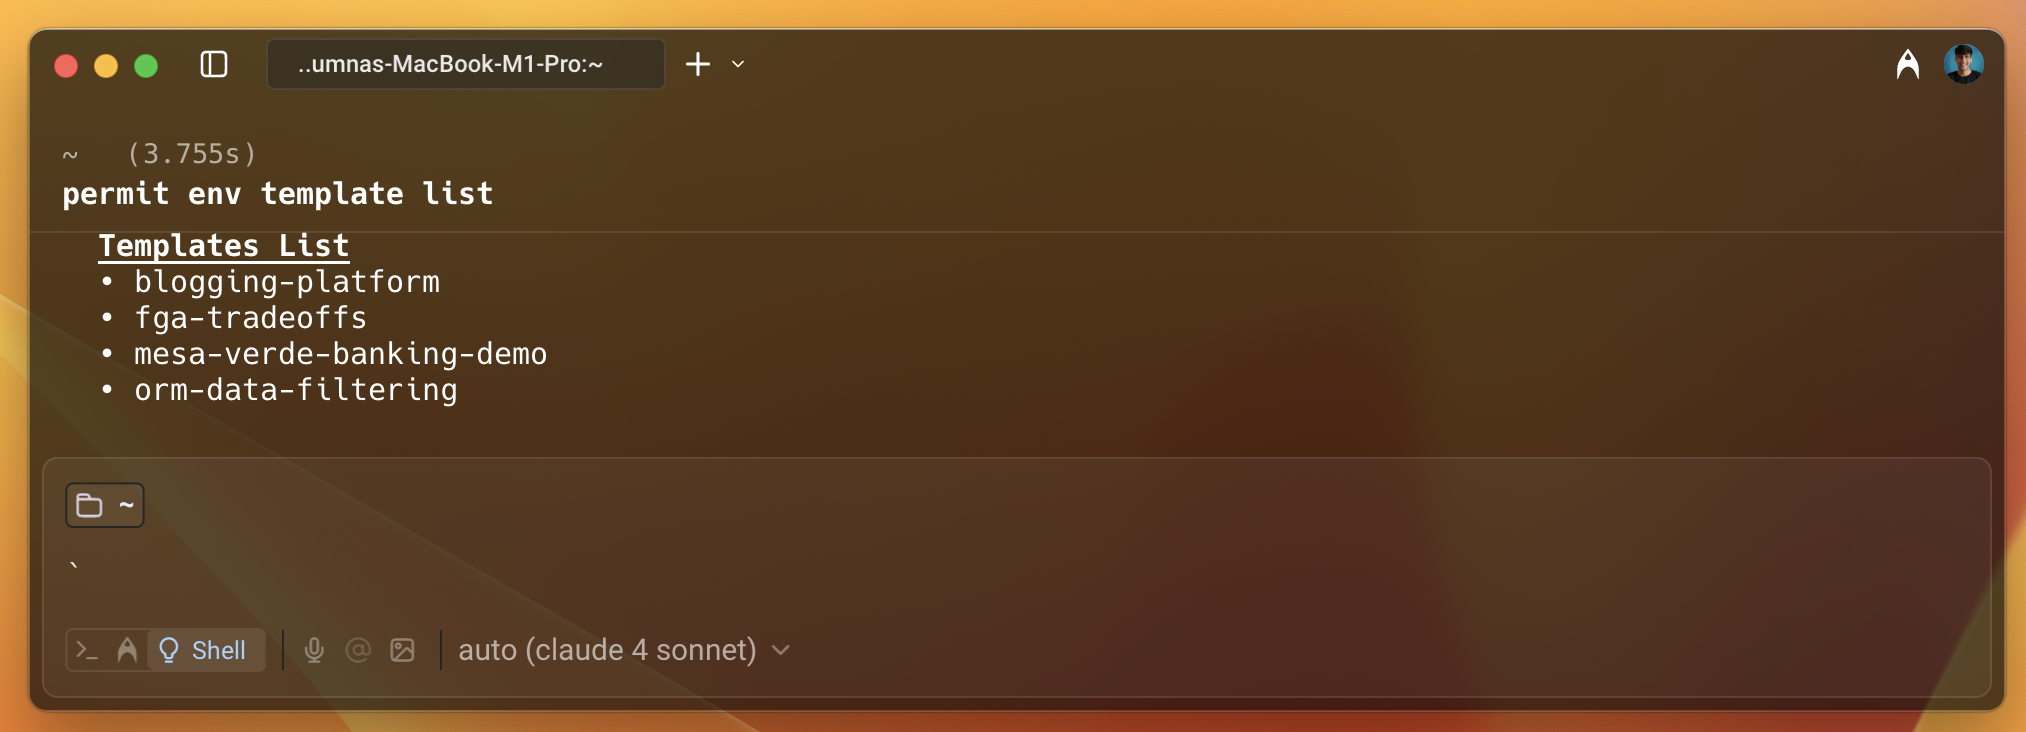
Apply the blogging-platform template to your environment:
permit env template apply --template blogging-platform
The CLI prints a success message when the template is applied.
Review the policy in the Policy Editor
In the Permit dashboard, select your project and open the Policy screen.
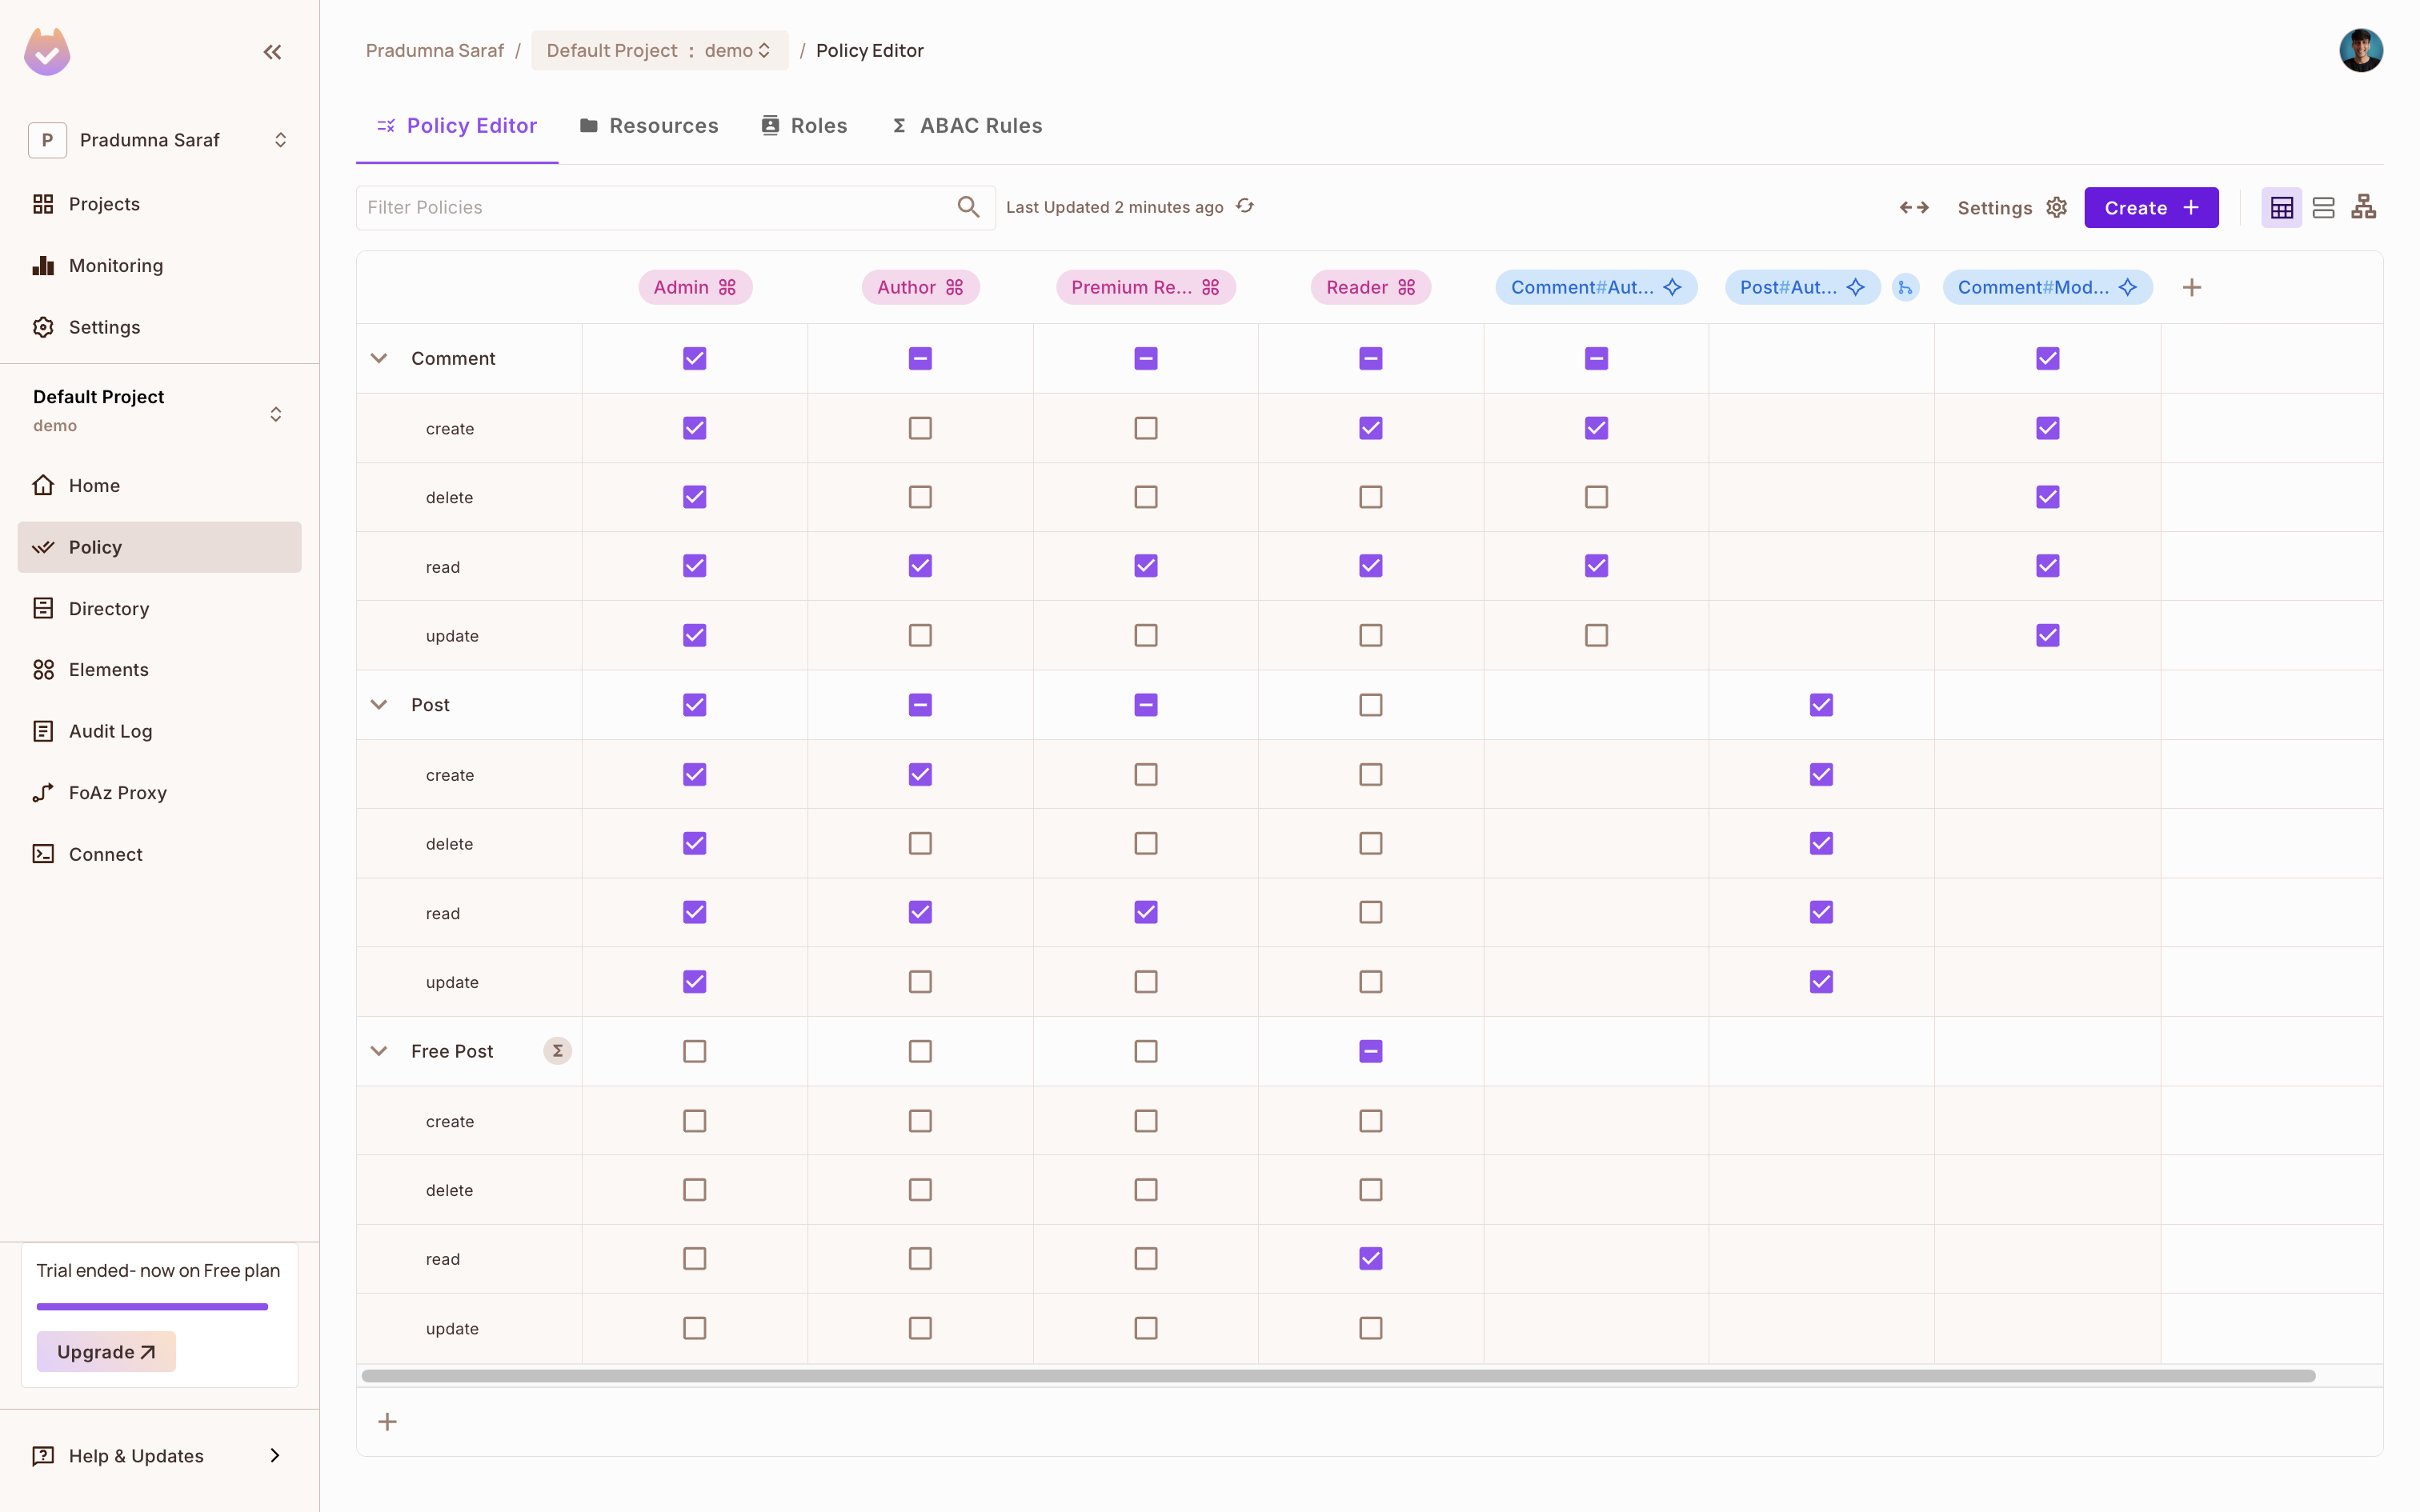
The blogging-platform template creates:
| Policy element | What the template defines |
|---|---|
| Resources | Post (with a premium boolean attribute) and Comment, each with create, read, update, and delete actions |
| Roles | Admin (all actions), Author (create and read posts, read comments), Reader (create and read comments), and Premium Reader (read posts and comments) |
| Relationship | A Post is the parent of its Comment instances. An Author of a post instance becomes a Moderator of the comments on that post. This rule is relationship-based access control (ReBAC). |
| Resource set | Free Post contains posts where premium is false. Readers can read free posts. This rule is attribute-based access control (ABAC). |
This tutorial uses one rule from the policy: the Author role can create a Post, and the Reader role cannot. To change which role can perform an action, check or clear the box in the Policy Editor.
2. Get your API key
Your Flask app and the PDP authenticate with Permit.io with your environment API key. Copy the API key of the environment where you applied the template. See Get your API key.
Anyone with the environment API key can change that environment's policy through the Permit API. Load the key from an environment variable, and don't commit it.
3. Run the PDP
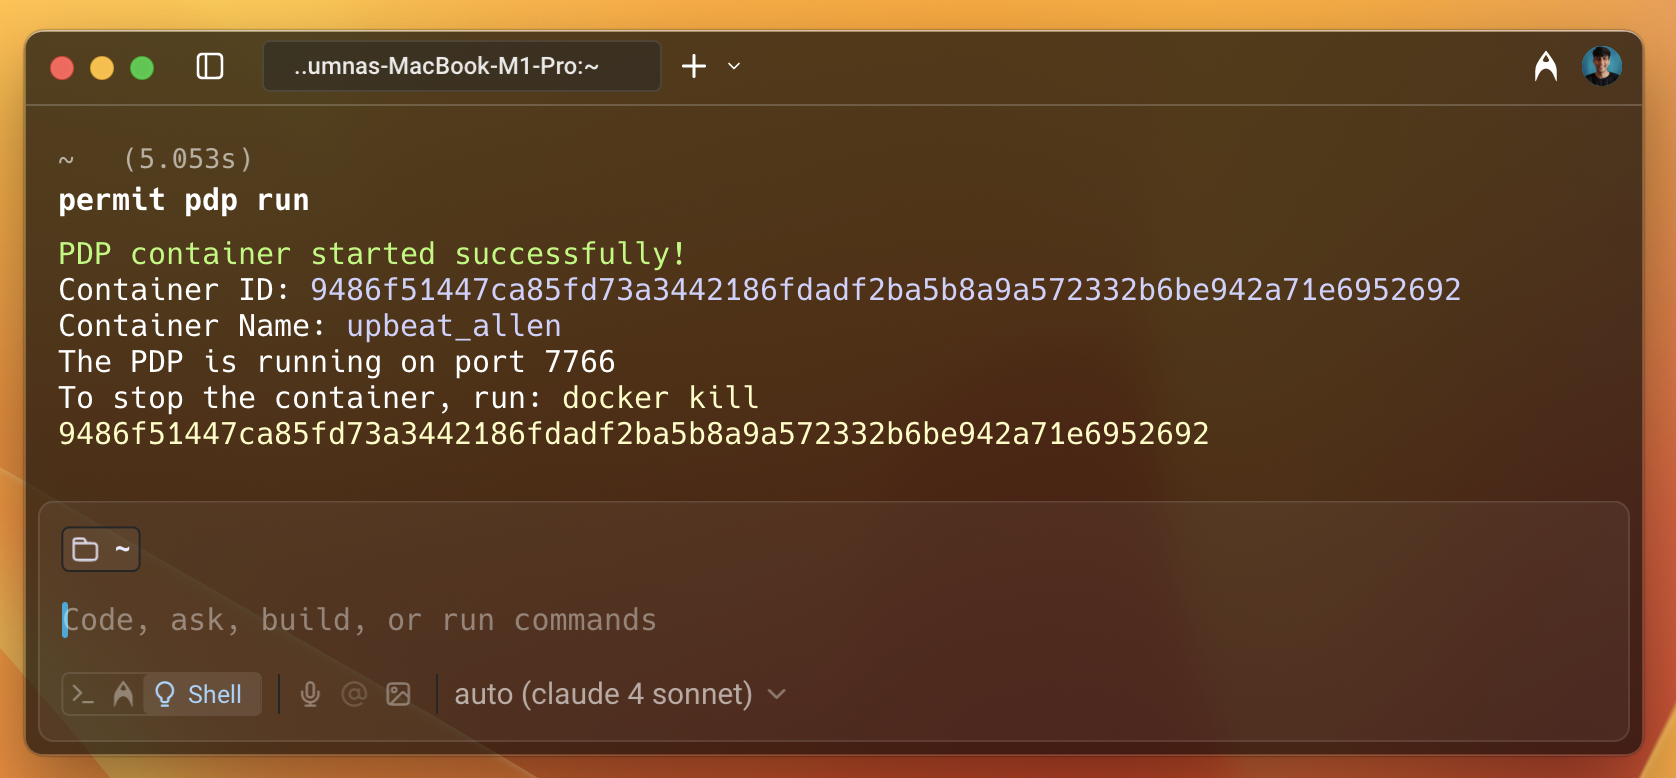
The PDP evaluates each permit.check() call against your policy. Start a PDP container with the Permit CLI:
permit pdp run
The command starts the PDP in Docker and prints the container ID and name. The PDP listens on port 7766, so your app connects to it at http://localhost:7766.
The Free Post resource set is an ABAC rule, and the Cloud PDP doesn't evaluate ABAC rules, so run the container PDP for this policy. To run the container with docker run instead, or to check that the PDP is healthy, see Run the PDP.
4. Build the Flask app
Install the Python SDK
In your Flask project, install the Permit Python SDK:
pip install permit
The permit package installs Pydantic with email validation, which the request models in this tutorial use. For all SDK options, see Check permissions with the Python SDK (asyncio).
Initialize the Permit client in app.py
Create a file named app.py with the following code:
# app.py
from flask import Flask, request, jsonify
from permit import Permit
import os
import asyncio
from pydantic import BaseModel, EmailStr, ValidationError

app = Flask(__name__)

permit = Permit(
    token=os.getenv("PERMIT_API_KEY"),
    pdp=os.getenv("PDP_URL", ""),
)

class UserIn(BaseModel):
    email: EmailStr
    first_name: str
    last_name: str
The UserIn Pydantic model validates the body of registration requests. The Permit client reads two environment variables:
| Variable | Value |
|---|---|
PERMIT_API_KEY | Your environment API key from 2. Get your API key |
PDP_URL | The PDP address from 3. Run the PDP: http://localhost:7766 |
The Permit class imported from permit is the asyncio client, so its methods are coroutines. Flask route functions in this tutorial are synchronous, so each call runs the coroutine with asyncio.run(). If you prefer synchronous calls without asyncio.run(), see Check permissions with the Python SDK (sync).
Add the /register endpoint
Add the following code to app.py. The register route syncs the user to Permit.io with permit.api.users.sync(), then assigns the user the Reader role in the default tenant with permit.api.users.assign_role().
# app.py
@app.route("/", methods=["GET"])
def root():
    return jsonify({"message": "Hello, Flask with Permit!"})

@app.route("/register", methods=["POST"])
def register():
    try:
        user_in = UserIn(**request.get_json())
    except ValidationError as e:
        return jsonify(e.errors()), 422

    # Sync user with Permit
    user = asyncio.run(permit.api.users.sync({
        "key": user_in.email,
        "email": user_in.email,
        "first_name": user_in.first_name,
        "last_name": user_in.last_name,
    }))

    # Assign Reader role to the user in the 'default' tenant
    role_assignment = asyncio.run(permit.api.users.assign_role({
        "user": user_in.email,
        "role": "Reader",
        "tenant": "default",
    }))

    # Continue with your app's registration logic..

    return jsonify({
        "message": "User registered and role assigned",
        "user": user.dict() if hasattr(user, "dict") else user.__dict__,
        "role_assignment": role_assignment.dict() if hasattr(role_assignment, "dict") else role_assignment,
    }), 201
The user's email address is the user key in Permit.io. Your app passes the same key to permit.check(). The / route returns a greeting that confirms the app is running.
Protect the /posts endpoint with permit.check()
Add the following code to app.py. The posts route asks the PDP whether the user in the request body can create a Post, and returns 403 when the PDP denies the request.
# app.py
# Posts model
class Posts(BaseModel):
    user: str

# post creation endpoint
@app.route("/posts", methods=["POST"])
def posts():
    action = 'create'
    resource = 'Post'
    try:
        check = Posts(**request.get_json())
    except ValidationError as e:
        return jsonify(e.errors()), 422

    permitted = asyncio.run(permit.check(check.user, action, resource))
    if permitted:
        return jsonify({"message": "User is permitted"})
    else:
        return jsonify({"message": "User is not permitted"}), 403

if __name__ == "__main__":
    app.run(debug=True, port=8000)
permit.check() takes the user key, the action, and the resource type, and returns True or False. To protect other endpoints, such as commenting or editing, change the action and resource values.
In a production app, take the user key from your authenticated session. This example reads the user key from the request body so that you can test the endpoint with curl.
Start the Flask app
Set the environment variables and run app.py, replacing <YOUR_API_KEY> with your API key:
export PERMIT_API_KEY=<YOUR_API_KEY>
export PDP_URL=http://localhost:7766
python app.py
app.run(debug=True, port=8000) starts the Flask development server on http://localhost:8000.
5. Test the permission check
Register two users, give one of them the Author role, and confirm that the PDP allows only that user to create a post.
Register two users
In a second terminal, register John and Emma:
curl -X POST http://localhost:8000/register \
  -H "Content-Type: application/json" \
  -d '{"email": "john@example.com", "first_name": "John", "last_name": "Doe"}'

curl -X POST http://localhost:8000/register \
  -H "Content-Type: application/json" \
  -d '{"email": "emma@example.com", "first_name": "Emma", "last_name": "Den"}'
Each request returns "message": "User registered and role assigned", the synced user under user, and the role assignment under role_assignment, with "role": "Reader" and "tenant": "default". Both users appear in the Directory screen of the Permit dashboard.
Assign John the Author role
Both users have the Reader role, which can't create posts. Give John the Author role in the Permit dashboard:
- Open the Directory screen and select
john@example.comto open the Edit User panel. - Under Permissions Per Tenant, select the Default Tenant.
- In Top Level Access, add the Author role.
- Click Save.
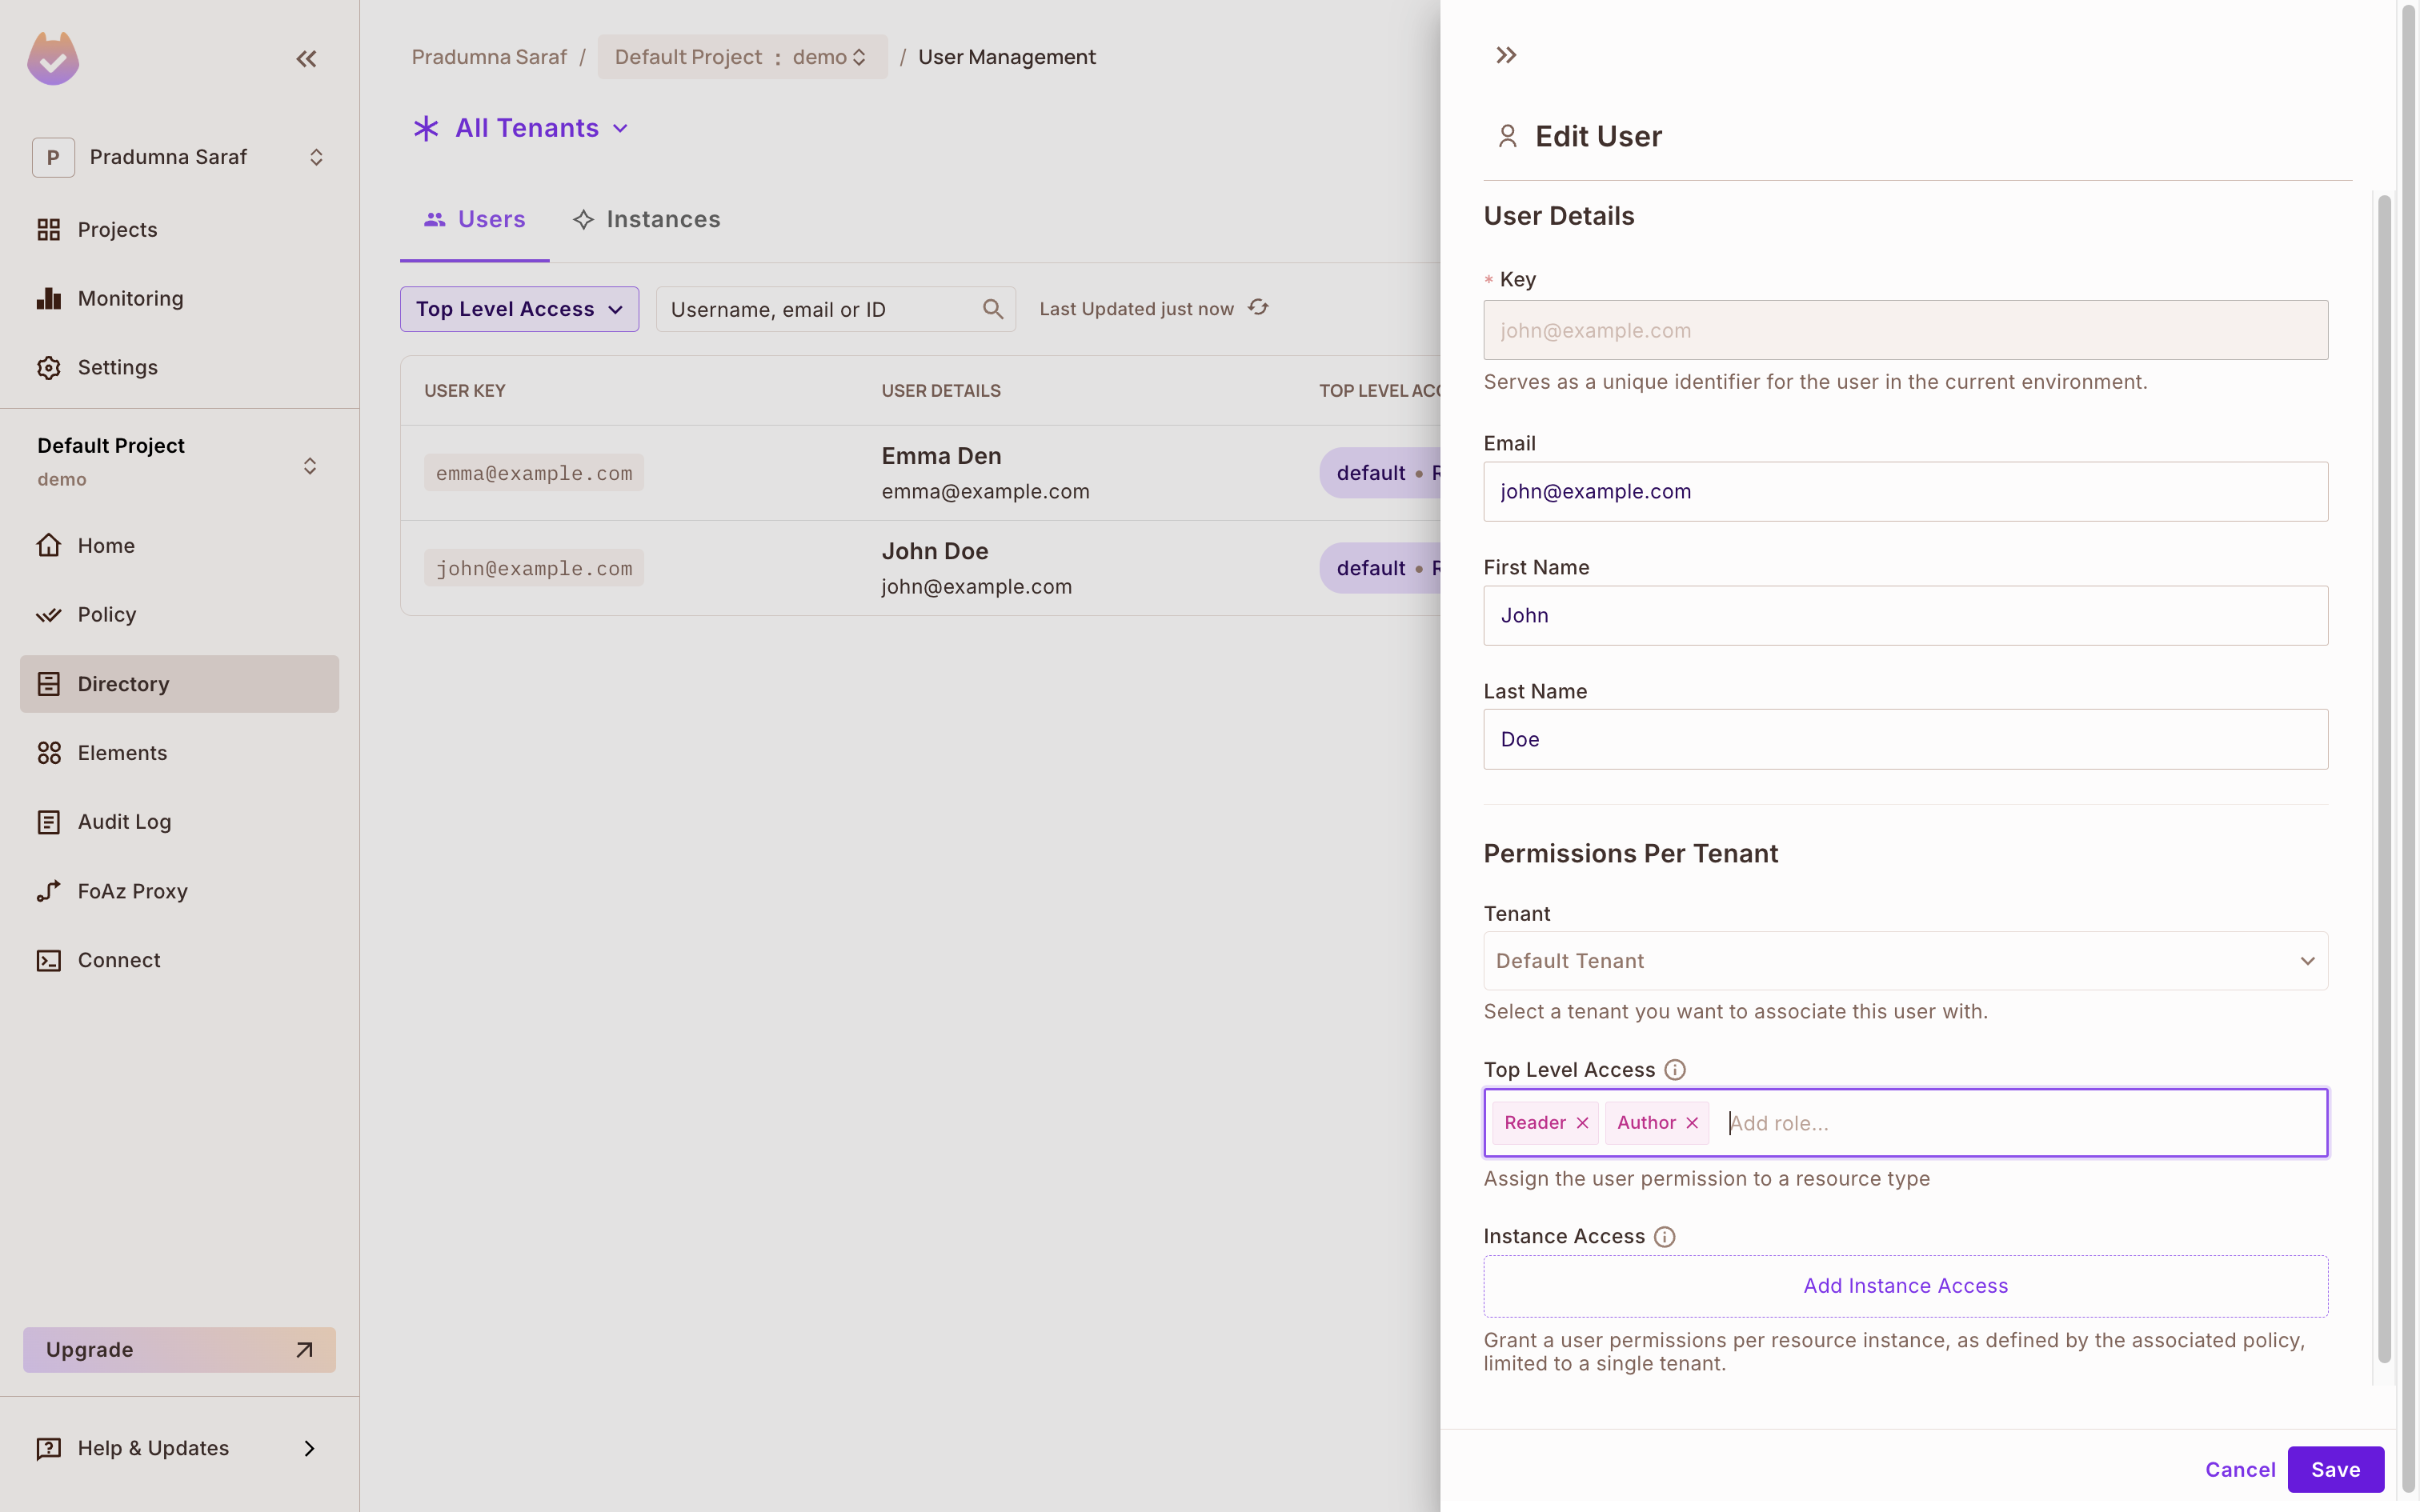
For other ways to assign roles, including the API and SDK, see Sync users.
Check that John can create a post and Emma can't
Send a POST /posts request for John:
curl -X POST http://localhost:8000/posts \
  -H "Content-Type: application/json" \
  -d '{"user": "john@example.com"}'
The PDP allows the request because John has the Author role. The app returns HTTP 200 with "message": "User is permitted" in the JSON body.
Send the same request for Emma:
curl -X POST http://localhost:8000/posts \
  -H "Content-Type: application/json" \
  -d '{"user": "emma@example.com"}'
The PDP denies the request because Emma has only the Reader role. The app returns HTTP 403 with "message": "User is not permitted" in the JSON body.
Each check also appears in the Audit Log screen of the Permit dashboard, with the user, action, resource, and decision.
Next steps
- Check permissions with the Python SDK (sync): call Permit from synchronous Python code without
asyncio.run(). - Check permissions with permit.check(): check against tenants, resource instances, and attributes.
- Build RBAC policies: create roles and permissions for your own resources.
- Permit Elements overview: embed user management and other UI components in your app.