Sync your First User with the API
Create your first user in Permit.io with the Permit REST API, assign the user a role, and then give the same user a different role in a second tenant. This walkthrough is for developers who are new to Permit and want to see how users, roles, and tenants fit together. For the full reference on syncing users from your sign-in flow, see Sync users.
In Permit, a user is any identity you check permissions for, human or machine. Syncing a user copies the identity from your application or identity provider (IdP) into the Permit control plane, so the policy decision point (PDP) can evaluate permission checks for that user.
What you build
- A user,
John Smith, created with the Create User endpoint. - A role assignment for John in the
defaulttenant. - A second tenant,
Marketing, where John has theManagerrole.
You can repeat the same calls for any number of users, roles, and tenants. To load many users at once, use the bulk endpoints.
Prerequisites
- Your environment API key (Get your API key)
- Your project ID and environment ID (Use the Permit API and SDK). To see how workspaces, projects, and environments relate, read Projects and environments.
- Two roles to assign, with the keys
adminandmanager(Configure your first RBAC policy) cURL, an HTTP client such as Postman, or Node.js with thepermitiopackage installed
The code samples show each request as cURL and as Node.js. In the samples, replace these placeholders:
| Placeholder | Replace with |
|---|---|
{proj_id}, {env_id} | Your project and environment keys or IDs |
YOUR_API_KEY (cURL), PERMIT_API_KEY environment variable (Node.js) | Your environment API key |
The Node.js sample in step 1 creates the permit client. The Node.js samples in later steps reuse that client. The screenshots show the requests sent with cURL and Postman.
API endpoints used in this walkthrough
| Task | Endpoint |
|---|---|
| Create a user | POST /v2/facts/{proj_id}/{env_id}/users |
| Assign a role to a user | POST /v2/facts/{proj_id}/{env_id}/users/{user_id}/roles |
| Create a tenant | POST /v2/facts/{proj_id}/{env_id}/tenants |
| Add a user to a tenant | POST /v2/facts/{proj_id}/{env_id}/tenants/{tenant_id}/users |
Every request authenticates with your environment API key as a bearer token. Sync a user when your application signs the user up or signs the user in. For the reasons, see When to sync users.
1. Create a user with the API
Send a POST request to the users endpoint. The request body holds the user's unique key and optional profile fields. Permit creates the user in that environment, ready for role assignments.
The POST request fails with HTTP 409 if a user with the same key already exists. The Node.js sample calls permit.api.users.sync(), which creates the user or replaces an existing user with the same key.
- cURL
- Node.js
curl 'https://api.permit.io/v2/facts/{proj_id}/{env_id}/users' \
  --request POST \
  --header 'Authorization: Bearer YOUR_API_KEY' \
  --header 'Content-Type: application/json' \
  --data '{
  "key": "user|123456789",
  "email": "john@smith.com",
  "first_name": "John",
  "last_name": "Smith"
}'
import { Permit } from "permitio";

const permit = new Permit({
  token: process.env.PERMIT_API_KEY,
  pdp: "https://cloudpdp.api.permit.io",
});

const { user, created } = await permit.api.users.sync({
  key: "user|123456789",
  email: "john@smith.com",
  first_name: "John",
  last_name: "Smith",
});
console.log("User synced:", user.key, "created:", created);
The API returns the user object as JSON, with "key": "user|123456789". The Node.js sample prints User synced: user|123456789 created: true the first time you run it.
Permit also syncs users with System for Cross-domain Identity Management (SCIM). A SCIM connection to an identity provider such as Microsoft Entra ID or Okta provisions, updates, and deprovisions users in Permit.
2. Verify the user in the Permit Directory
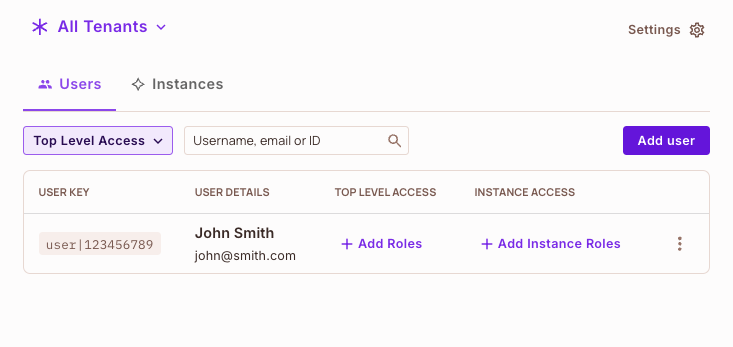
In the Permit dashboard, open Directory and select All Tenants. John Smith appears with the key user|123456789 and no roles yet.
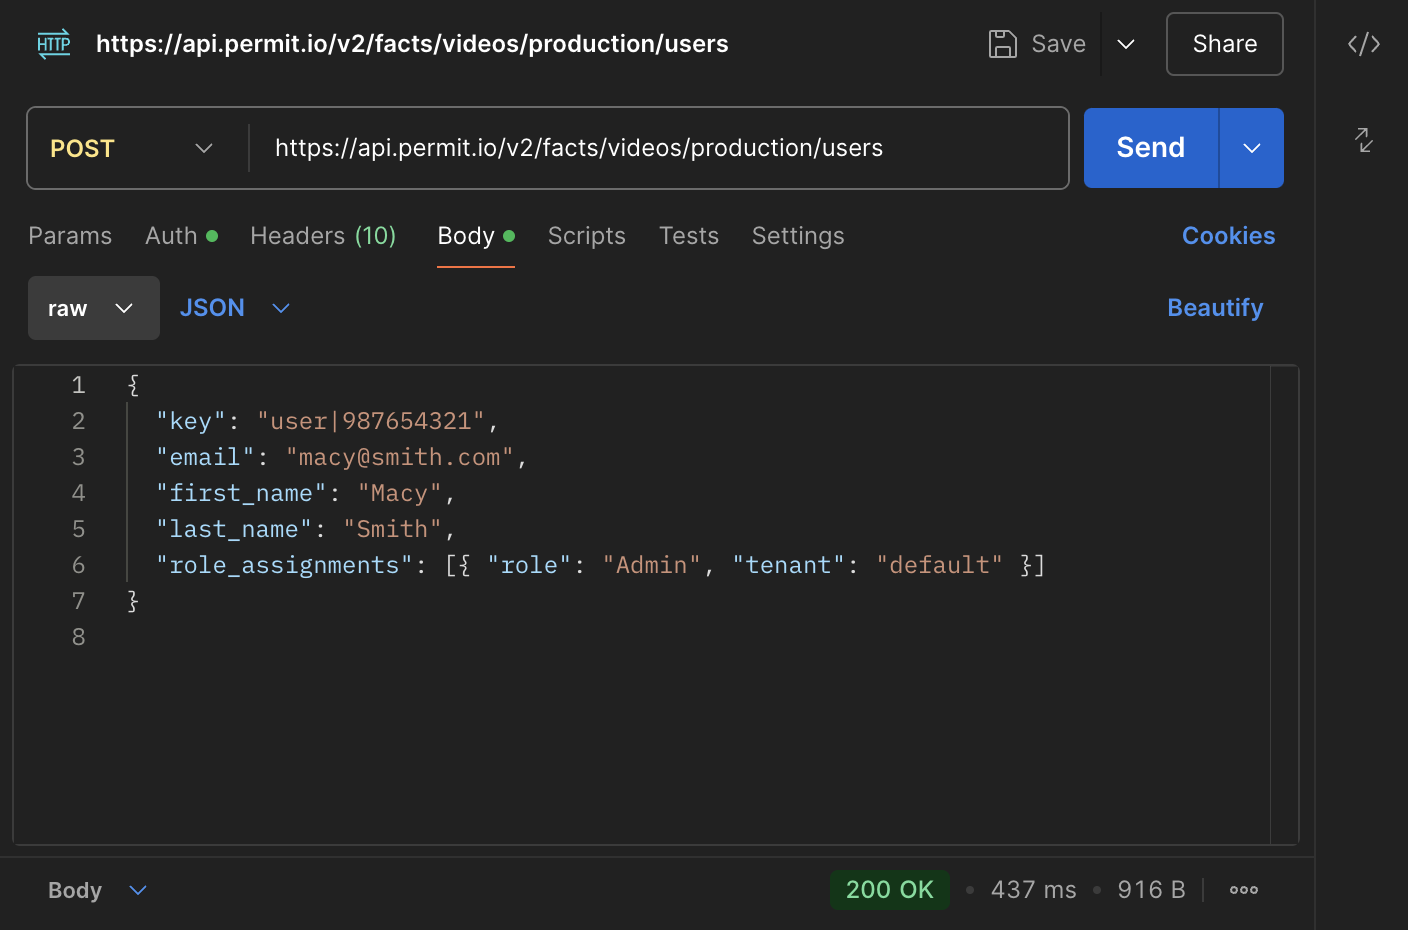
To create a user with a role in one request, add the role_assignments field to the create user request body. Each entry is a role key and the tenant key it applies in:
{
  "key": "user|123456789",
  "role_assignments": [{ "role": "admin", "tenant": "default" }]
}
This Postman request creates a second user, Macy Smith, with the Admin role in the default tenant:
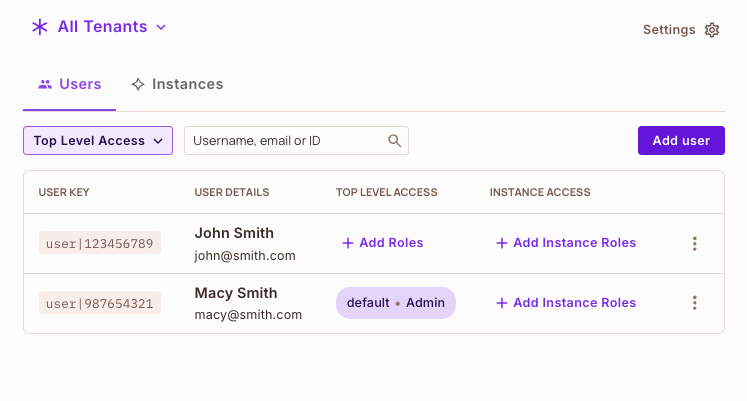
Macy Smith appears in the Directory with default • Admin under Top Level Access:
3. Assign a role to the user (optional)
If you created the user without role_assignments, assign a role in a separate request. Send a POST request to the user's roles endpoint with the role key and the tenant key. In the URL, the | in the user key is encoded as %7C. The Node.js SDK sends the same request with permit.api.users.assignRole().
- cURL
- Node.js
curl 'https://api.permit.io/v2/facts/{proj_id}/{env_id}/users/user%7C123456789/roles' \
  --request POST \
  --header 'Authorization: Bearer YOUR_API_KEY' \
  --header 'Content-Type: application/json' \
  --data '{
  "role": "admin",
  "tenant": "default"
}'
const assignment = await permit.api.users.assignRole({
  user: "user|123456789",
  role: "admin",
  tenant: "default",
});
console.log("Role assigned:", assignment.role, "in tenant:", assignment.tenant);
The Node.js sample prints Role assigned: admin in tenant: default. In the Directory, the admin role appears under Top Level Access for John Smith.
4. Create a second tenant
A tenant is an isolated space in your application, with its own role assignments and resource instances. Permit uses tenants for multitenancy: the same user can have a different role in each tenant, for example admin in one tenant and manager in another.
Create a tenant with the key marketing and the name Marketing:
- cURL
- Node.js
curl 'https://api.permit.io/v2/facts/{proj_id}/{env_id}/tenants' \
  --request POST \
  --header 'Authorization: Bearer YOUR_API_KEY' \
  --header 'Content-Type: application/json' \
  --data '{
  "key": "marketing",
  "name": "Marketing"
}'
const tenant = await permit.api.tenants.create({
  key: "marketing", // The unique key for the tenant
  name: "Marketing", // The display name for the tenant
});
console.log("Tenant created:", tenant.key);
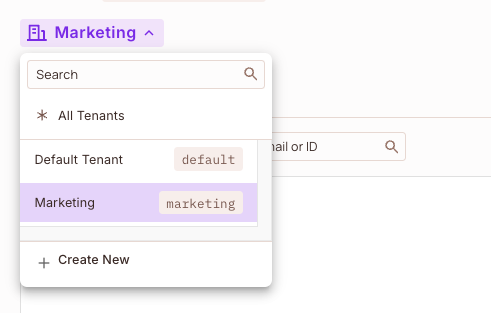
The Node.js sample prints Tenant created: marketing. The Marketing tenant appears in the tenant selector of the Directory:
5. Give the user a different role in the second tenant
Add John Smith to the marketing tenant with the manager role. You can use either request:
- cURL: send the user object, with a
role_assignmentsentry for themarketingtenant, to the tenant's users endpoint. - Node.js: assign the
managerrole in themarketingtenant withpermit.api.users.assignRole().
- cURL
- Node.js
curl 'https://api.permit.io/v2/facts/{proj_id}/{env_id}/tenants/marketing/users' \
  --request POST \
  --header 'Authorization: Bearer YOUR_API_KEY' \
  --header 'Content-Type: application/json' \
  --data '{
  "key": "user|123456789",
  "email": "john@smith.com",
  "first_name": "John",
  "last_name": "Smith",
  "role_assignments": [
    {
      "role": "manager",
      "tenant": "marketing"
    }
  ]
}'
const assignment = await permit.api.users.assignRole({
  user: "user|123456789",
  role: "manager",
  tenant: "marketing",
});
console.log("Role assigned:", assignment.role, "in tenant:", assignment.tenant);
The Node.js sample prints Role assigned: manager in tenant: marketing. John Smith has the manager role in the marketing tenant, and his admin role in the default tenant doesn't change.
Check John Smith's roles in both tenants
In the Directory, select the Marketing tenant. John Smith appears with the Manager role:
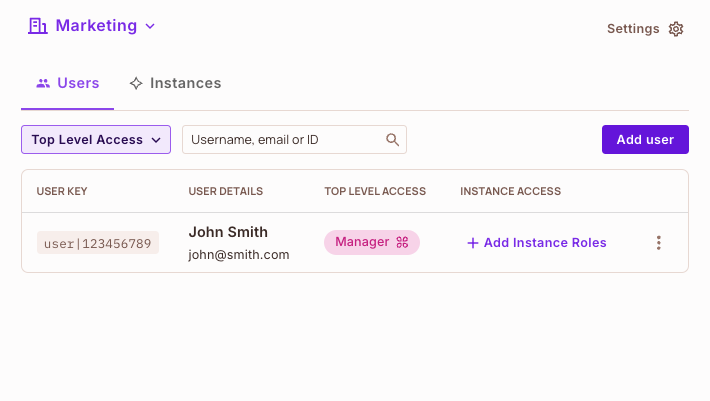
Select Default Tenant. John Smith appears with the admin role from step 3.
Sync users in bulk
To create, update, or delete many users in one request, use the bulk endpoints:
| Task | Endpoint |
|---|---|
| Create users | POST /v2/facts/{proj_id}/{env_id}/bulk/users |
| Replace users | PUT /v2/facts/{proj_id}/{env_id}/bulk/users |
| Assign roles to users | POST /v2/facts/{proj_id}/{env_id}/role_assignments/bulk |
| Unassign roles from users | DELETE /v2/facts/{proj_id}/{env_id}/role_assignments/bulk |
| Delete users | DELETE /v2/facts/{proj_id}/{env_id}/bulk/users |
To decide between a one-time bulk import and syncing each user at sign-in, see Plan your user sync.
What you did
- Created a user with the Permit API.
- Assigned a role to the user, in the create request and in a separate request.
- Gave the same user a different role in a second tenant.
Everything you did with the API in this walkthrough, you can also do in the Permit dashboard.
What's next?
Next: check a permission for the user you synced.