Hanko and Permit
Build a Next.js notes app that signs users in with Hanko passkeys and uses Permit.io to decide who can read, create, update, and delete notes. This tutorial is for developers who use Hanko, or plan to, and want to add authorization. You start with role-based access control (RBAC), sync Hanko users into Permit, and then limit updates and deletes to the note's owner with attribute-based access control (ABAC).
For background on passkeys and fine-grained authorization, read the Permit blog post Better access control with passkeys and fine-grained authorization.
What you build
- Passkey sign-in with Hanko Cloud, enforced by Next.js middleware.
- A Permit policy where every user can read and create notes, and only admins can update and delete them.
- A sync route that adds each Hanko user to Permit with the
userrole. - An ABAC rule that lets users update and delete the notes they own.
The app is written in Next.js. Permit has SDKs for other languages, so you can apply the same pattern in another stack. The full code is in the permit-hanko repository.
Prerequisites
- A Hanko Cloud account.
- A Permit.io account.
- Node.js and npm.
- For the ABAC section: Docker, to run a local policy decision point (PDP).
If your application already signs users in with Hanko, skip to Set up basic role-based authorization.
Run the demo application
Clone the demo application to follow the steps with working code.
- Clone the application:
git clone git@github.com:permitio/permit-hanko.git
cd permit-hanko
- Install the dependencies:
npm install
- Run the application:
npm run dev
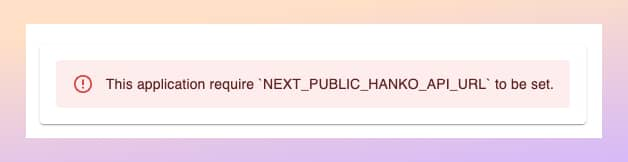
The application shows a configuration error page until you set the Hanko API URL in the next section.
Set up Hanko passkey authentication
You can run Hanko locally or use Hanko Cloud. These steps use Hanko Cloud.
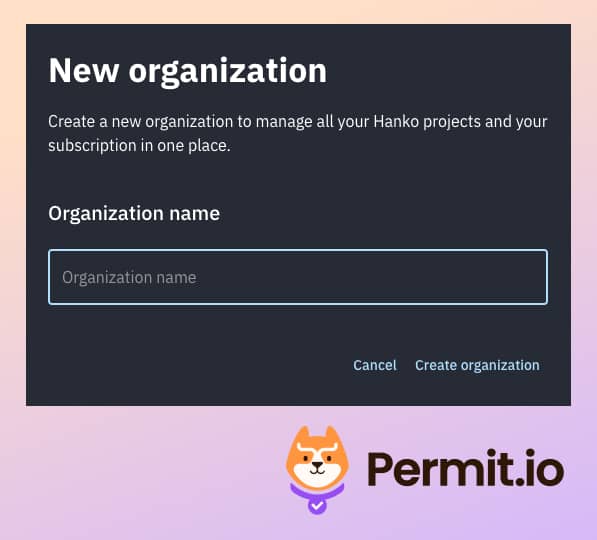
- Open Hanko Cloud, create an organization, and give it a name.
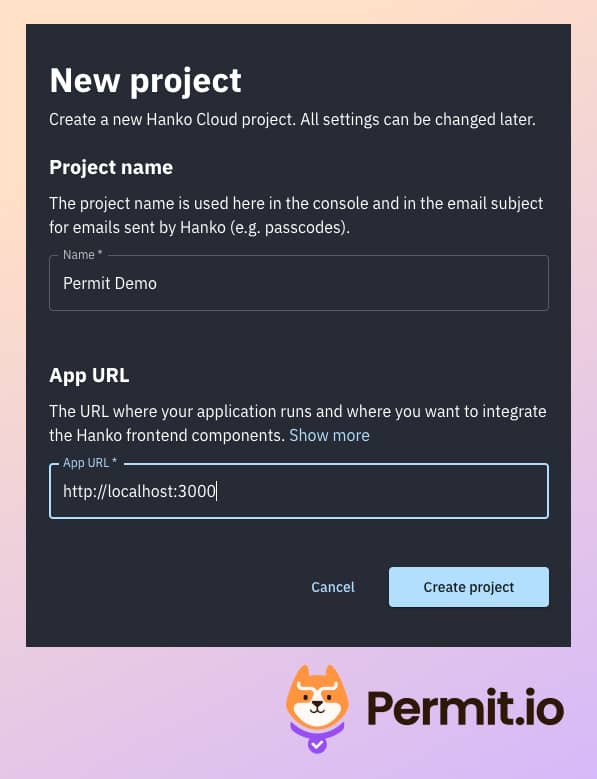
- In the dashboard, create a project and set the App URL to
http://localhost:3000.
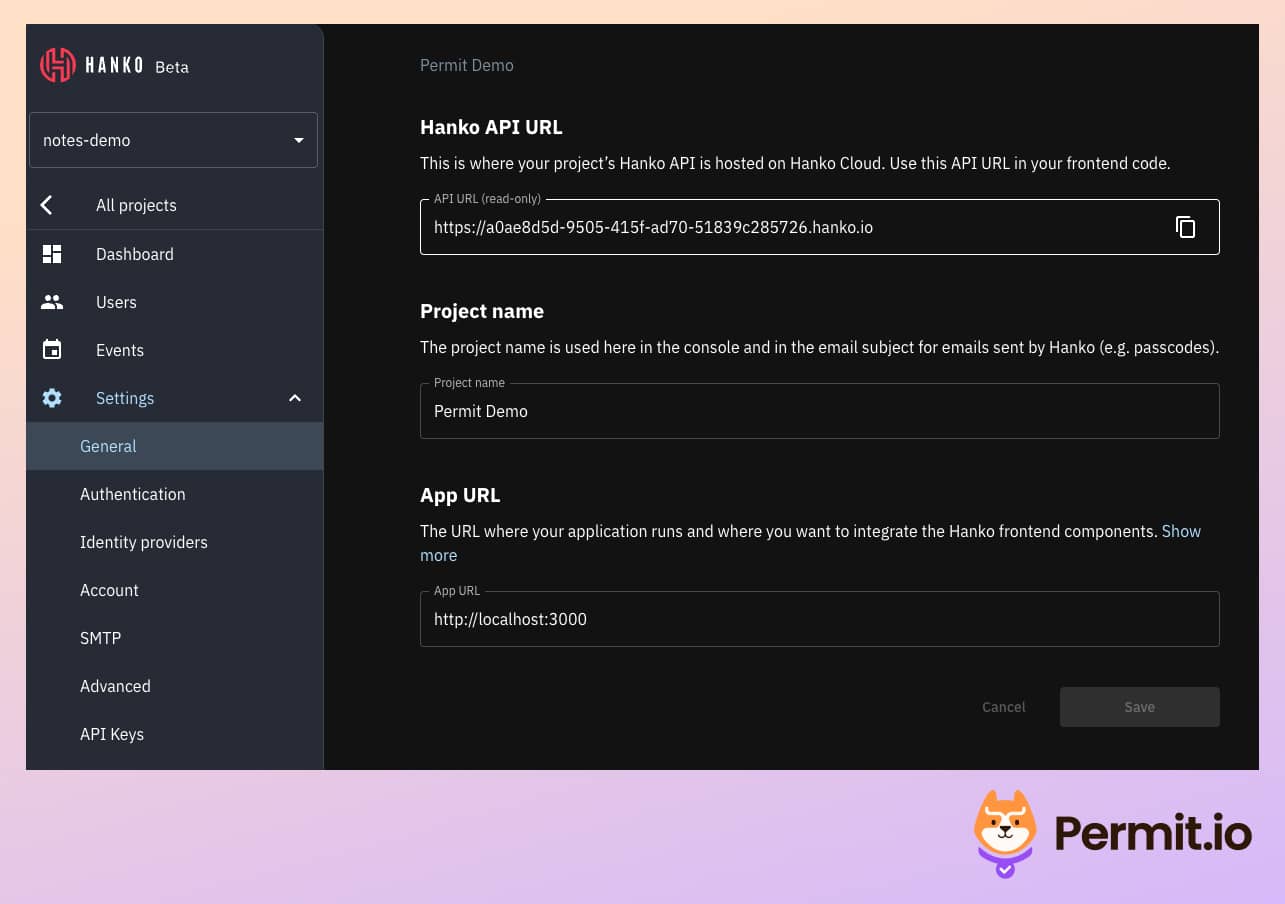
- In the project, open Settings > General and copy the API URL.
- Create a file named
.env.localin the root of the application and add the API URL. Replace the example value with your project's API URL:
NEXT_PUBLIC_HANKO_API_URL=https://a0ae8d5d-9505-415f-ad70-51839c285726.hanko.io
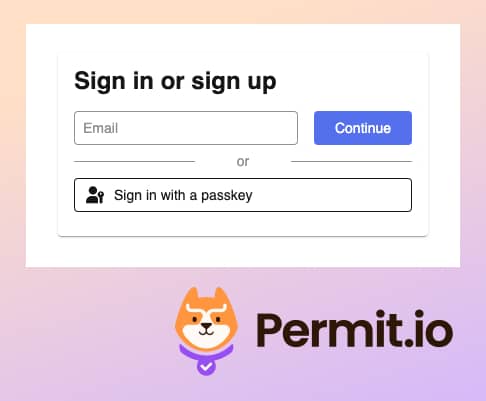
- Restart the application. The configuration error is gone, and the login page appears.
How the app uses Hanko
The login page renders the Hanko authentication component from the Hanko JavaScript SDK. See app/auth/login/page.tsx:
<Paper sx={{ p: 2 }}>
  <HankoAuth />
</Paper>
The middleware in middleware.ts reads the hanko cookie, verifies the token against the Hanko JSON Web Key Set (JWKS), and uses the token's sub claim as the user ID. If the token is missing or invalid, the middleware sends the user to the login page:
const authenticateUser = async (req: NextRequest): Promise<string> => {
if (!hankoApiUrl) {
return "";
}

// Get Hanko token from cookie
const hanko = req.cookies.get("hanko")?.value;

...

// Authenticate user using Hanko
const user = await authenticateUser(req);

// Redirect to login page if user is not authenticated
if (!user) {
urlToRedirect.pathname = LOGIN_URL;
return NextResponse.rewrite(urlToRedirect);
}
Set up basic role-based authorization
The notes API in /app/api/notes/route.ts has four handlers: GET, POST, PUT, and DELETE. They read, create, update, and delete notes.
The handlers don't check permissions themselves. The same middleware.ts file sends every request to the PDP's /allowed endpoint, which is the endpoint that permit.check() calls:
const response = await fetch(`${pdpUrl}/allowed`, {
    method: "POST",
    headers: {
        Authorization: `Bearer ${permitApiKey}`,
        "Content-Type": "application/json",
        Accept: "application/json",
},
body: JSON.stringify({
    user: user,
    action,
    resource: resource,
    context: {},
    }),
});
The request passes three values to the PDP:
| Value | In the demo app |
|---|---|
user | The Hanko user ID from the verified token |
action | The HTTP method in lowercase: get, post, put, or delete |
resource | The resource type from the request path (notes). For requests other than GET, the middleware also sends the JSON request body, the note, as resource attributes. |
When PERMIT_API_KEY is not set, the middleware skips the check and allows all requests. Set the key before you test the policy.
Create the policy in Permit
- Sign in to the Permit dashboard and open the environment you want to use.
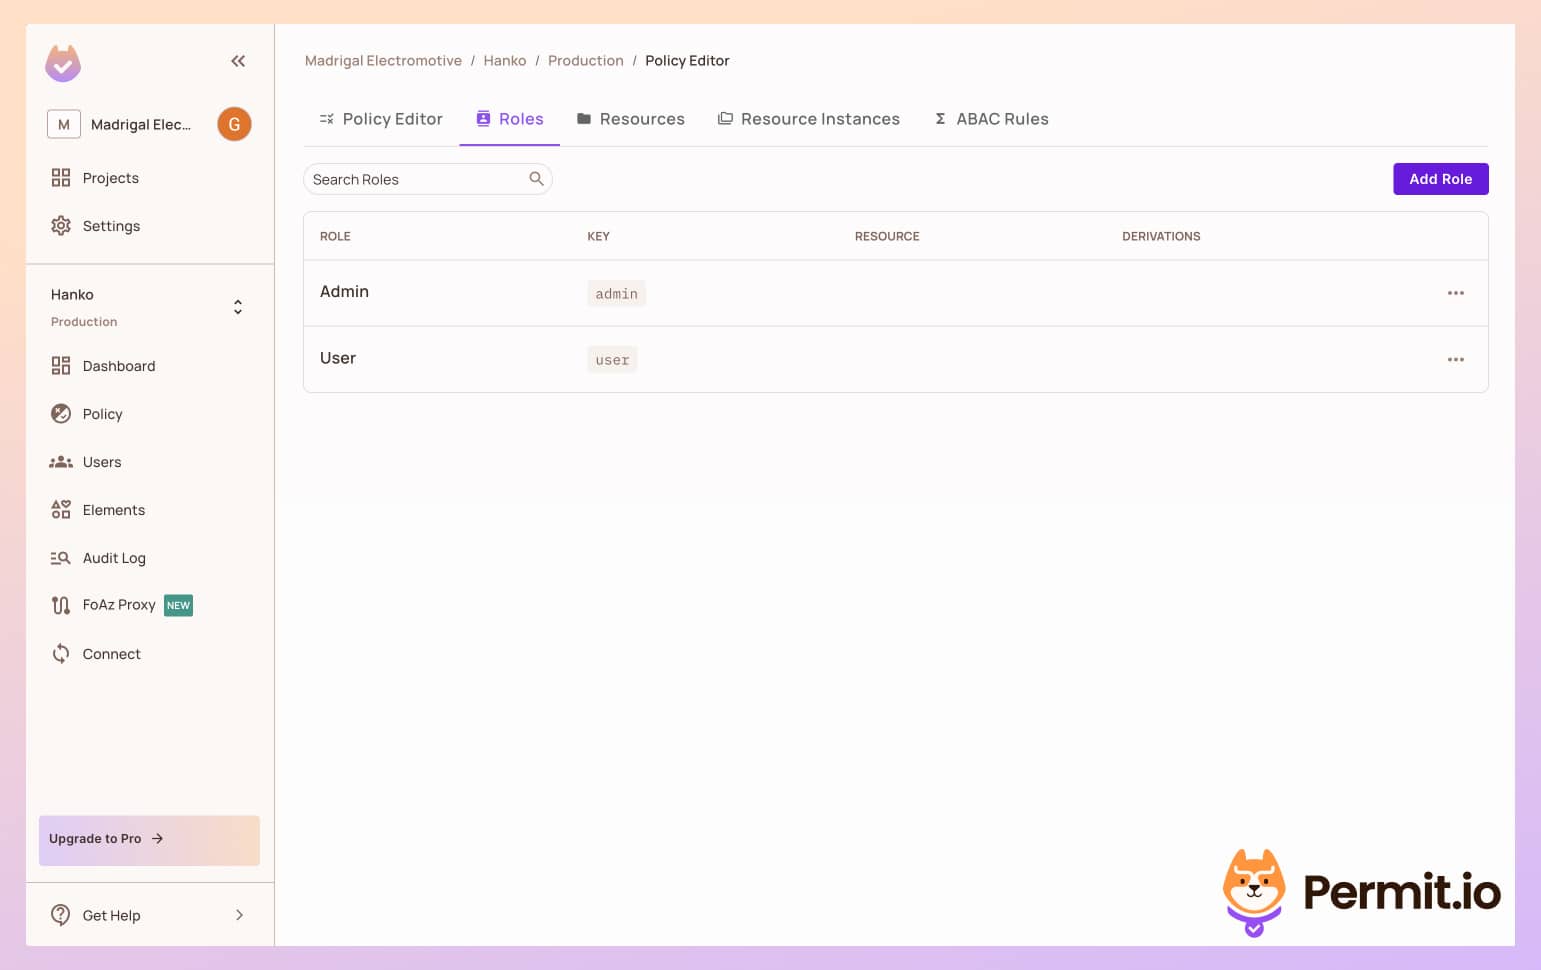
- Open Policy, go to the Roles tab, and create two roles:
adminanduser.
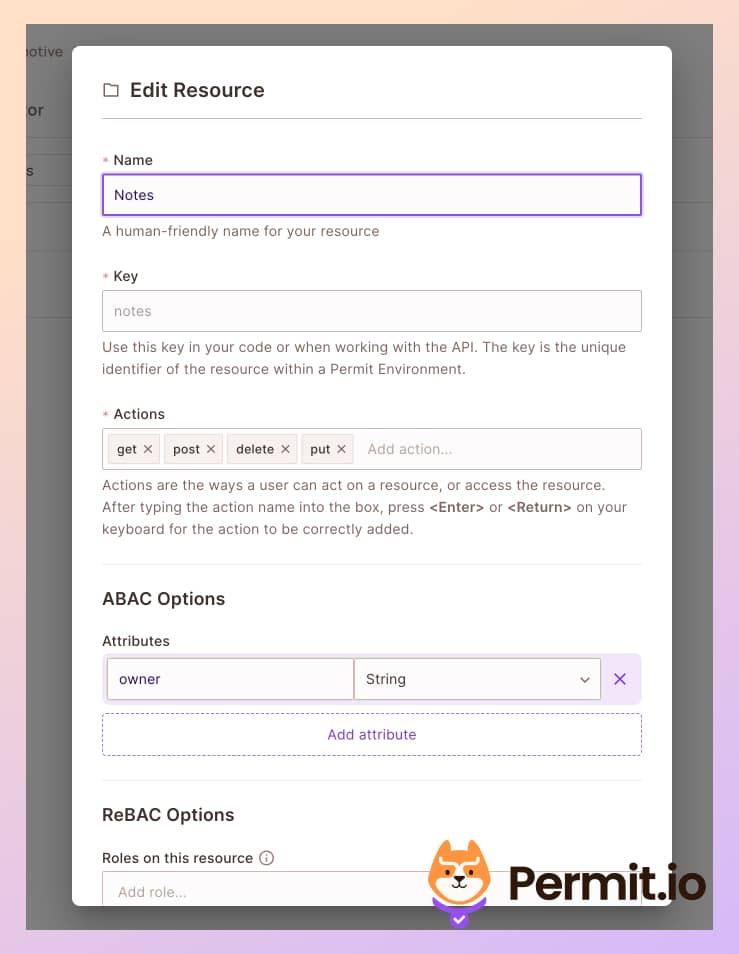
- In the Resources tab, create a resource named
noteswith the actionsget,post,put, anddelete, and anownerattribute.
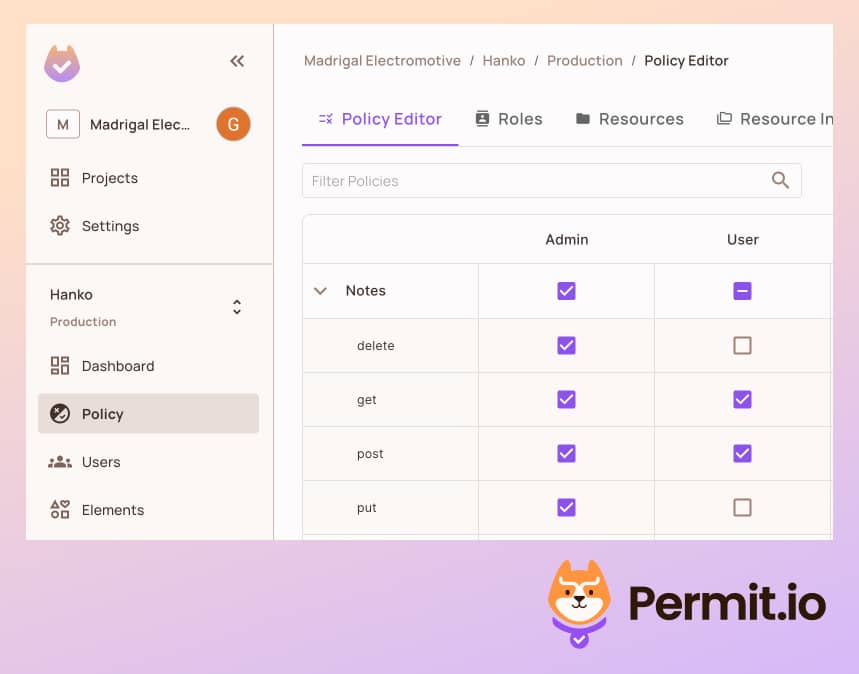
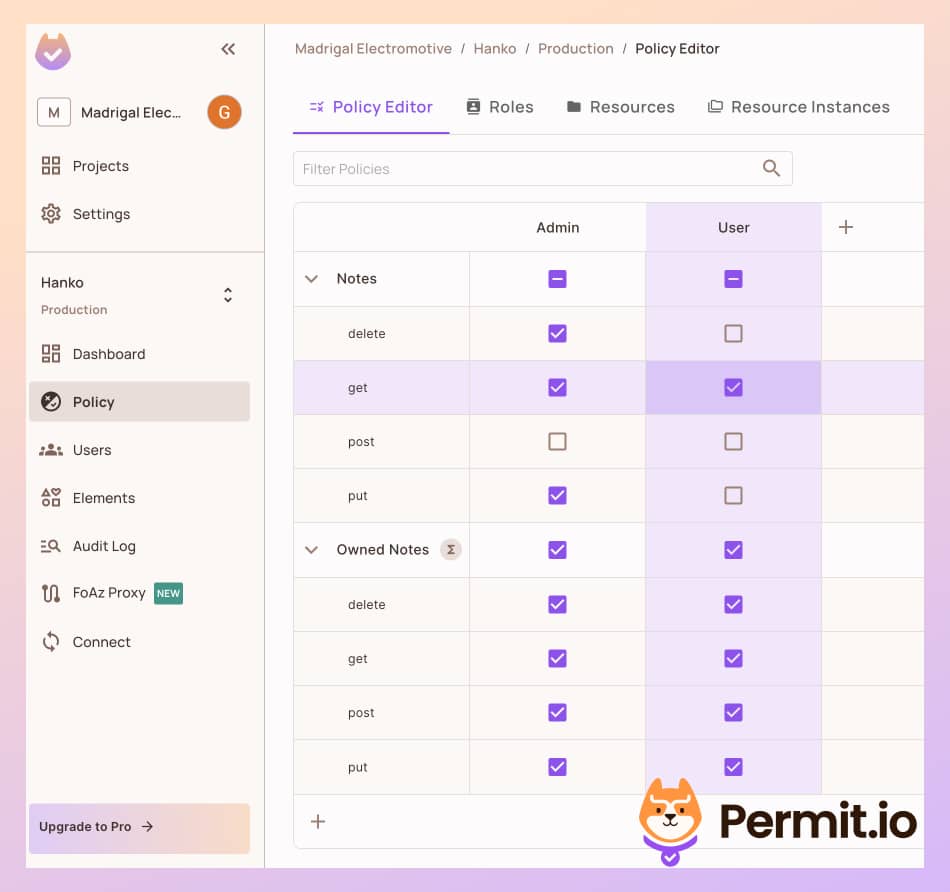
- In the Policy Editor tab, allow
getandpostonnotesfor both roles. Allowputanddeleteonly foradmin.
Add your Permit credentials to the app
- Copy your environment API key. See Get your API key.
- Add the key to the
.env.localfile:
PERMIT_API_KEY=<YOUR_COPIED_API_KEY>
- Set the PDP URL. This section uses the Cloud PDP:
PERMIT_PDP_URL=https://cloudpdp.api.permit.io
If you leave PERMIT_PDP_URL unset, the middleware uses the Cloud PDP by default.
- Restart the application so it loads the environment variables.
Sync Hanko users to Permit.io
The PDP can only match a user to a role if the user exists in Permit. The demo app syncs each user after Hanko sign-in: the Hanko component calls the /api/permit route when the authentication flow completes. The route gives every new user the user role in the default tenant, so new users start with the least privilege in the policy.
The code is in src/app/api/permit/route.ts:
const response = await permit.api.syncUser({

key,
  email,
  attributes: {
    roles: ["user"],
  },
});

await permit.api.roleAssignments.assign({

role: "user",
  tenant: "default",
  user: key,

});
The route first looks the user up with permit.api.getUser(). It runs the sync and the role assignment only for users that don't exist in Permit yet.
Verify the RBAC policy
- Open
http://localhost:3000and sign in with Hanko. Create a passkey when Hanko asks for one. - Create a note. The note appears in the list.
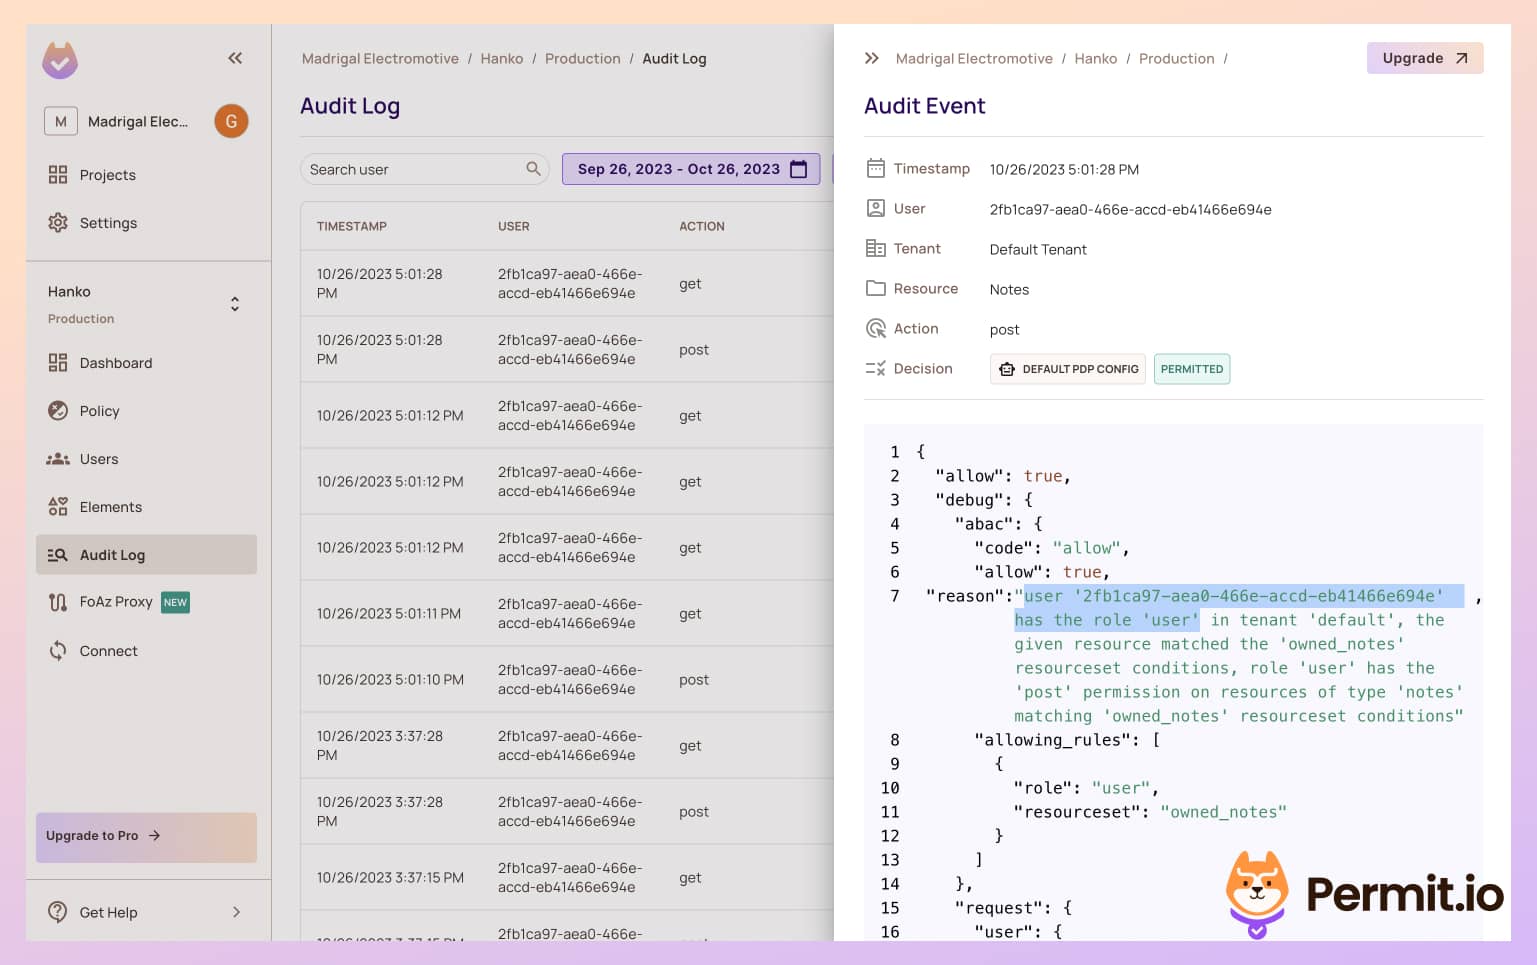
- In the Permit dashboard, open Audit Log. A
postentry for your user shows an allowed decision, because theuserrole allowspostonnotes.
- Delete the note. The app shows an error:
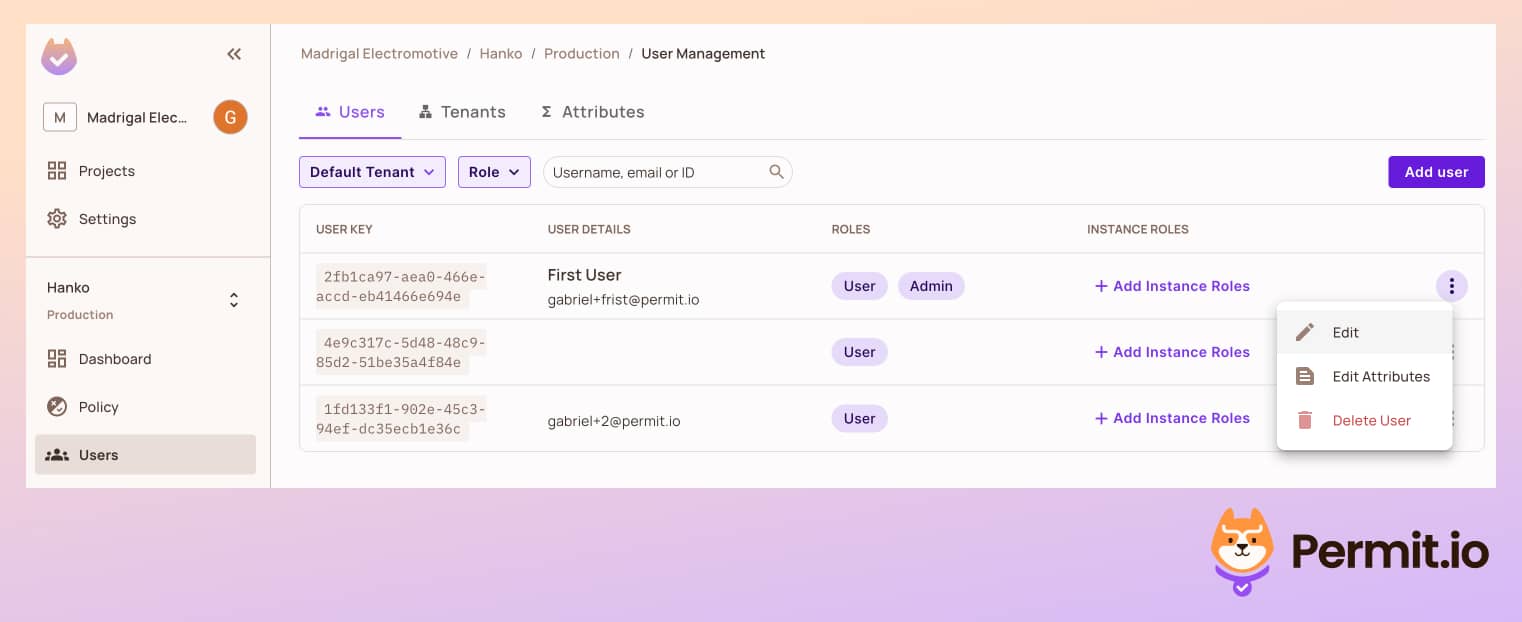
You are not allowed to access this resource.Theuserrole doesn't allowdelete. - In the Permit dashboard, open Directory and assign the
adminrole to your user in thedefaulttenant. - Delete the note again. The delete succeeds, and you didn't change any application code.
Add fine-grained attribute-based authorization
With the RBAC policy, only admins can update and delete notes. In this section, you also let each user update and delete the notes they own. This rule needs the note's owner attribute, so you add an ABAC rule.
The Cloud PDP doesn't support ABAC policies, so it can't apply the owner rule in this section. Run the PDP as a container and set PERMIT_PDP_URL to its address. See Deploy the PDP to production and Cloud PDP capabilities.
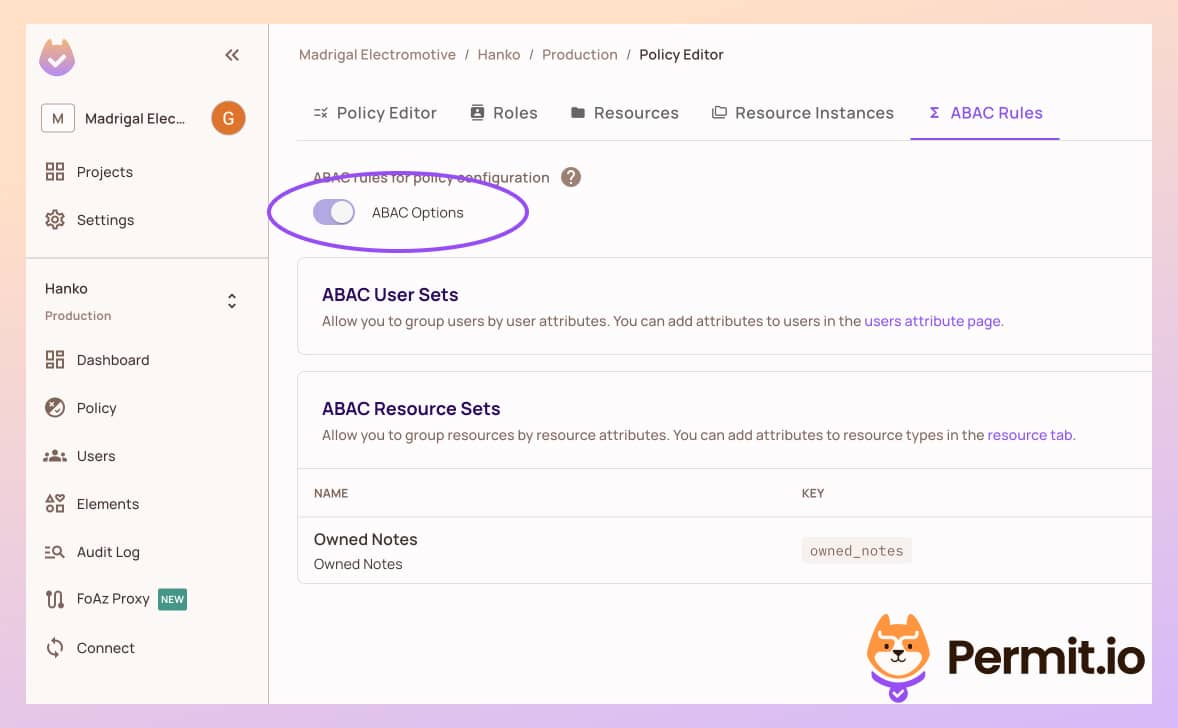
- In the Permit dashboard, open Policy > ABAC Rules and enable ABAC.
- Create a resource set named
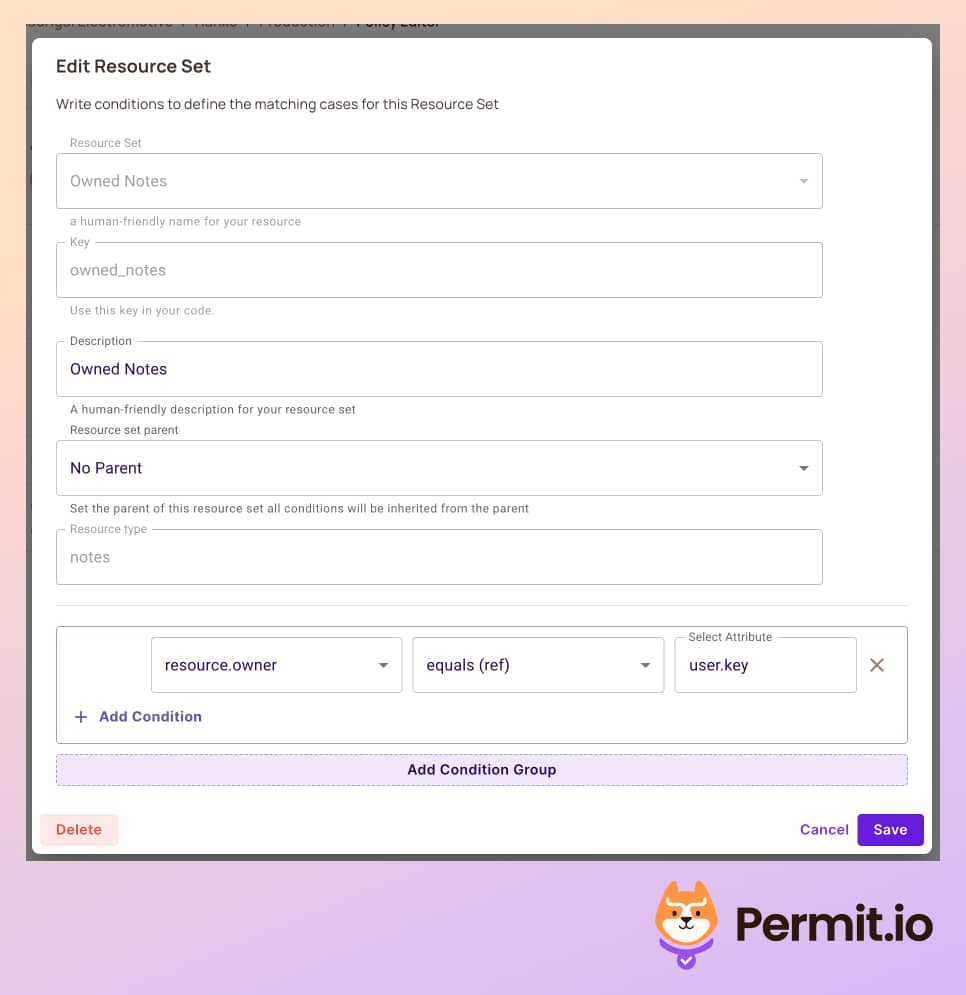
Owned Notes(keyowned_notes) on thenotesresource type. Add the conditionresource.ownerequals (ref)user.key. The set matches a note only when itsownerattribute equals the key of the user who makes the request.
- In the Policy Editor, allow
putanddeleteon theOwned Notesresource set for theuserrole. Keepputanddeleteonnotesfor theadminrole, so admins can change any note.
Verify the ABAC policy
The first user from the RBAC section has the admin role. Sign up a second user to test the owner rule.
- Sign out, then sign up with a second user. The sync route gives the second user the
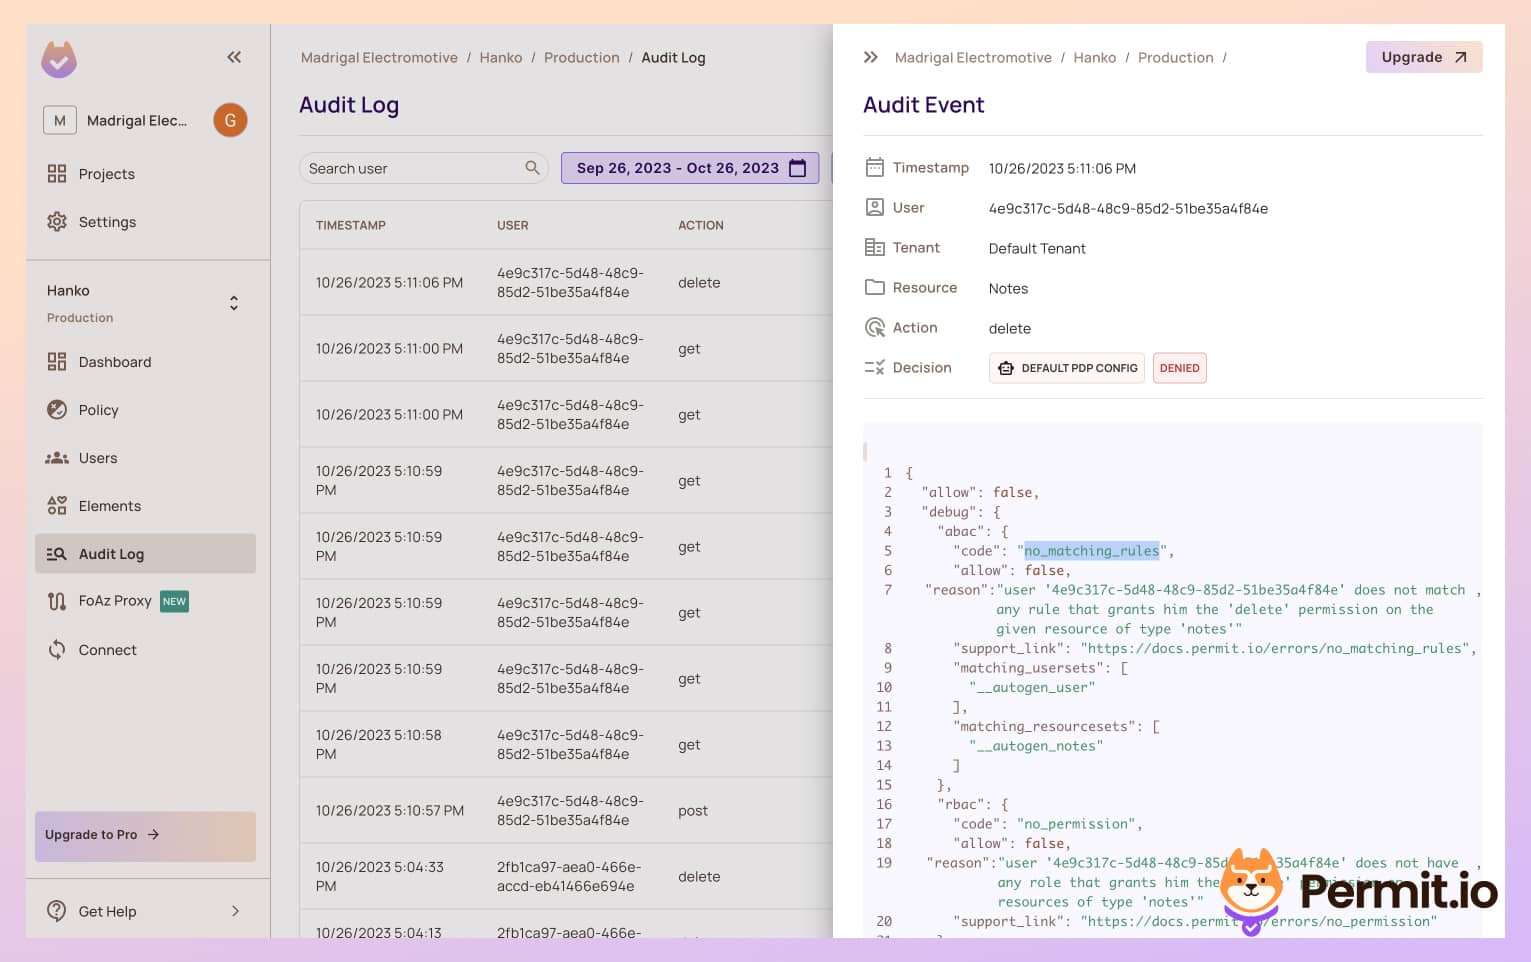
userrole. - As the second user, delete a note that the first user created. The delete fails. The Audit Log shows a denied
deletedecision for the second user.
- As the second user, create a note, then delete it. The delete succeeds, because the second user owns the note.
- Create another note as the second user. Sign out, and sign in as the first user.
- As the first user, delete the second user's note. The delete succeeds, because the first user has the
adminrole.
Check permissions inside application logic
The middleware checks each API request. Some decisions belong inside your application logic, for example an operation that only premium users can run. Call permit.check() at that point in the code. The policy stays in Permit, so a policy change doesn't need a code change.
const permit = new Permit({ token: process.env.PERMIT_API_KEY });

const permitted = await permit.check(user, action, resource);
The client reads your environment API key from PERMIT_API_KEY. Inside the application logic, permit.check() can use data that isn't in the HTTP request, such as attributes you load from your database.
Next step: relationship-based authorization
Relationship-based access control (ReBAC) grants access through relationships between resources. For example, a notes app with workspaces and folders might have no owner field on a note, but each note belongs to a workspace, and the user's role in the workspace decides access to its notes. You configure ReBAC policies in Permit, and the permit.check() calls and middleware in the app stay the same.