Connect a GitHub repository to Permit
Connect a GitHub repository to a Permit.io project so that Permit writes the policy code of each environment to the repository and syncs your changes to your policy decision points (PDPs). This page is for developers who set up GitOps with the Permit API. For what GitOps does, see the GitOps overview.
The setup has two parts:
- Add an SSH deploy key with write access to your GitHub repository.
- Register the repository in Permit with the repository's SSH URL and the private key, then activate the repository.
The permit gitops create github command of the Permit CLI runs the same setup as an interactive wizard: it generates the SSH key pair, asks for the repository details, and registers the repository in Permit.
The same steps work with other Git providers that support SSH deploy keys, with provider-specific changes to the deploy key step:
Prerequisites
- A Permit.io account with a project. Permit maps each repository to one project.
- A GitHub repository you can change settings for, or permission to create one.
ssh-keygen,awk, andcurlon your machine.- An Edge PDP if you plan to add custom Rego. The Cloud PDP doesn't run custom policy code. See Cloud PDP capabilities.
Add an SSH deploy key to the repository
Permit pushes generated policy code to your repository over SSH. Give Permit access with a deploy key that has write access.
Create a repository with an initial commit
Permit needs a repository whose default branch exists on the remote, with at least one commit. If you already have such a repository, go to Generate an SSH key.
Create the repository in GitHub, and add at least one file, such as a README, so the default branch has a commit.
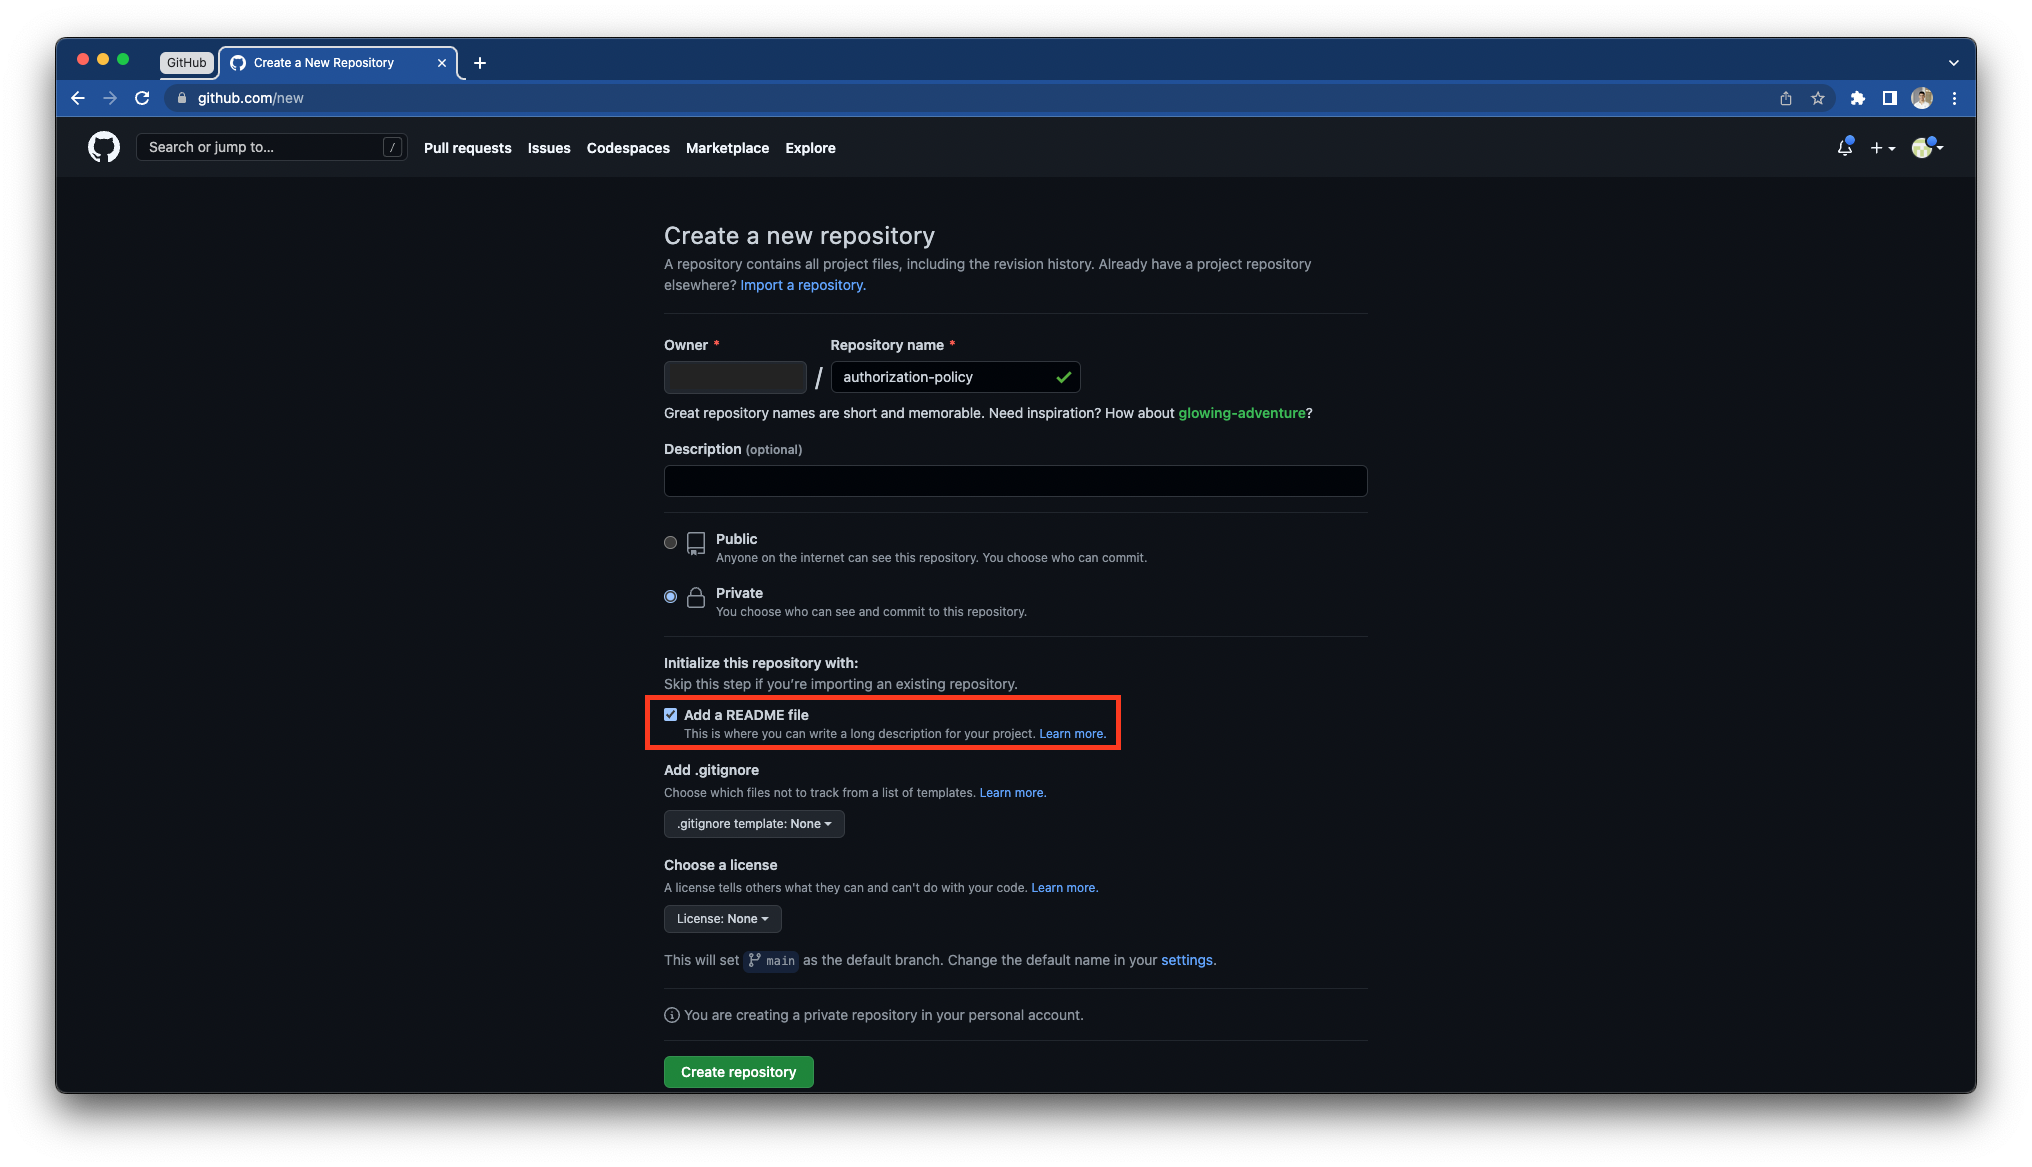
If the default branch of the repository has no commits, Permit can't clone the branch. This also applies when you use the Copy Environment API with GitOps. Commit at least one file before you continue.
Permit maps each repository to one Permit project. For each environment in the project, Permit creates and maps a branch in the repository.
Generate an SSH key
Generate an SSH key pair on your machine:
ssh-keygen -t ecdsa -b 521 -C "help@permit.io"
ssh-keygen asks for a file location and a passphrase. Leave the passphrase empty: the Permit API accepts a private key without a passphrase field.
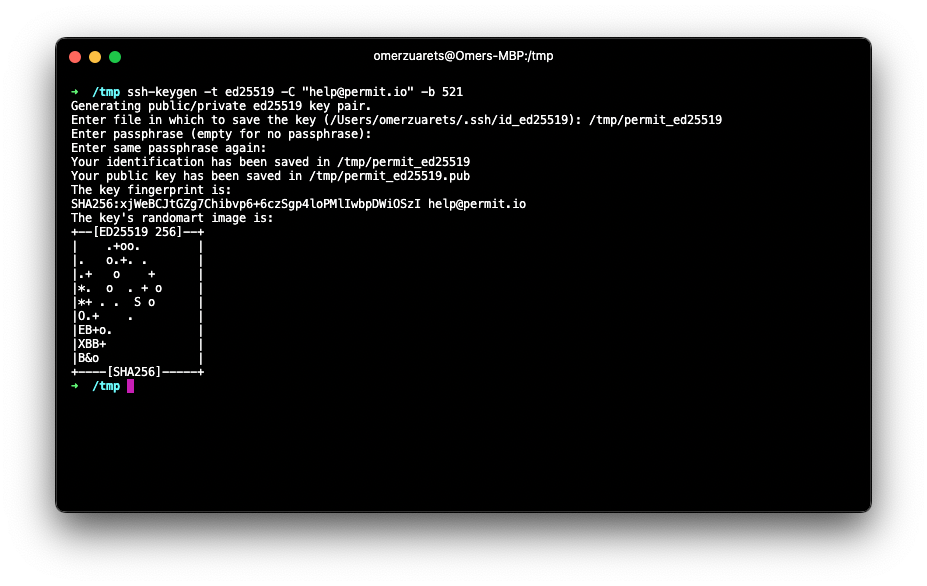
The private key is saved at the location you chose. The public key is saved at the same location with a .pub suffix. You send the private key to Permit in a later step, so keep it out of your repositories.
Add the public key as a deploy key
-
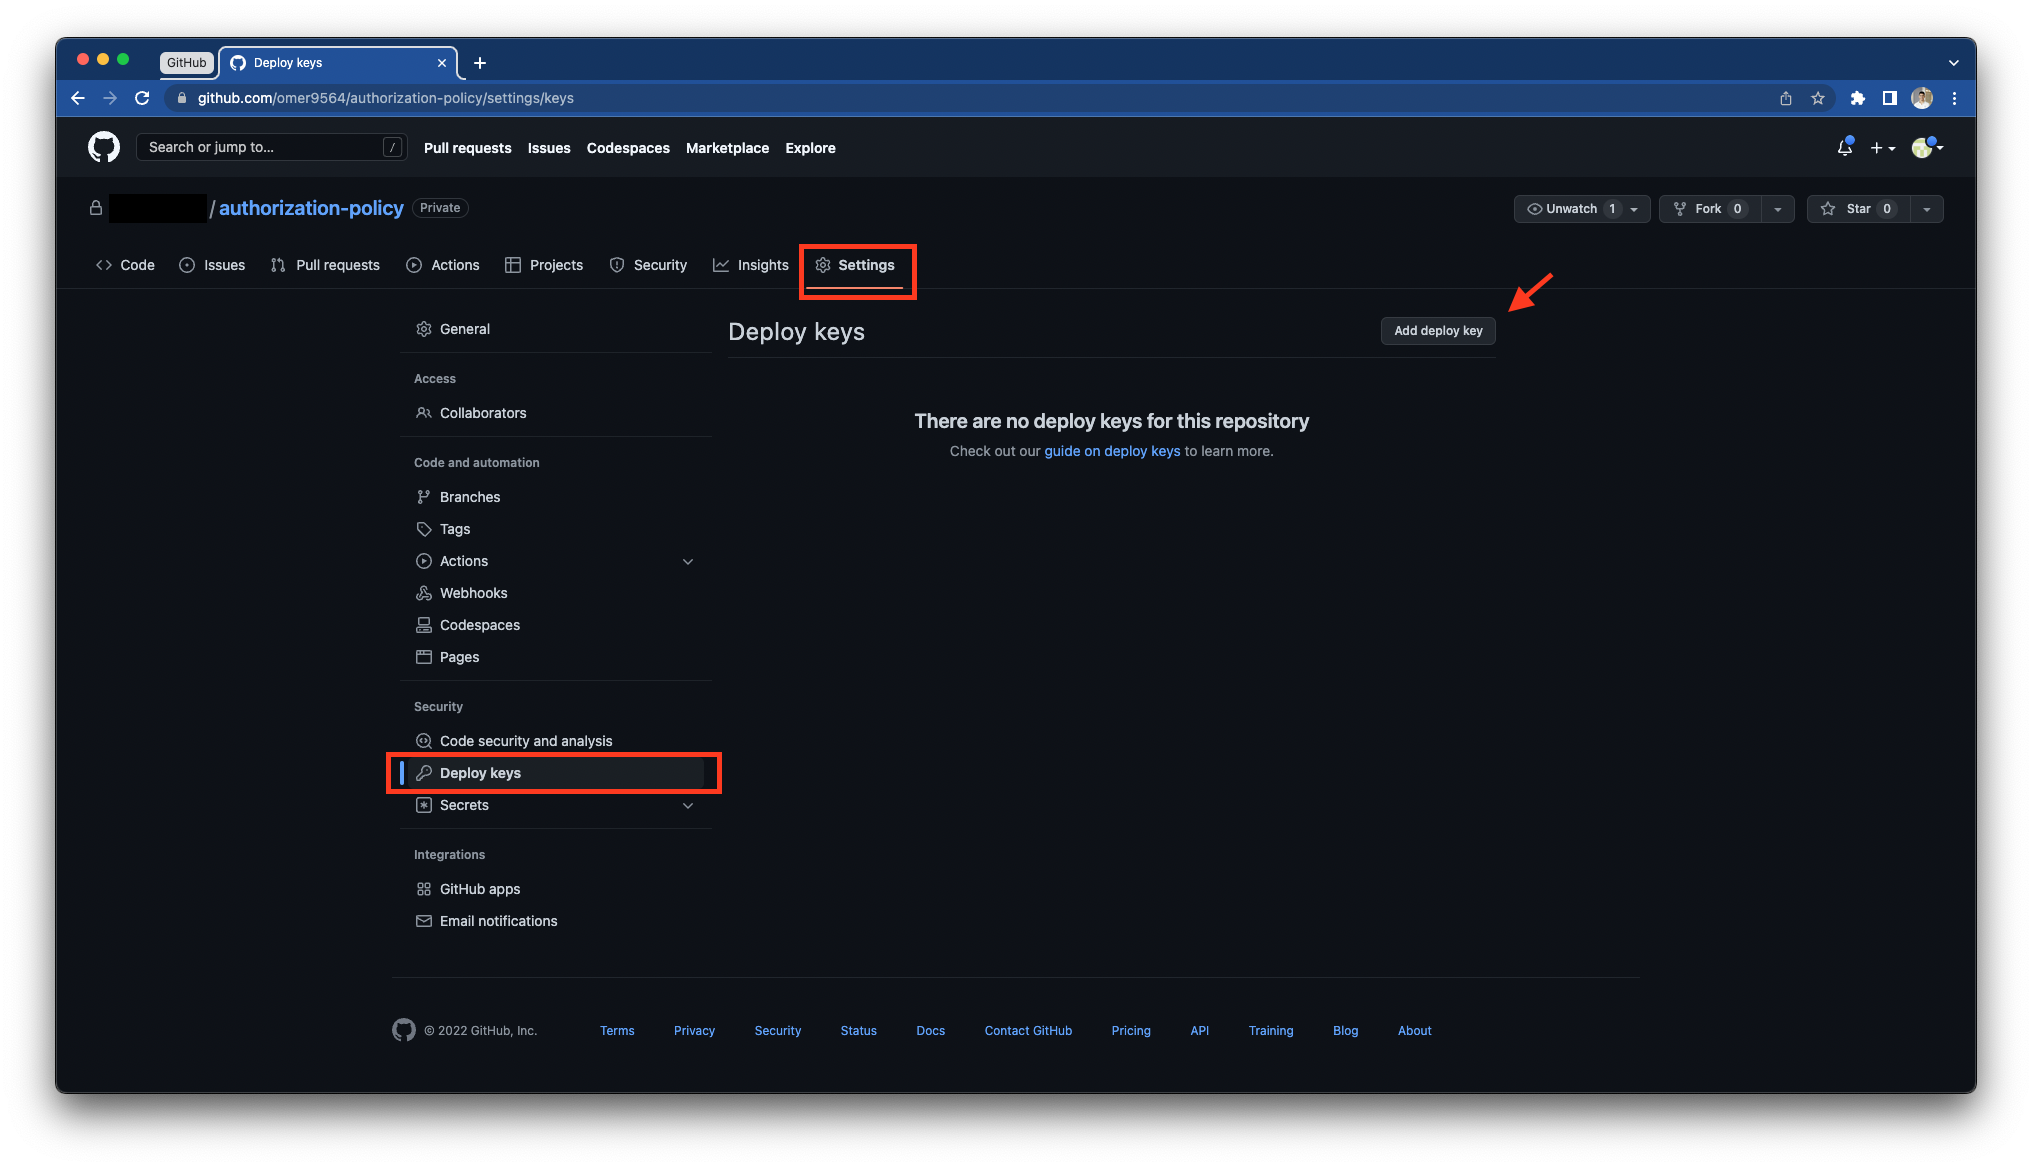
In your GitHub repository, go to Settings > Deploy keys and click Add deploy key.
-
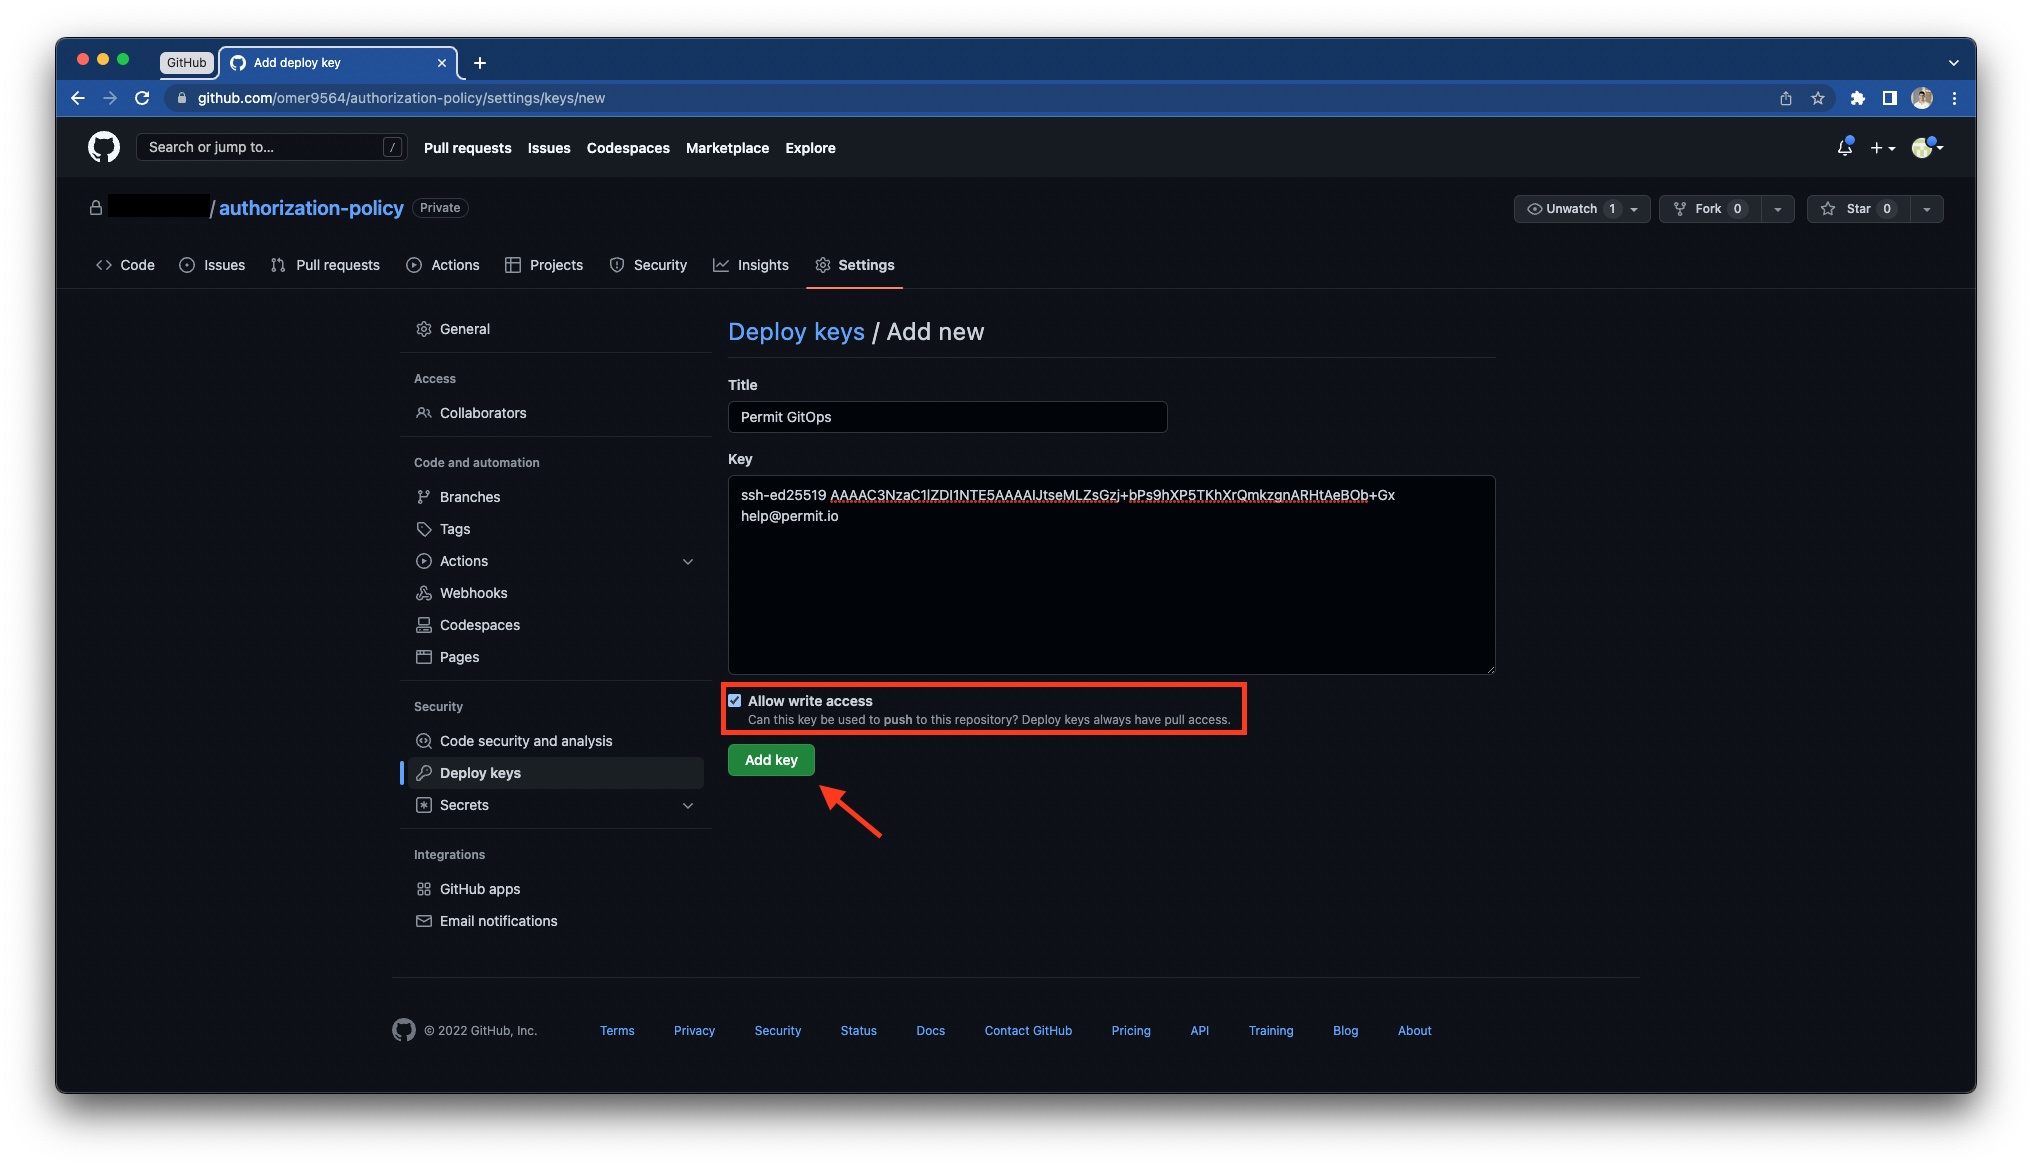
Paste the contents of the public key file (the
.pubfile) from Generate an SSH key. -
Select Allow write access, then click Add key. Without write access, Permit can't push the generated policy branches.
Register the repository in Permit
Register the repository with the Permit API, then activate the repository.
Create the repository configuration file
Create a JSON file with this structure. The next sections fill in each placeholder.
{
  "url": "<your-ssh-url>",
  "main_branch_name": "<your-default-branch>",
  "credentials": {
    "auth_type": "ssh",
    "username": "git",
    "private_key": "<your-private-key>"
  },
  "key": "<your-custom-id-string-without-spaces>"
}
| Field | Value |
|---|---|
url | The SSH URL of the repository, such as git@github.com:acme-corp/policy.git. |
main_branch_name | The default branch of the repository. The API default is main. |
credentials.private_key | The private key from Generate an SSH key, on one line. |
key | A name you choose for the repository configuration. Letters, digits, -, and _ only. You use the key later to activate the repository. |
Add the SSH details from GitHub
-
In GitHub, click Code, select the SSH tab, and copy the SSH URL. Replace
<your-ssh-url>in the JSON file with the URL.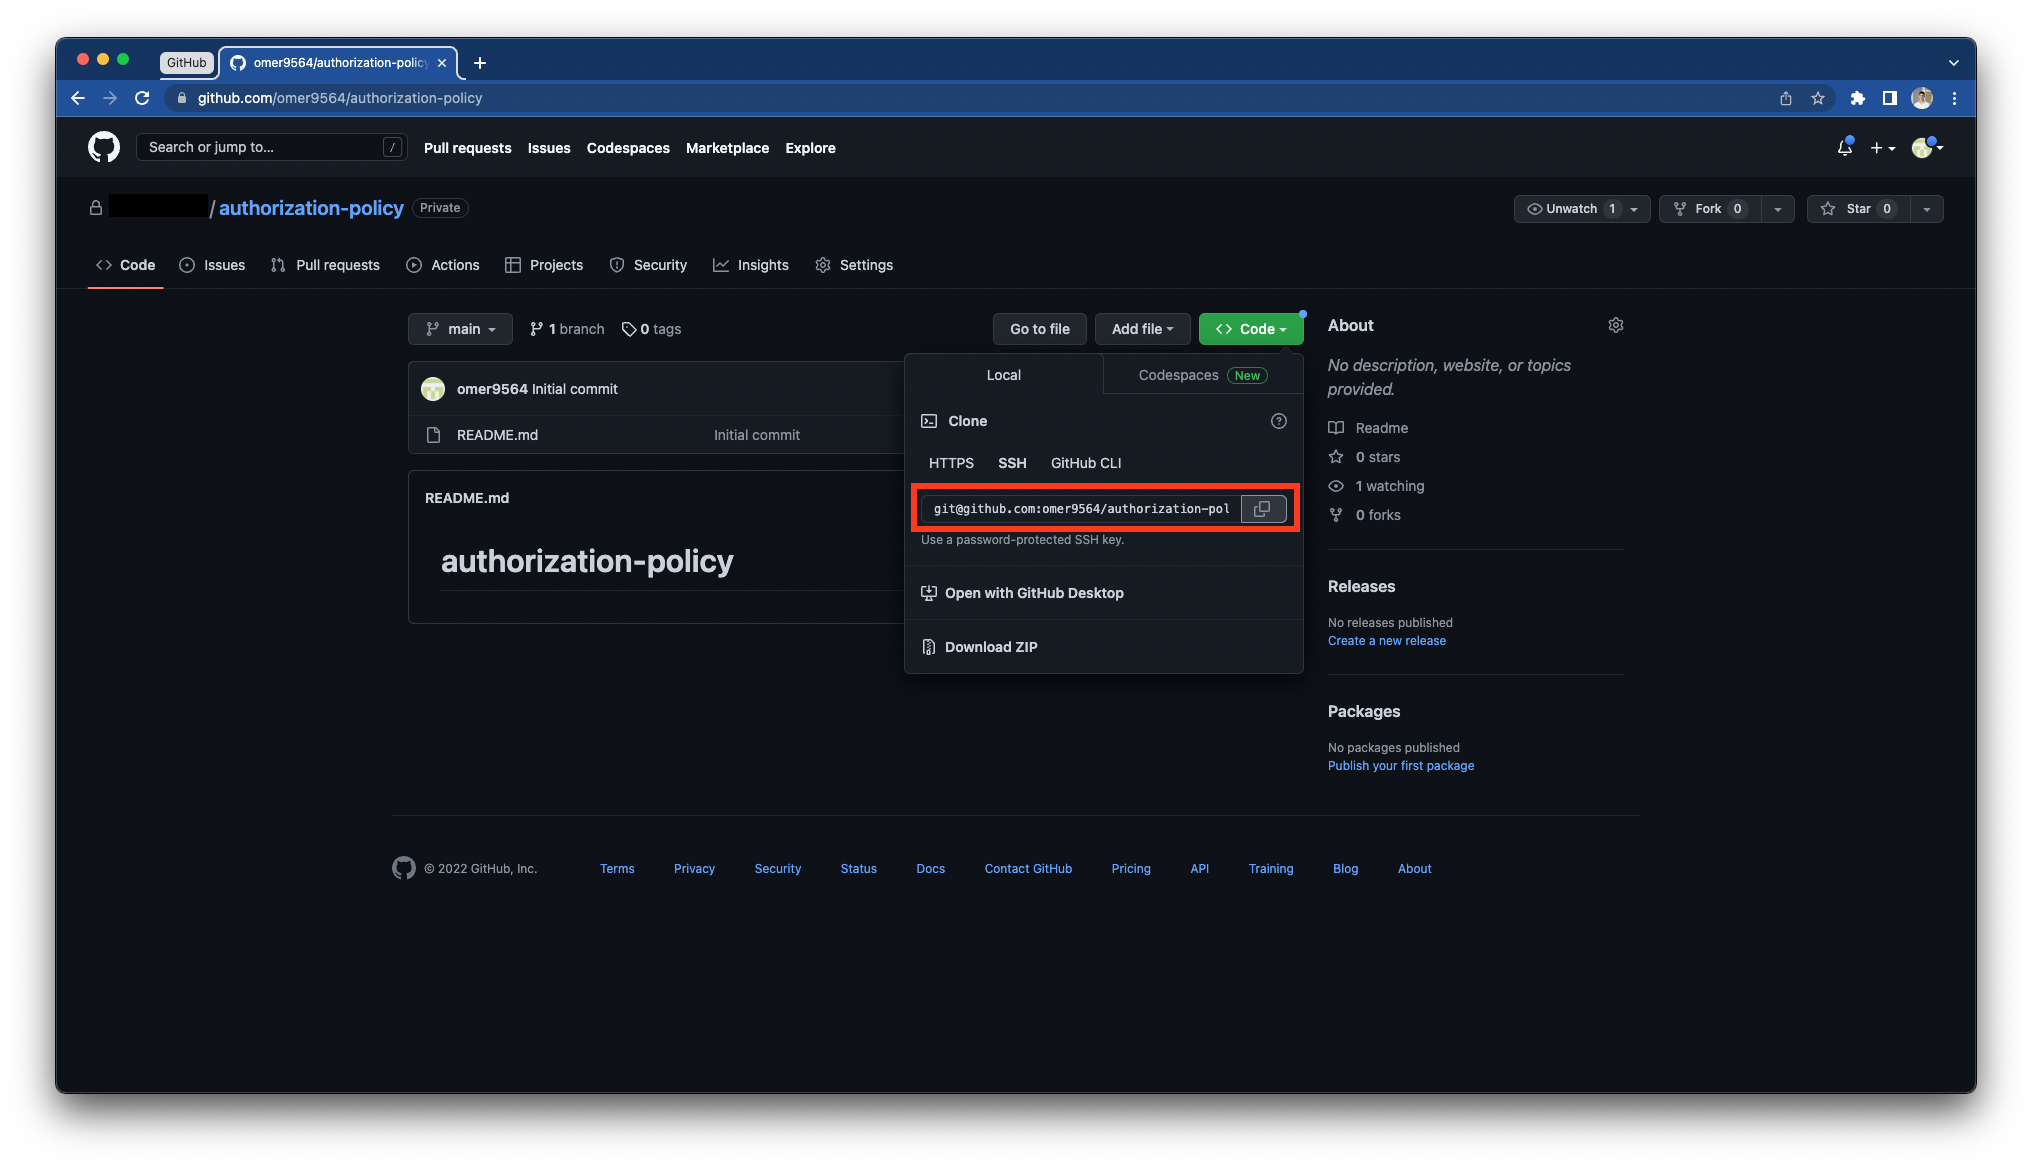
-
Print the private key with each new line replaced by
\n, and replace<your-private-key>with the output. Replace<private-key-file>with the path of the private key file:awk -v ORS='\\n' '1' <private-key-file> -
Replace
<your-default-branch>with the default branch name of your repository, such asmain.
Get your project key from Permit
The repository API calls in this guide use a project or organization API key.
-
Sign in to Permit.
-
Select your project in the project selector in the sidebar.
-
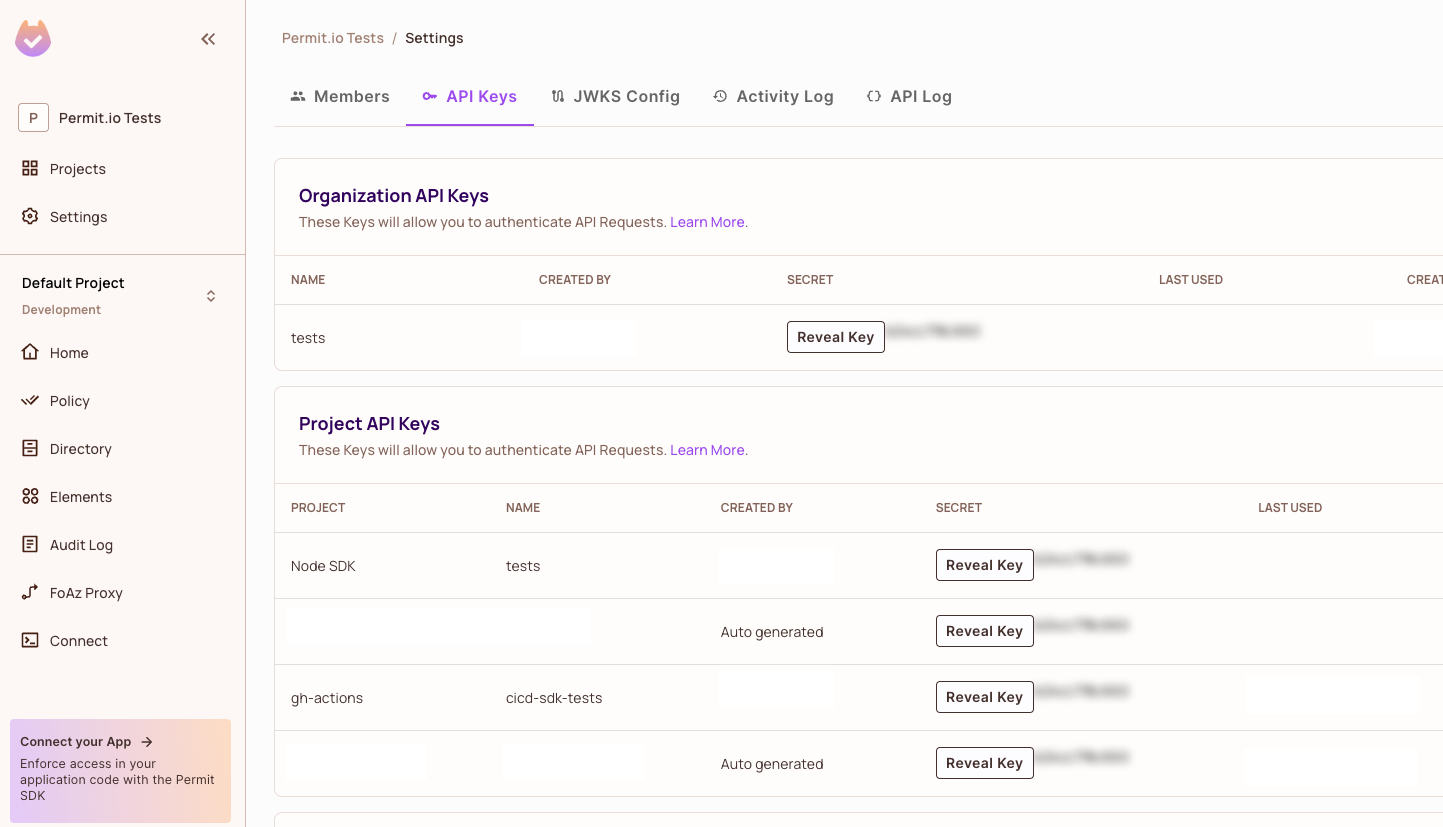
Go to the API Keys page and create a project or organization API key. For the differences between key levels, see API key levels.
-
List your projects. Replace
<your-permit-api-key>with the API key you created:curl -X GET "https://api.permit.io/v2/projects" -H "Content-Type: application/json" -H "Authorization: Bearer <your-permit-api-key>" -
Copy the
keyoridof your project from the response. For more detail, see Get project ID or key.
Register and activate the repository
-
Send the JSON file to Permit. Replace
<your-project-id-or-key>with your project key,<your-permit-api-key>with the project or organization API key you created, andpath/to/your/jsonwith the path of the JSON file:curl -X POST "https://api.permit.io/v2/projects/<your-project-id-or-key>/repos" -H "Content-Type: application/json" -H "Authorization: Bearer <your-permit-api-key>" --data-binary @"path/to/your/json" -
In your GitHub repository, check the branch list. Permit creates one branch per environment of the project, named
permit/generated/<env_id>, where<env_id>is the ID of the environment.To use a different branch name for an environment, set the environment's custom branch name. See Customize the GitOps branch name.
-
Activate the repository. Replace
<your-project-id-or-key>with your project key,<your-repo-id-or-key>with thekeyfrom your JSON file, and<your-permit-api-key>with the same API key:curl -X PUT "https://api.permit.io/v2/projects/<your-project-id-or-key>/repos/<your-repo-id-or-key>/activate" -H "Authorization: Bearer <your-permit-api-key>"
Verify the repository connection
Send a GET request to https://api.permit.io/v2/projects/<your-project-id-or-key>/repos/active with the same API key. The response is the active repository of the project and includes the repository's key, url, and status. The status is one of pending, valid, or invalid.
If the request returns no active repository, or status is invalid, check that the deploy key has write access, that the private key in the JSON file matches the public deploy key, and that the default branch has at least one commit.
Test the connection with a custom policy
-
Check out an environment branch,
permit/generated/<env_id>. -
Add your Rego code in the
customfolder only. Either editcustom/root.rego, or create a file in thecustomfolder and reference its package fromcustom/root.rego. For a worked example, see Write custom policies with GitOps.Keep your code in the custom folderPermit generates the files outside the
customfolder. If you edit a generated file, Permit can overwrite your change when it regenerates the policy, or your change can break the generated Rego. The one edit outsidecustomthat Permit's generated comments describe is combining theallowrules in the top-levelroot.rego, covered in Enforce the deny rule. -
Commit your change and push the environment branch to GitHub. Push to the environment branch, not the main branch. Permit detects the push and sends the updated policy to the PDPs of that environment.
-
Run a permission check that your custom rule affects, such as a
permit.check()call, against an Edge PDP of that environment. The result reflects your custom rule.