Operation Approval
Embed the Operation Approval element so users must get a reviewer's approval before they perform a sensitive action in your application. This page is for developers who add Permit Elements, the embeddable UI components, to an application. Reviewers approve or deny the requests in the Approval Management element.
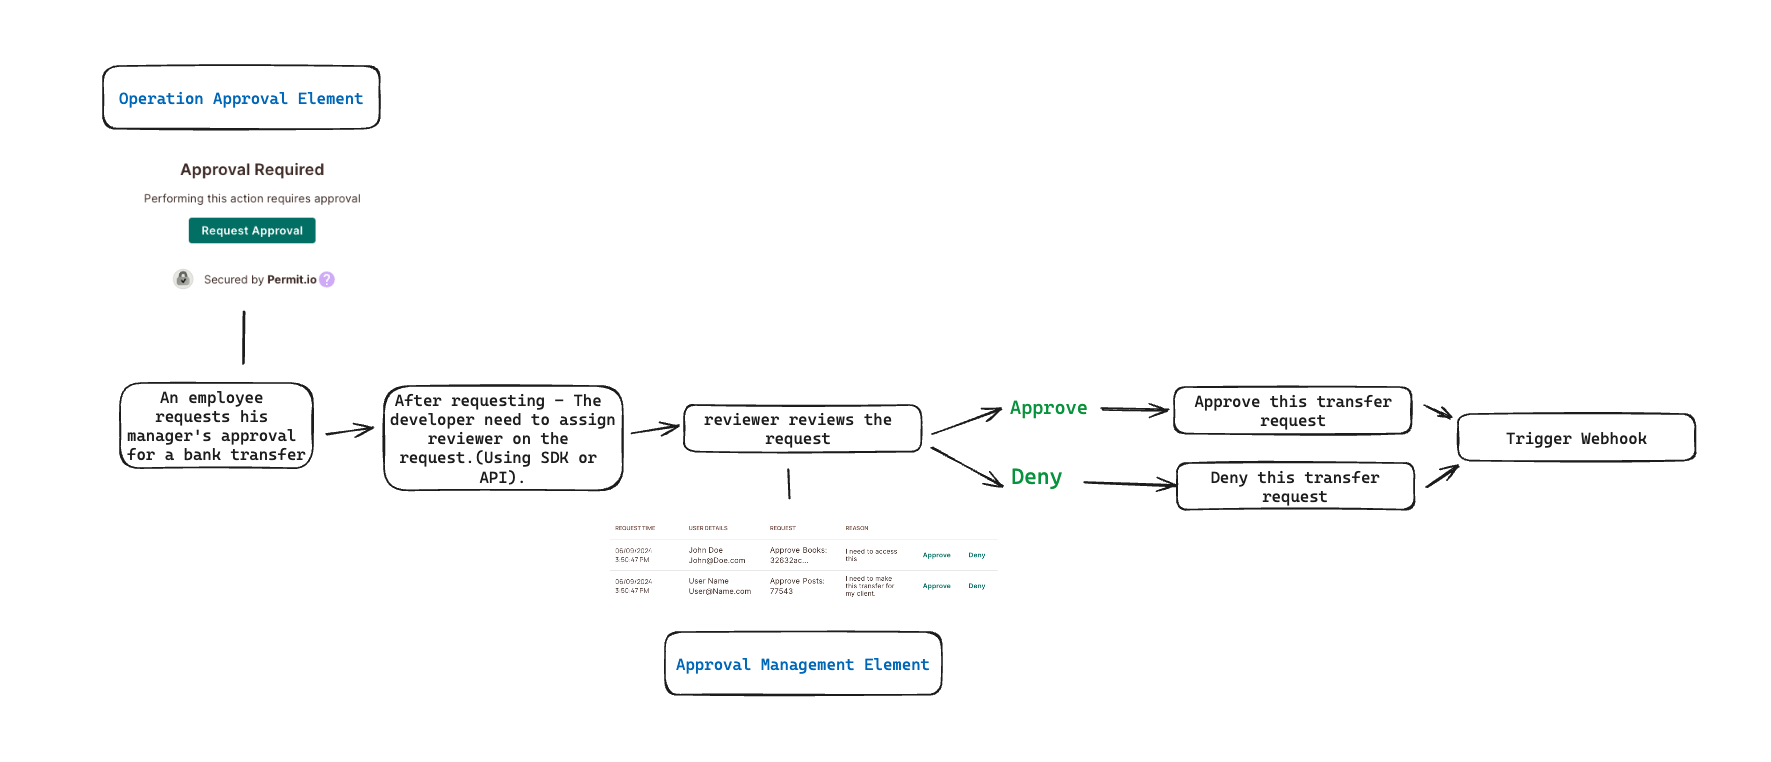
How operation approvals work
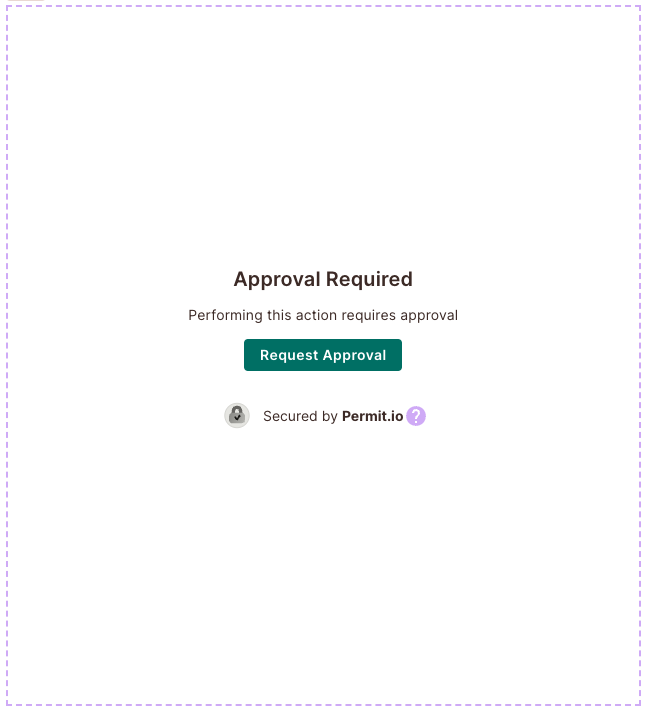
- A user who wants to perform the action enters a reason in the Operation Approval element and clicks Request Approval.
- Your application assigns a reviewer to the request's resource instance, with the Permit SDK or API.
- The reviewer sees the request in the Approval Management element, and approves or denies it.
- If the reviewer approves, Permit assigns the requesting user the
_Approved_role on the resource instance, which grants theoperatepermission. If the reviewer denies, the user doesn't get the role. - When the element has a webhook configured, Permit sends the result to your webhook endpoint. See Operation Approval webhook.
For example, a bank lets users transfer funds, and requires a manager's approval for transfers above a set amount. A user requests approval for a large transfer through the Operation Approval element. A manager reviews the request in the Approval Management element and approves or denies the transfer.
Prerequisites
- A resource in your policy for the operations that need approval, such as
transfer. See Configure your first RBAC policy. - JWKS or a backend login route set up for element login. See Embed Permit Elements.
- An environment API key for the backend that assigns reviewers. See Get your API key.
- A webhook endpoint, if your backend acts on the approval result. Turn on Webhook Notification in the element form and enter the endpoint URL and secret. See Configure your webhook and the Operation Approval payload. Without a webhook, the result stays in Permit, and your application reads it with the Operation Approval API.
Create the element
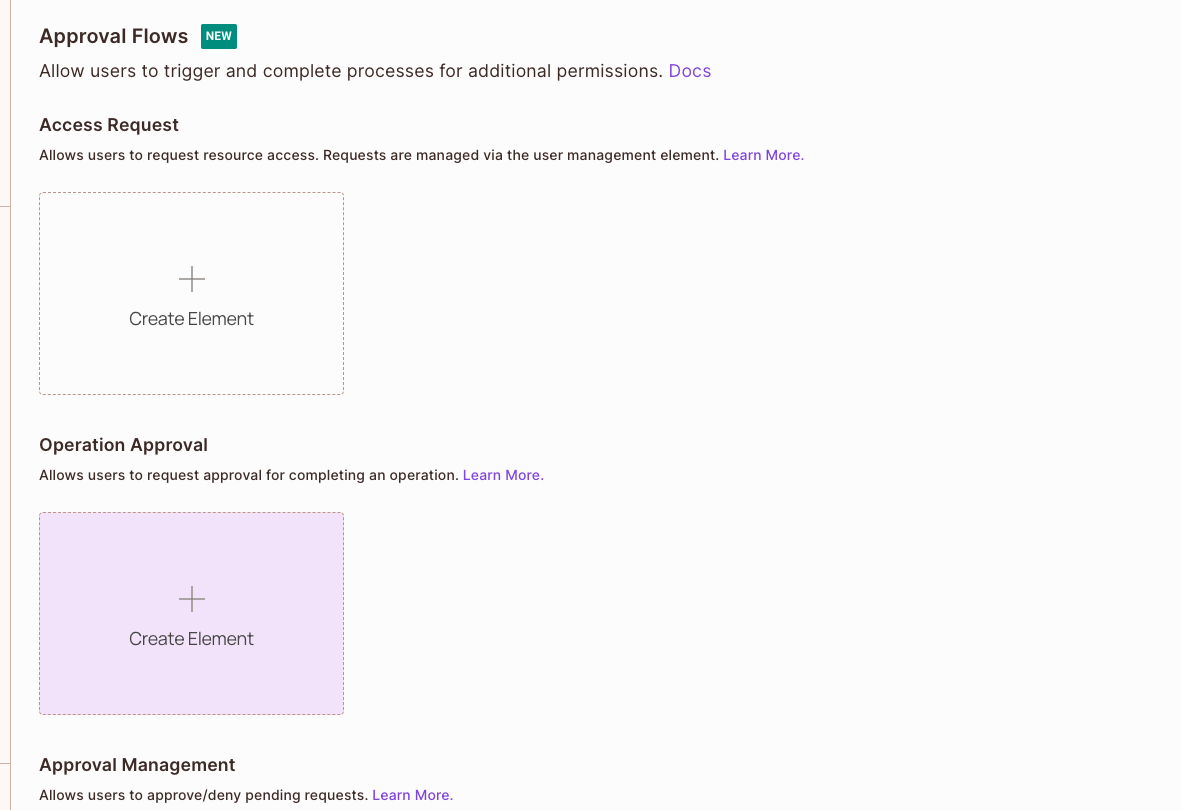
1. Start a new Operation Approval element
In the Elements screen, under Operation Approval, click Create Element.
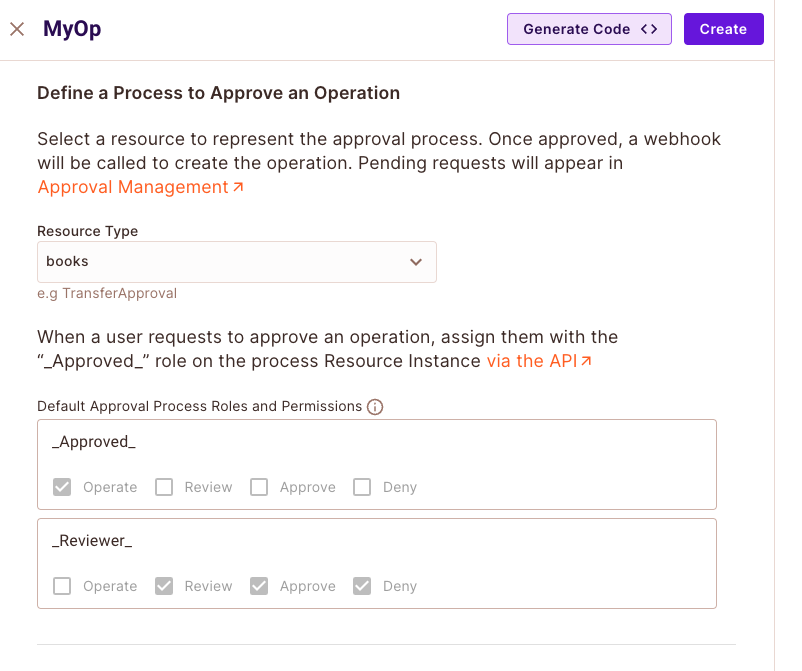
2. Select the resource
Select the resource that the element's approvals apply to.
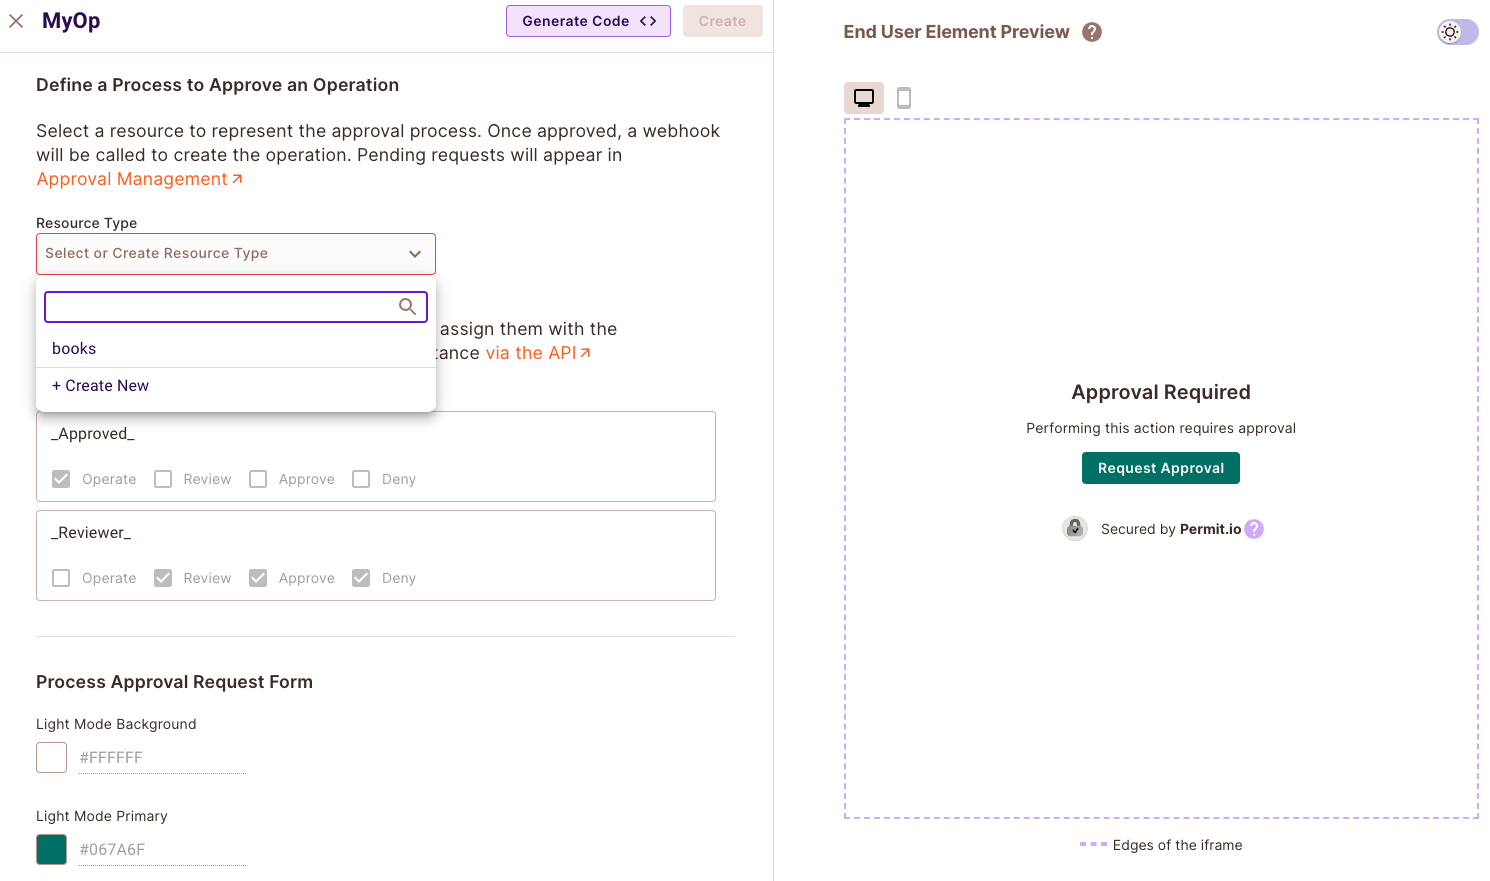
When you create the element, Permit adds four actions to the selected resource (operate, review, approve, and deny) and two roles that use them: _Reviewer_, which holds review, approve, and deny, and _Approved_, which holds operate.
3. Name the element
Enter a name for the element, and click Create.
Customize the element
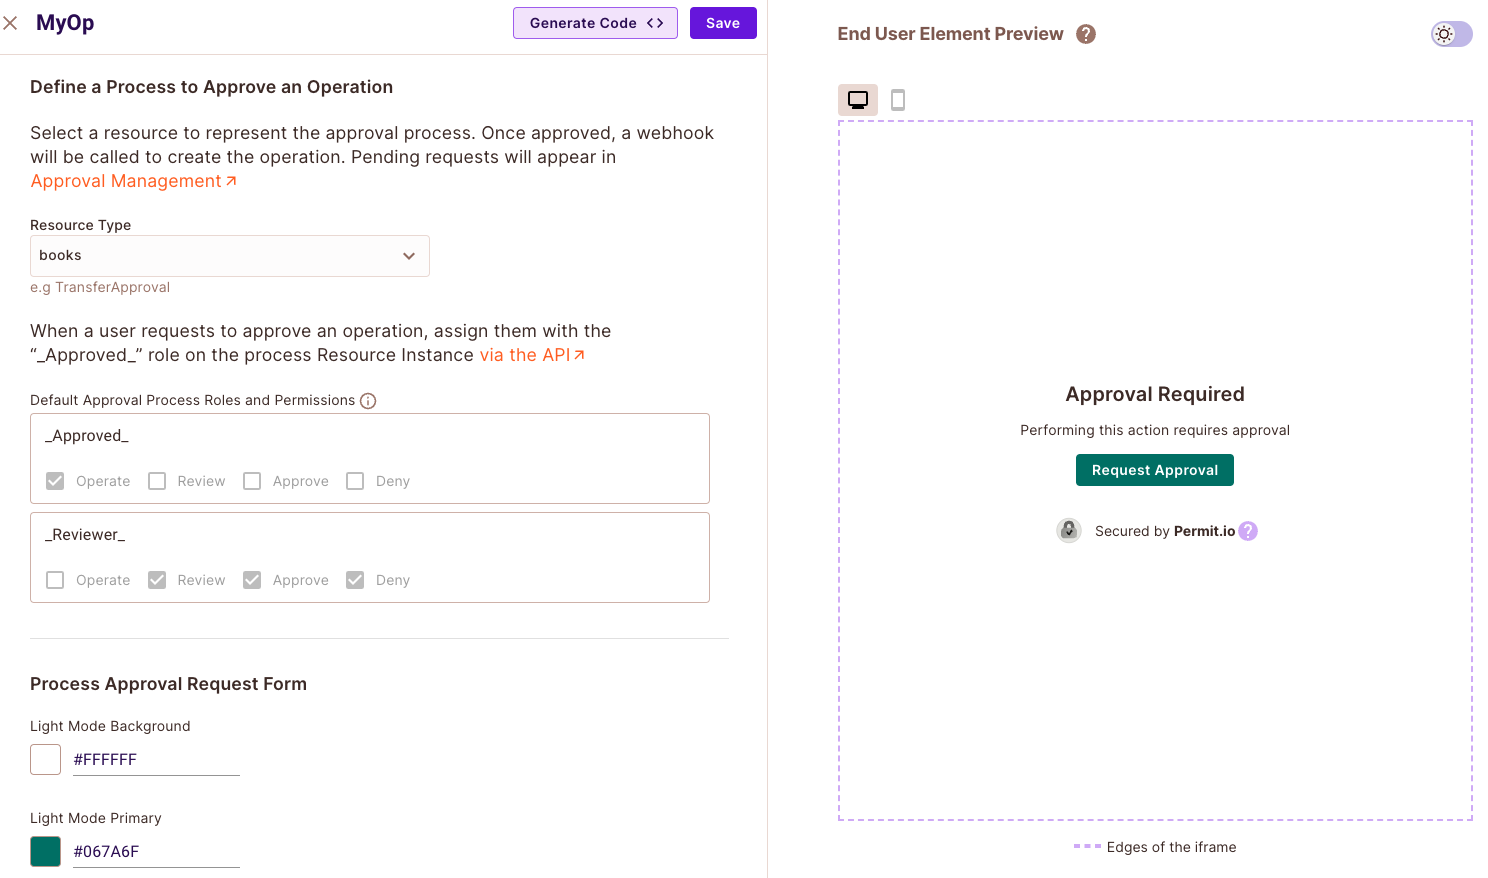
In the element form, you can change:
- The background color and the button color
- The title, the message, and the button text
Add the iframe to your application
-
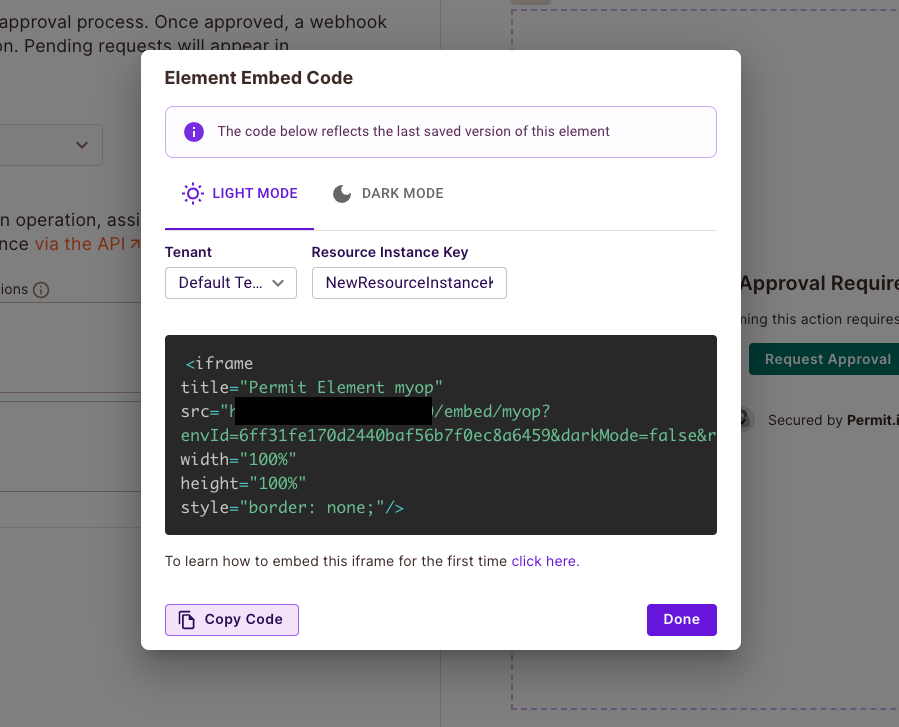
Open the Operation Approval element, and click Generate Code at the top of the screen.
-
Copy the iframe snippet, and paste it into the page where users request approval.
-
Replace the placeholders in
srcwith your values.
Placeholders in the iframe src
| Placeholder | Value |
|---|---|
<ELEMENT_NAME> | The name of the element you created. |
<SOME_UNIQUE_ID> | The ID of your environment. |
<TENANT_KEY> | The key of the tenant the element applies to. |
<RESOURCE_INSTANCE_KEY> | The key of the resource instance for this request. Use an existing instance key, or a new key. |
Set <TENANT_KEY> to the same tenant key that permit.elements.login() logs the user in to. When the two differ, the signed-in user has no role in the tenant the iframe asks for, the login fails with USER_NOT_FOUND, and the element doesn't load. See Login errors.
<iframe
	title="Permit Element Name"
	src="https://embed.permit.io/<ELEMENT_NAME>?envId=<SOME_UNIQUE_ID>&darkMode=false&resourceInstanceKey=<RESOURCE_INSTANCE_KEY>&tenantKey=<TENANT_KEY>"
	width="100%"
	height="100%"
	style="border: none;"
></iframe>
Assign a reviewer to each request
Each request needs its own resource instance key and its own reviewer.
- Generate a resource instance key for the request, for example
transfer-1, and set it asresourceInstanceKeyin the iframesrcfrom Add the iframe to your application. - The user enters a reason and clicks Request Approval.
- Assign the reviewer the
_Reviewer_role on that resource instance.
For a transfer resource and the instance key transfer-1, the reviewer's role assignment is transfer:transfer-1#_Reviewer_. Run the assignment from your backend with your environment API key. Replace <YOUR_API_KEY> with that key, <REVIEWER_USER_KEY> with the reviewer's user key in Permit, and <TENANT_KEY> with the tenant key of the request:
- Node.js
- Python
const { Permit } = require("permitio");

const permit = new Permit({ token: "<YOUR_API_KEY>" });

async function assignReviewer() {
  await permit.api.roleAssignments.assign({
    user: "<REVIEWER_USER_KEY>",
    role: "_Reviewer_",
    resource_instance: "transfer:transfer-1",
    tenant: "<TENANT_KEY>",
  });
}

assignReviewer();
import asyncio

from permit import Permit

permit = Permit(token="<YOUR_API_KEY>")


async def assign_reviewer():
    await permit.api.role_assignments.assign(
        {
            "user": "<REVIEWER_USER_KEY>",
            "role": "_Reviewer_",
            "resource_instance": "transfer:transfer-1",
            "tenant": "<TENANT_KEY>",
        }
    )


asyncio.run(assign_reviewer())
The call returns once Permit stores the role assignment. If the user, the role, or the resource instance doesn't exist, the SDK raises PermitApiError with the status code from the Permit API.
You can also assign the role in the Permit dashboard, in the user's ReBAC Permissions:
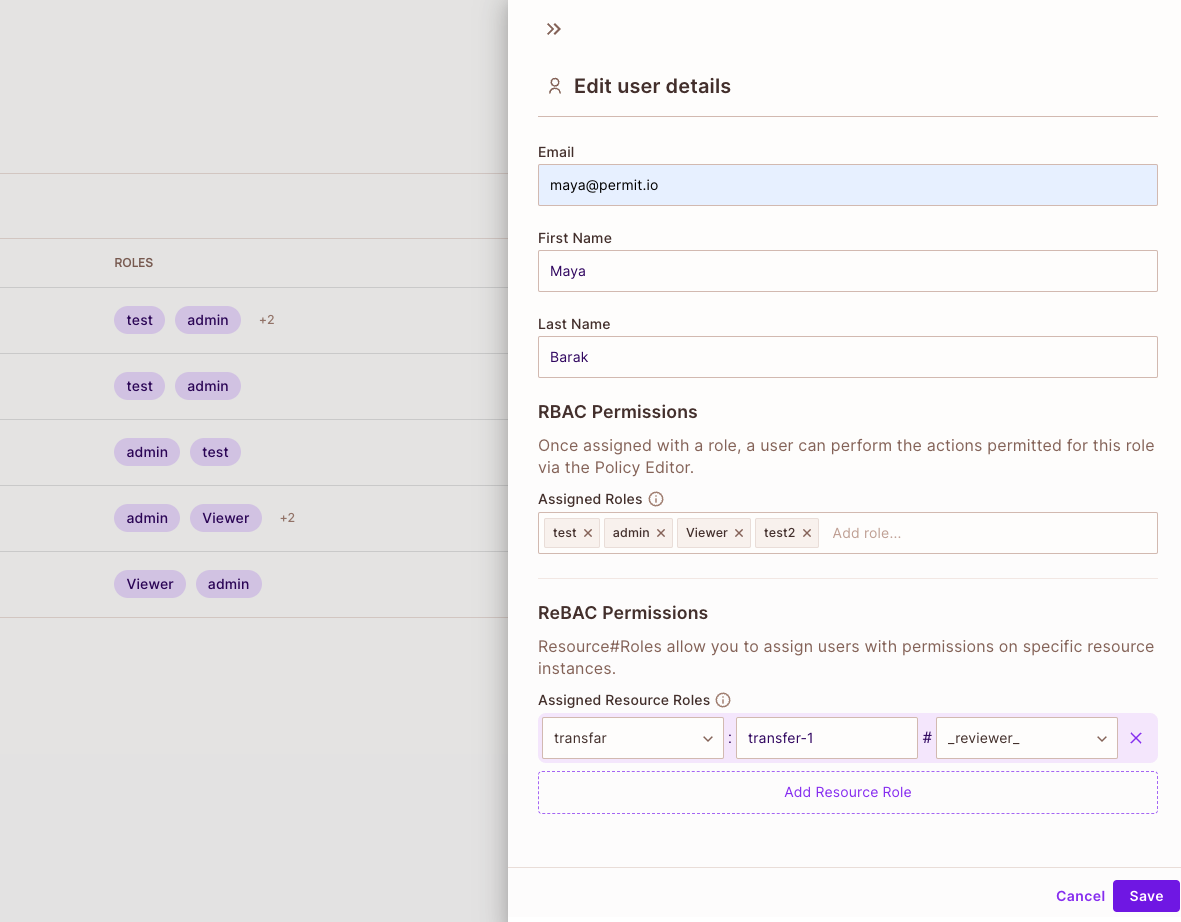
The reviewer sees the request in the Approval Management element and can click Approve or Deny.
Log users in to the element
Before the iframe loads, log the user in to Permit Elements with permit.elements.login(). For the steps, see Embed Permit Elements. For all login methods, see Log users in to Permit Elements.
Verify the approval flow
- Sign in to your application as a user, and request approval in the Operation Approval element.
- Assign a reviewer to the request's resource instance, as in Assign a reviewer to each request.
- Sign in as the reviewer. The request appears in the Approval Management element. Click Approve.
- In the Permit dashboard, open Directory and select the requesting user. The user has the
_Approved_role on the resource instance, for exampletransfer:transfer-1#_Approved_. - If you configured a webhook for the element, your endpoint received a
POSTrequest whosestatusisapprovedand whoseoperation_approval_details.resource_instanceis the ID that Permit assigned the request's resource instance, not the instance key you put in the iframe.
Next steps
- Approval Management element: embed the element where reviewers approve requests.
- Operation Approval API: create and review operation approvals from your own interface.
- Configure webhooks: handle approval results in your backend.