Approval Management
Embed the Approval Management element so reviewers can approve or deny operation approval requests inside your application. This page is for developers who add Permit Elements, the embeddable UI components, to an application that already uses the Operation Approval element.
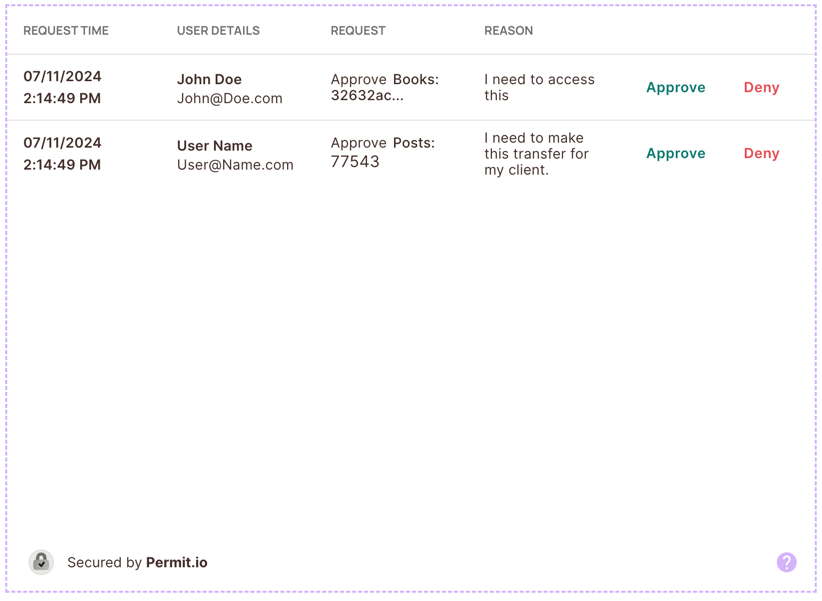
How approval management works
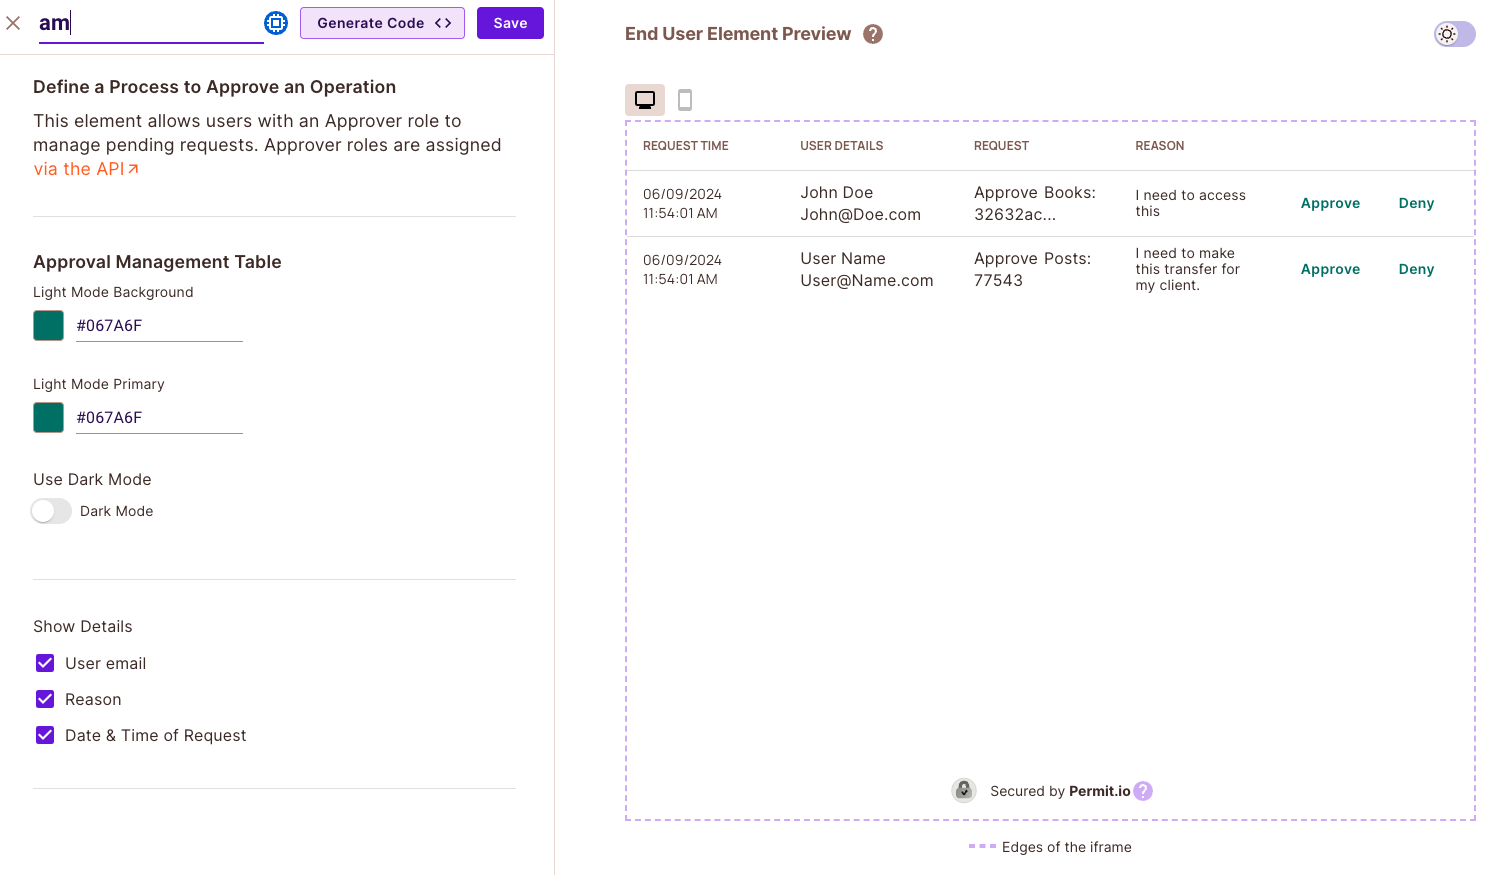
The Approval Management element lists the requests that users submit through an Operation Approval element.
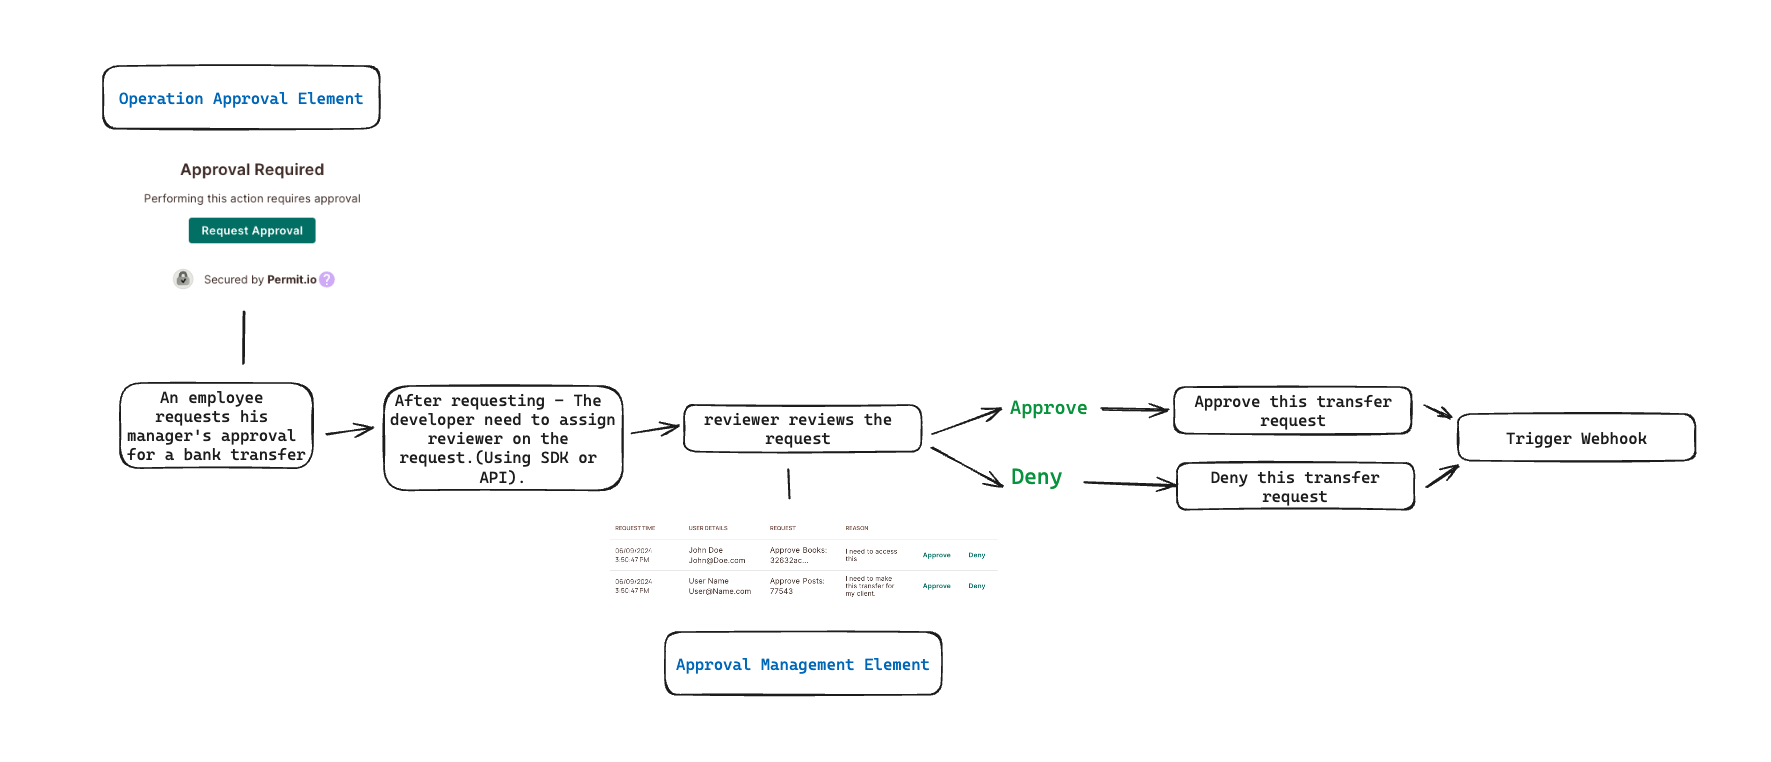
- When you create an Operation Approval element, Permit creates two roles on its resource:
_Reviewer_and_Approved_. - Users who hold the
_Reviewer_role on a request's resource instance see that request in the Approval Management element. - A reviewer approves or denies the request.
- When a reviewer approves a request, Permit assigns the requesting user the
_Approved_role on the request's resource instance.
For example, an employee in the marketing department wants to transfer money to an advertising supplier. The employee can't make the transfer without approval, so the employee requests it through the Operation Approval element. The marketing manager approves the transfer in the Approval Management element.
Prerequisites
- An Operation Approval element, with reviewers assigned to its requests.
- JWKS or a backend login route set up for element login. See Embed Permit Elements.
Create the element
1. Start a new Approval Management element
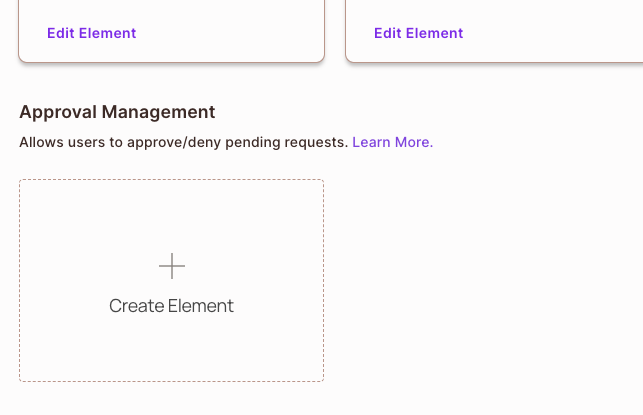
In the Elements screen, under Approval Management, click Create Element.
2. Name the element
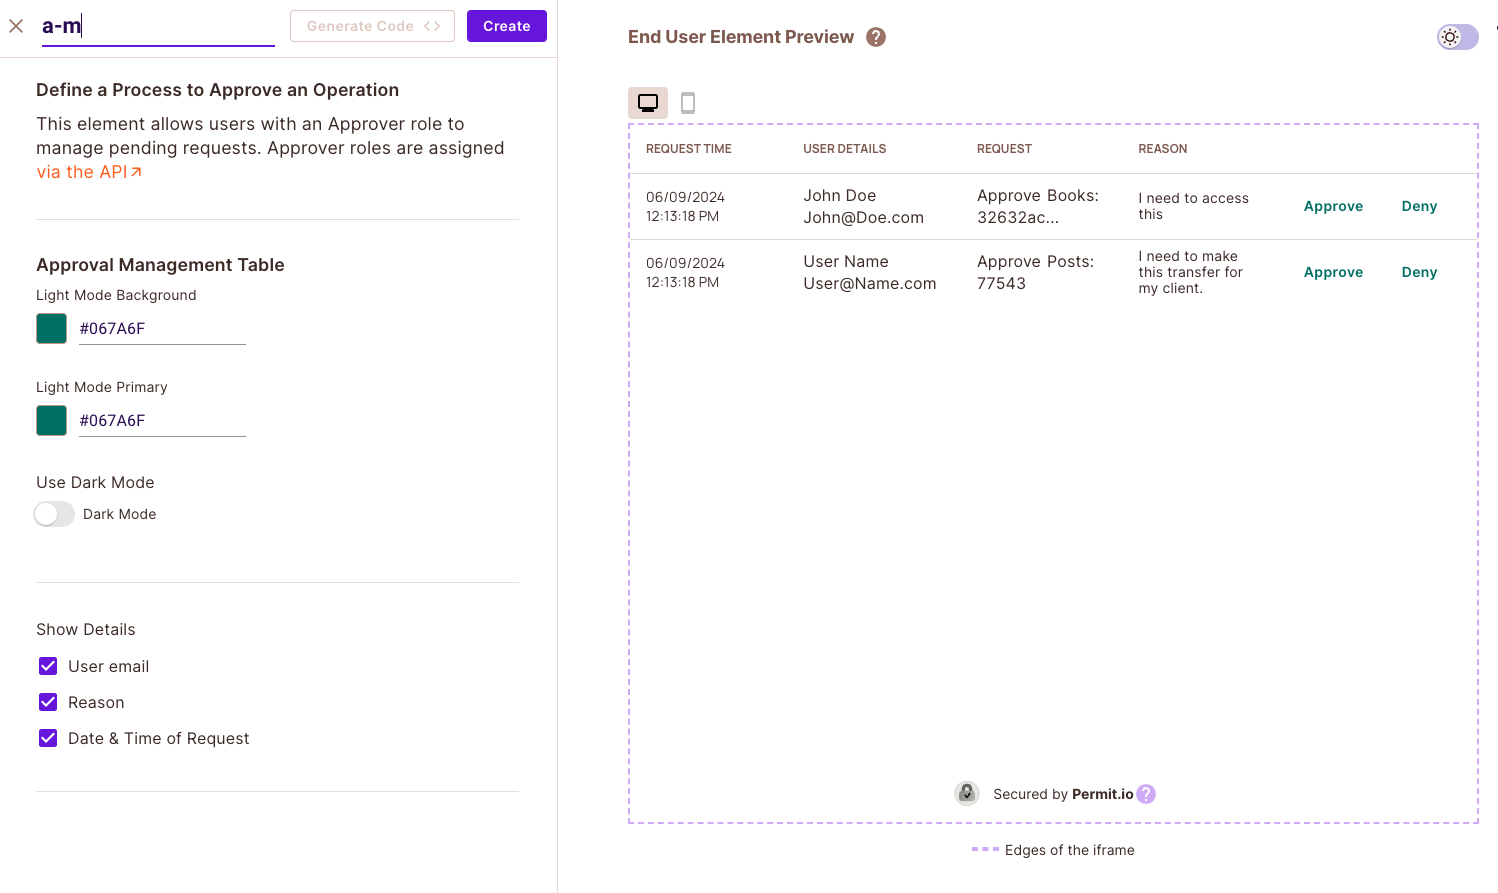
Enter a name for the element, and click Create.
Customize the element
In the element form, you can:
- Change the background color and the button colors
- Show or hide the requesting user's email, the request reason, and the request date and time
Add the iframe to your application
-
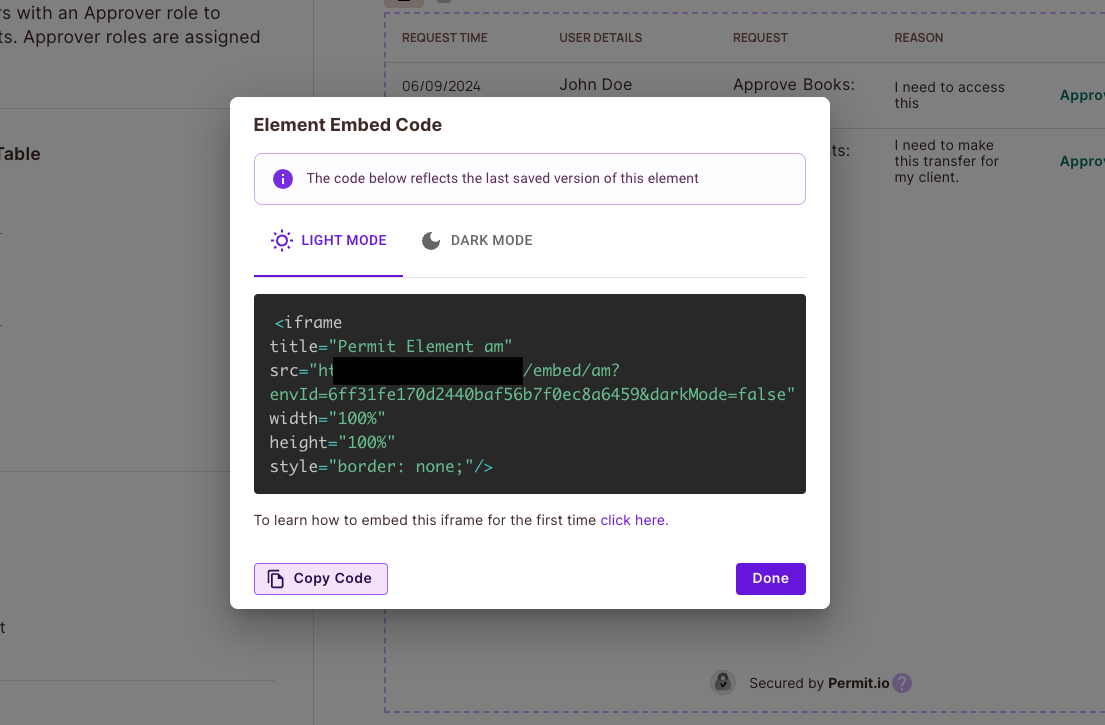
Open the Approval Management element, and click Generate Code at the top of the screen.
-
Copy the iframe snippet, and paste it into the page where reviewers work.
-
Replace the placeholders in
srcwith your values.
Placeholders in the iframe src
| Placeholder | Value |
|---|---|
<ELEMENT_NAME> | The name of the element you created. |
<SOME_UNIQUE_ID> | The ID of your environment. |
<iframe
	title="Permit Element Name"
	src="https://embed.permit.io/<ELEMENT_NAME>?envId=<SOME_UNIQUE_ID>&darkMode=false"
	width="100%"
	height="100%"
	style="border: none;"
/>
This example has no tenantKey parameter. If the snippet that Generate Code produces includes tenantKey, set it to the key of the tenant the element applies to.
Log users in to the element
Before the iframe loads, log the reviewer in to Permit Elements with permit.elements.login(). For the steps, see Embed Permit Elements. For all login methods, see Log users in to Permit Elements.
Verify the element
- Submit a request through the Operation Approval element, and assign a reviewer to the request's resource instance.
- Sign in to your application as the reviewer, and open the page with the Approval Management element. The request appears in the list.
- Click Approve. In the Permit dashboard, open Directory. The requesting user has the
_Approved_role on the resource instance.
Next steps
- Operation Approval API: review operation approvals from your own interface.
- Configure webhooks: get notified when a request is approved or denied.