Permission Levels
Permission levels decide what a user sees and can do in a Permit element, based on the user's role. This reference is for admins who configure elements in the Permit dashboard. It lists the five levels and explains how to assign your roles to them.
How permission levels work
Every element in Permit Elements, the embeddable UI components, has permission levels in its configuration form. You drag each of your roles into one level. A user's role decides the user's level in that element.
When you create an element, every level is empty, and all your roles start in Hidden Roles. Users whose roles stay in Hidden Roles don't see the element. If a user opens the element with such a role, the login fails with INVALID_PERMISSION_LEVEL. See Login errors.
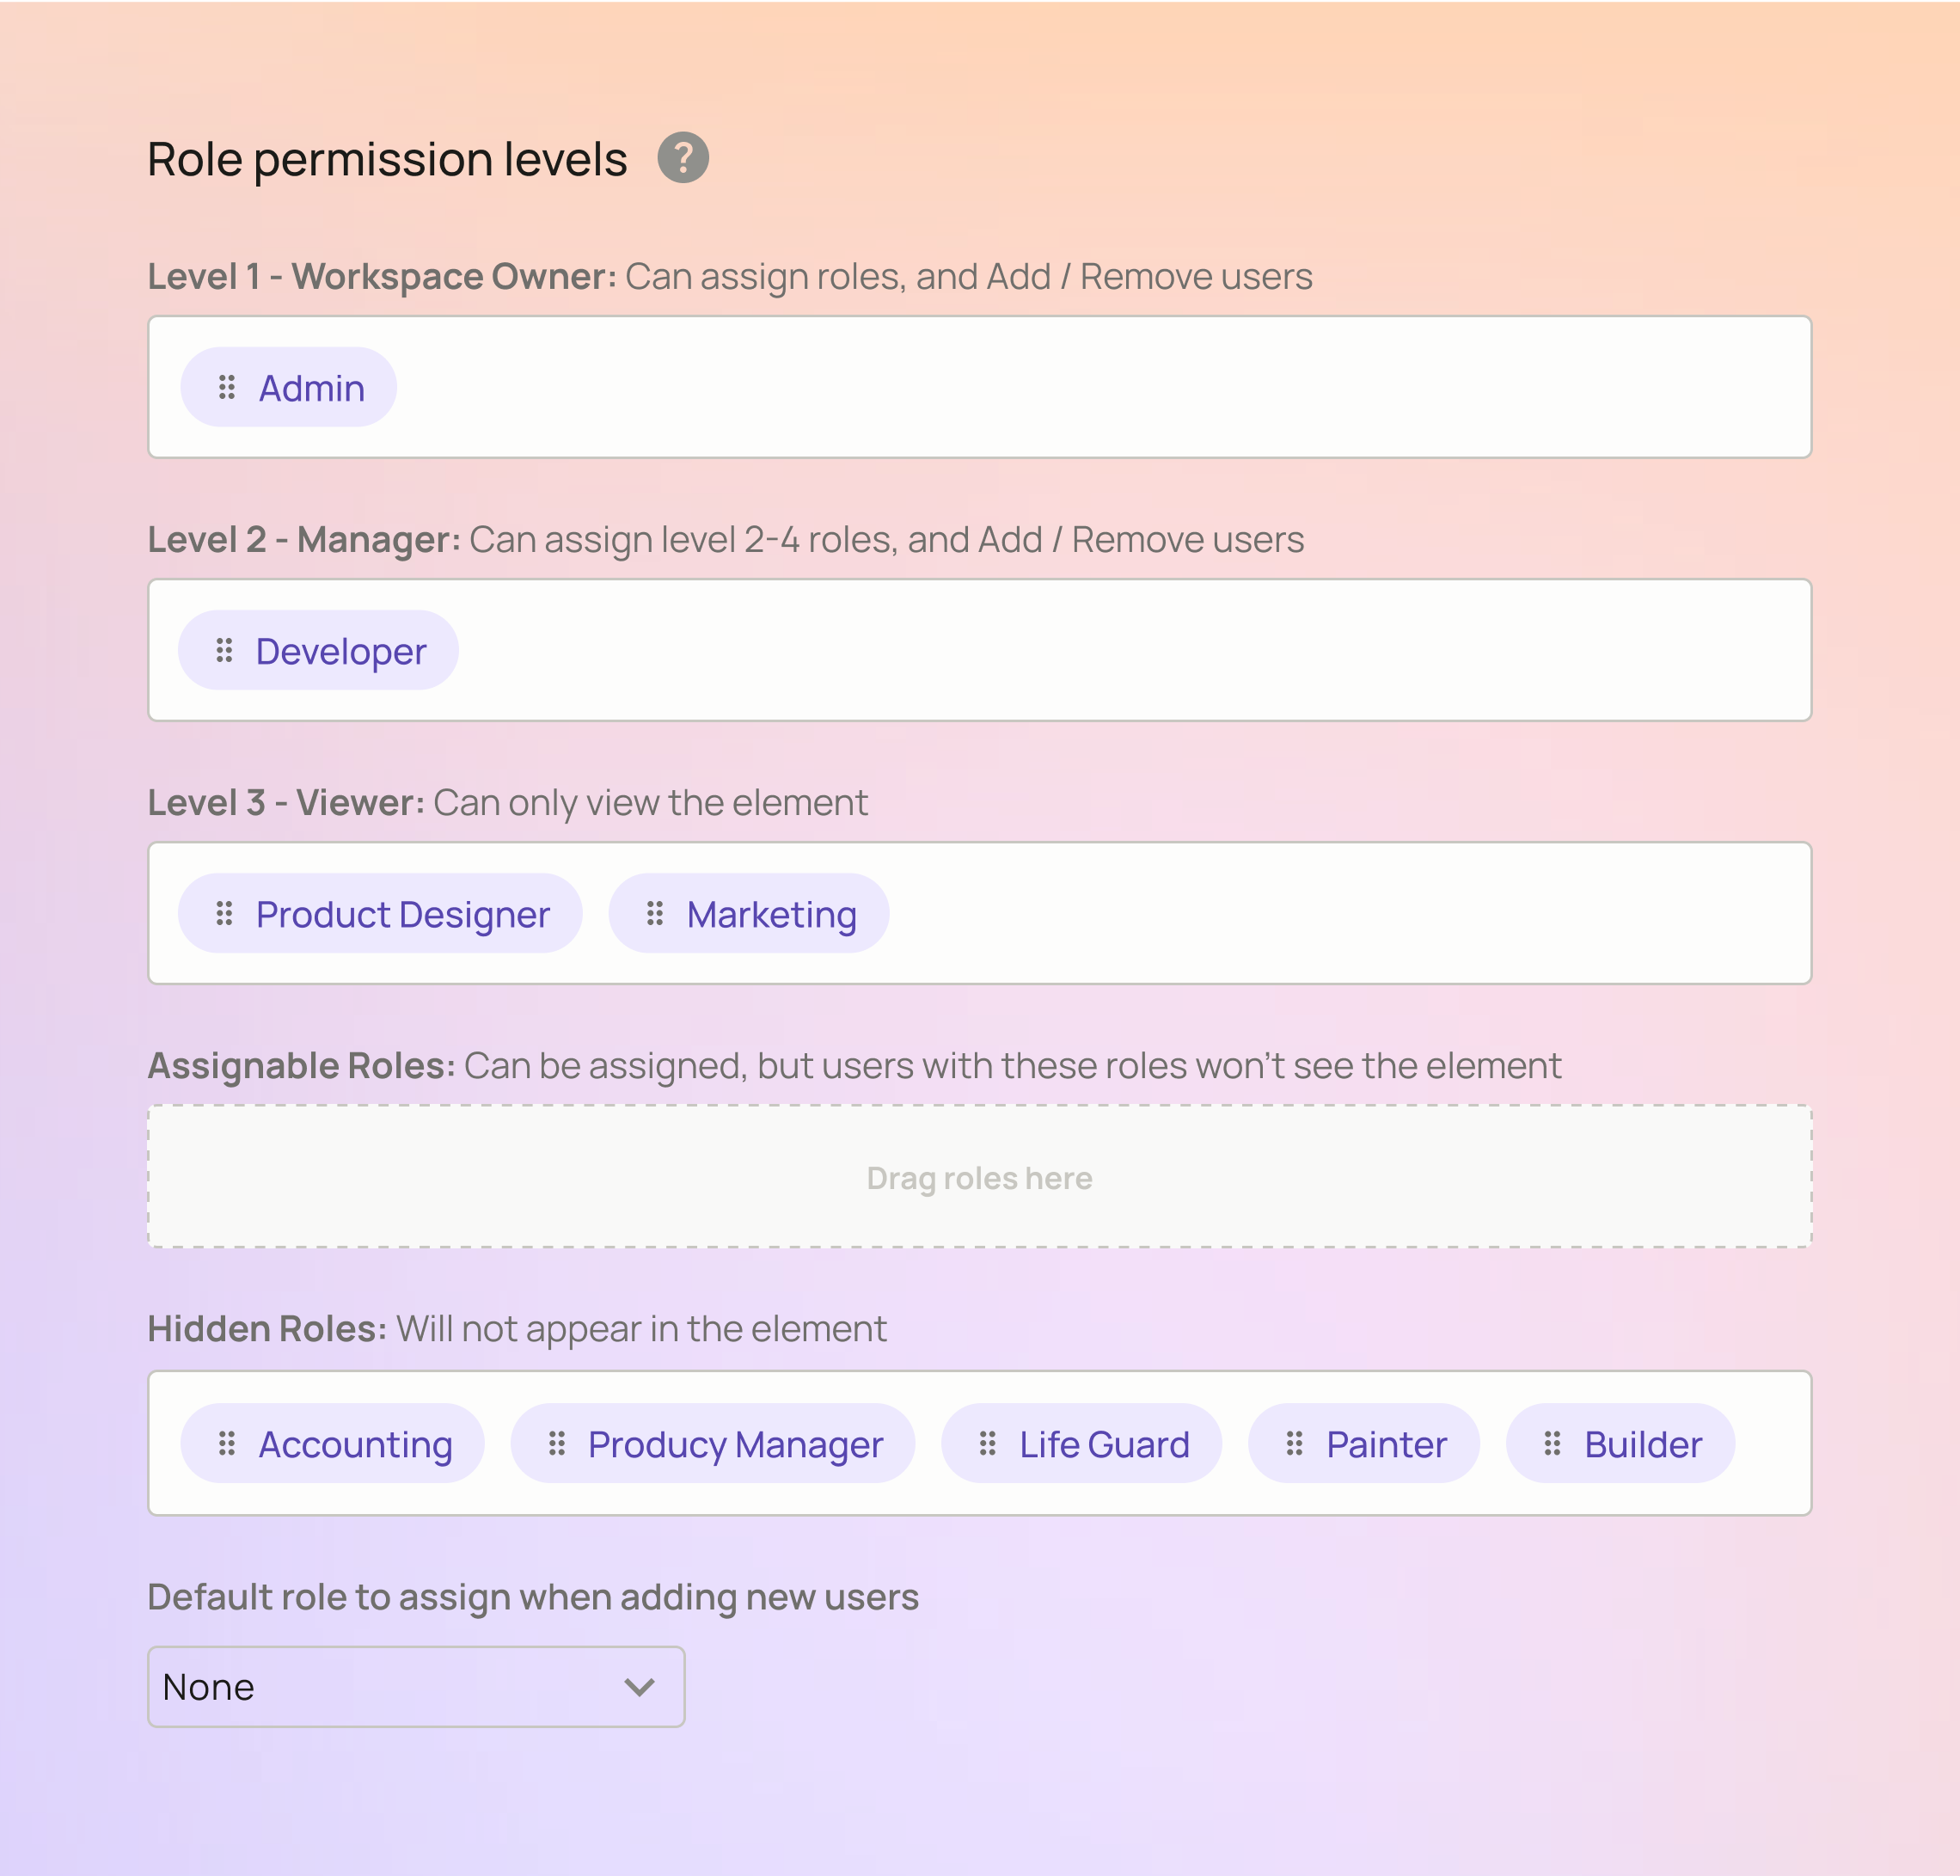
The five permission levels
| Level | What users with a role in this level can do |
|---|---|
| Level 1: Workspace Owner | Assign any role, and add or remove users. |
| Level 2: Manager | Assign roles in levels 2 to 4, and add or remove users. |
| Level 3: Viewer | View the element. They can't make changes. |
| Assignable Roles (level 4) | Nothing in the element. They don't see the element, but Level 1 and Level 2 users can assign these roles to others. |
| Hidden Roles | Nothing. These roles don't appear in the element, and nobody can assign them from the element. |
The element form also has a Default role to assign when adding new users setting, which picks the role a new user gets when added from the element.
Some element types don't use all five levels. The configuration form of each element shows the levels that element type supports.
Assign roles to levels
- Open the element in the Elements screen.
- Under Role permission levels, drag each role from Hidden Roles to the level that role should have.
- Click Save.
- In the End User Preview, select each level to confirm what users with that level see. See Preview an element.
Related pages
- Embed Permit Elements
- Access Request element: Level 1 users review access requests.
- Log users in to Permit Elements