Embed Permit Elements
Embed a Permit element in your web application, from the Permit dashboard to a signed-in user who sees the element. This page is for frontend developers adding Permit Elements, the embeddable UI components, to an application. The example embeds a User Management element and logs users in with the frontendOnly method, which needs no backend route.
For a working application, see the permit-demo-element example project on GitHub.
How embedding works
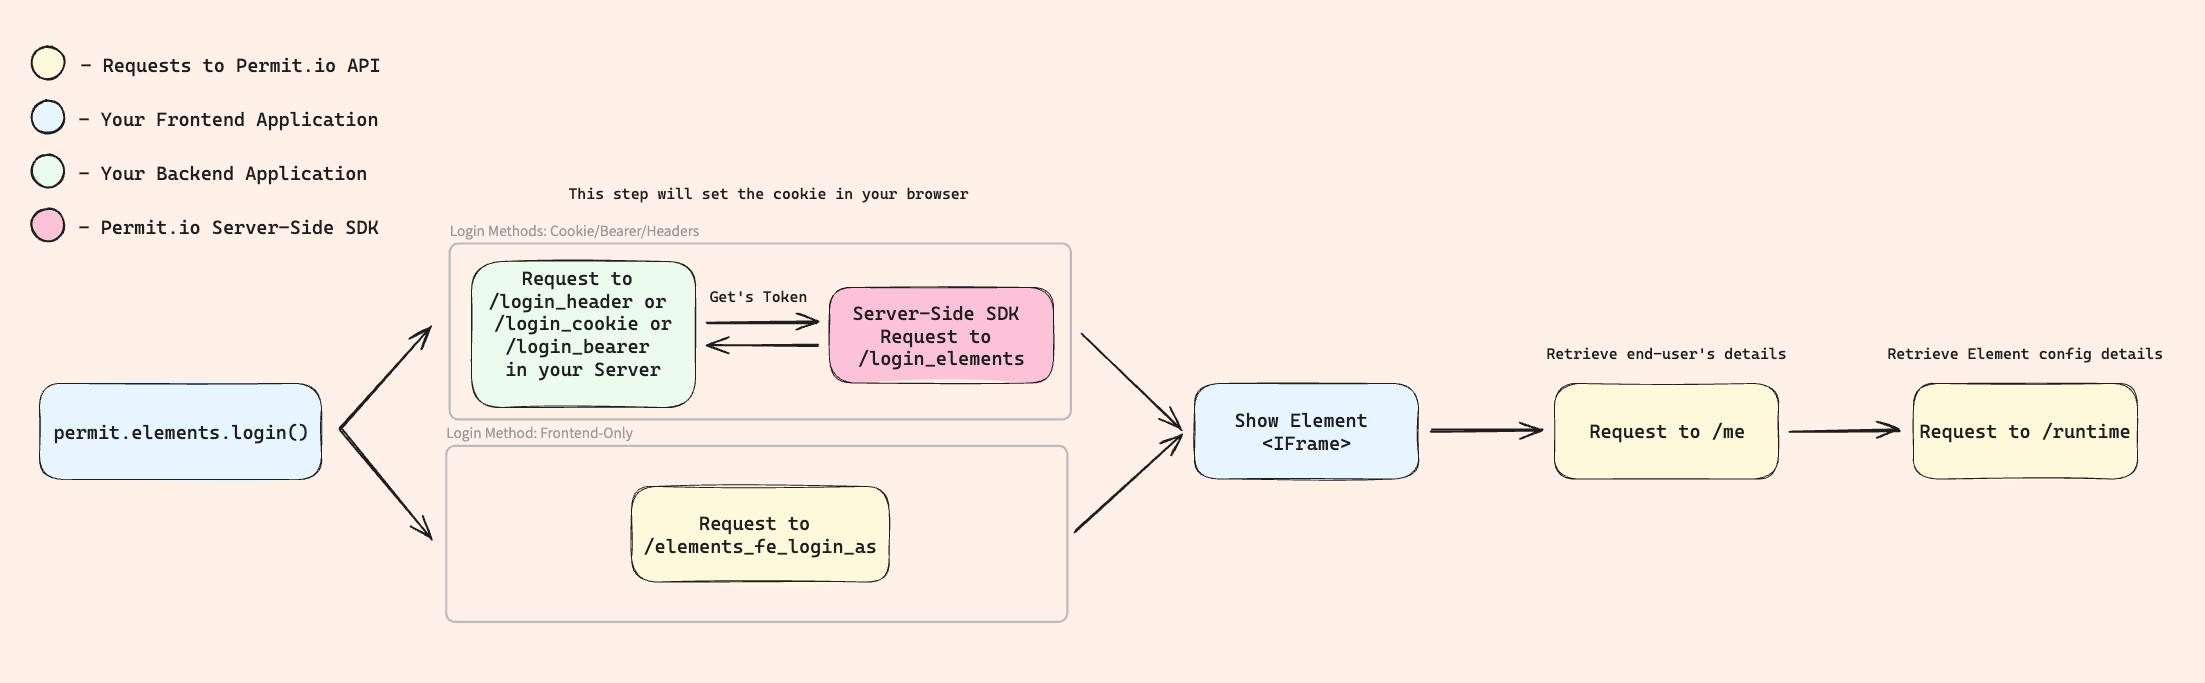
You create and configure the element in the Permit dashboard, and copy its iframe code into your application. Before the iframe loads, your frontend logs the user in to the element with permit.elements.login(). The element then shows the data and actions that the user's role allows.
Prerequisites
- A Permit.io account with roles defined in your policy. See Configure your first RBAC policy.
- Your users synced to Permit, each with a role in the tenant the element shows. See Sync users.
- An identity provider that issues JSON Web Tokens (JWTs) for your users, and the JSON Web Key Set (JWKS) that verifies them. See What are JWKS?.
- A frontend project that installs packages with npm.
1. Configure JWKS for your environment
The frontendOnly login method sends the user's JWT to Permit, and Permit verifies the JWT with the JWKS of the environment.
- In the Permit dashboard, open Settings and click JWKS Config.
- Select the environment the element runs in.
- Paste your JWKS in the editor and click Save.
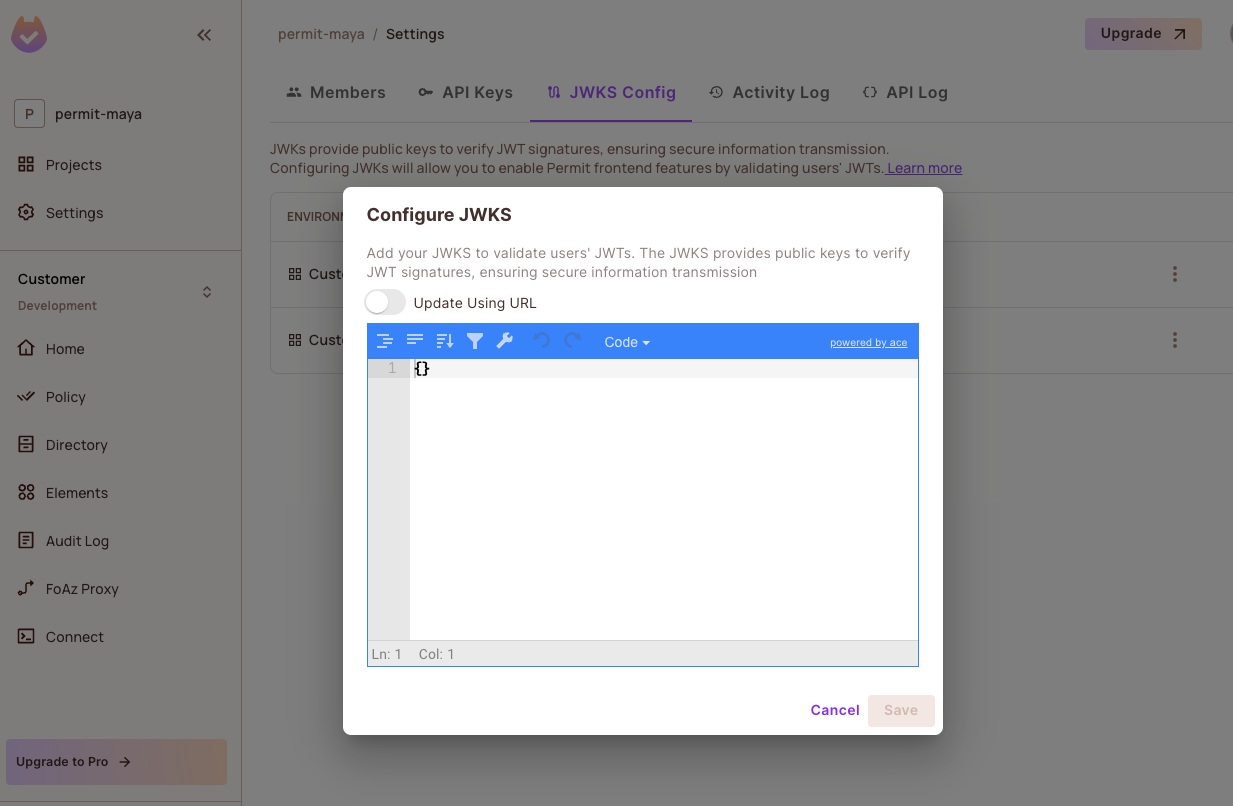
Check that each user's key in Permit matches the sub claim of the user's JWT. The Users page in the Permit dashboard shows user keys. To read the sub claim, decode a JWT with a tool such as jwt.io. If the user key is in a different claim, pass that claim's name as userKeyClaim when you log the user in.
For JWKS options, including a JWKS URL, see Configure JWKS.
2. Create the element
-
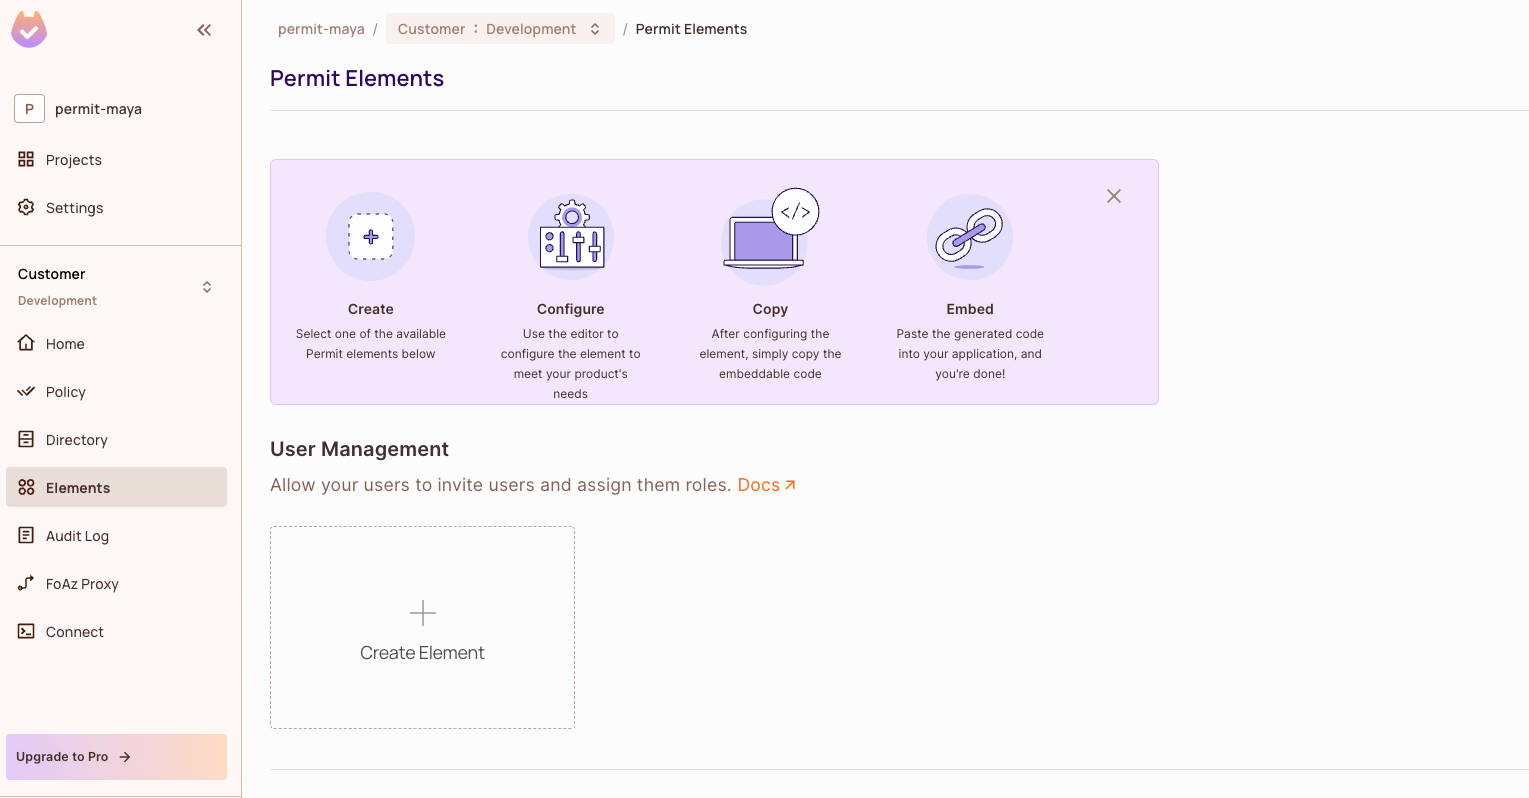
Open the Elements screen in the Permit dashboard.
-
Under User Management, click Create Element.
-
Fill in the element details:
Field Description Name The name of the element. Permission Model RBAC (role-based access control) or ReBAC (relationship-based access control). Roles Levels Which of your roles belongs to each permission level. See Permission levels. 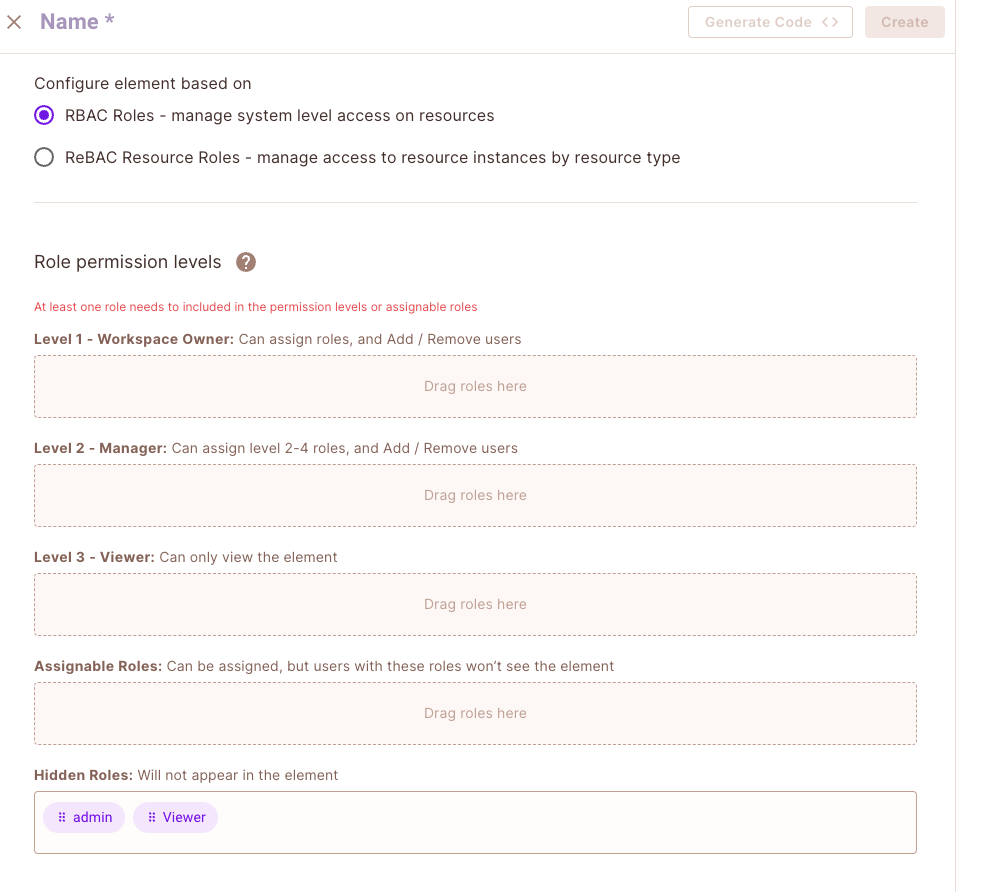
3. Customize the element
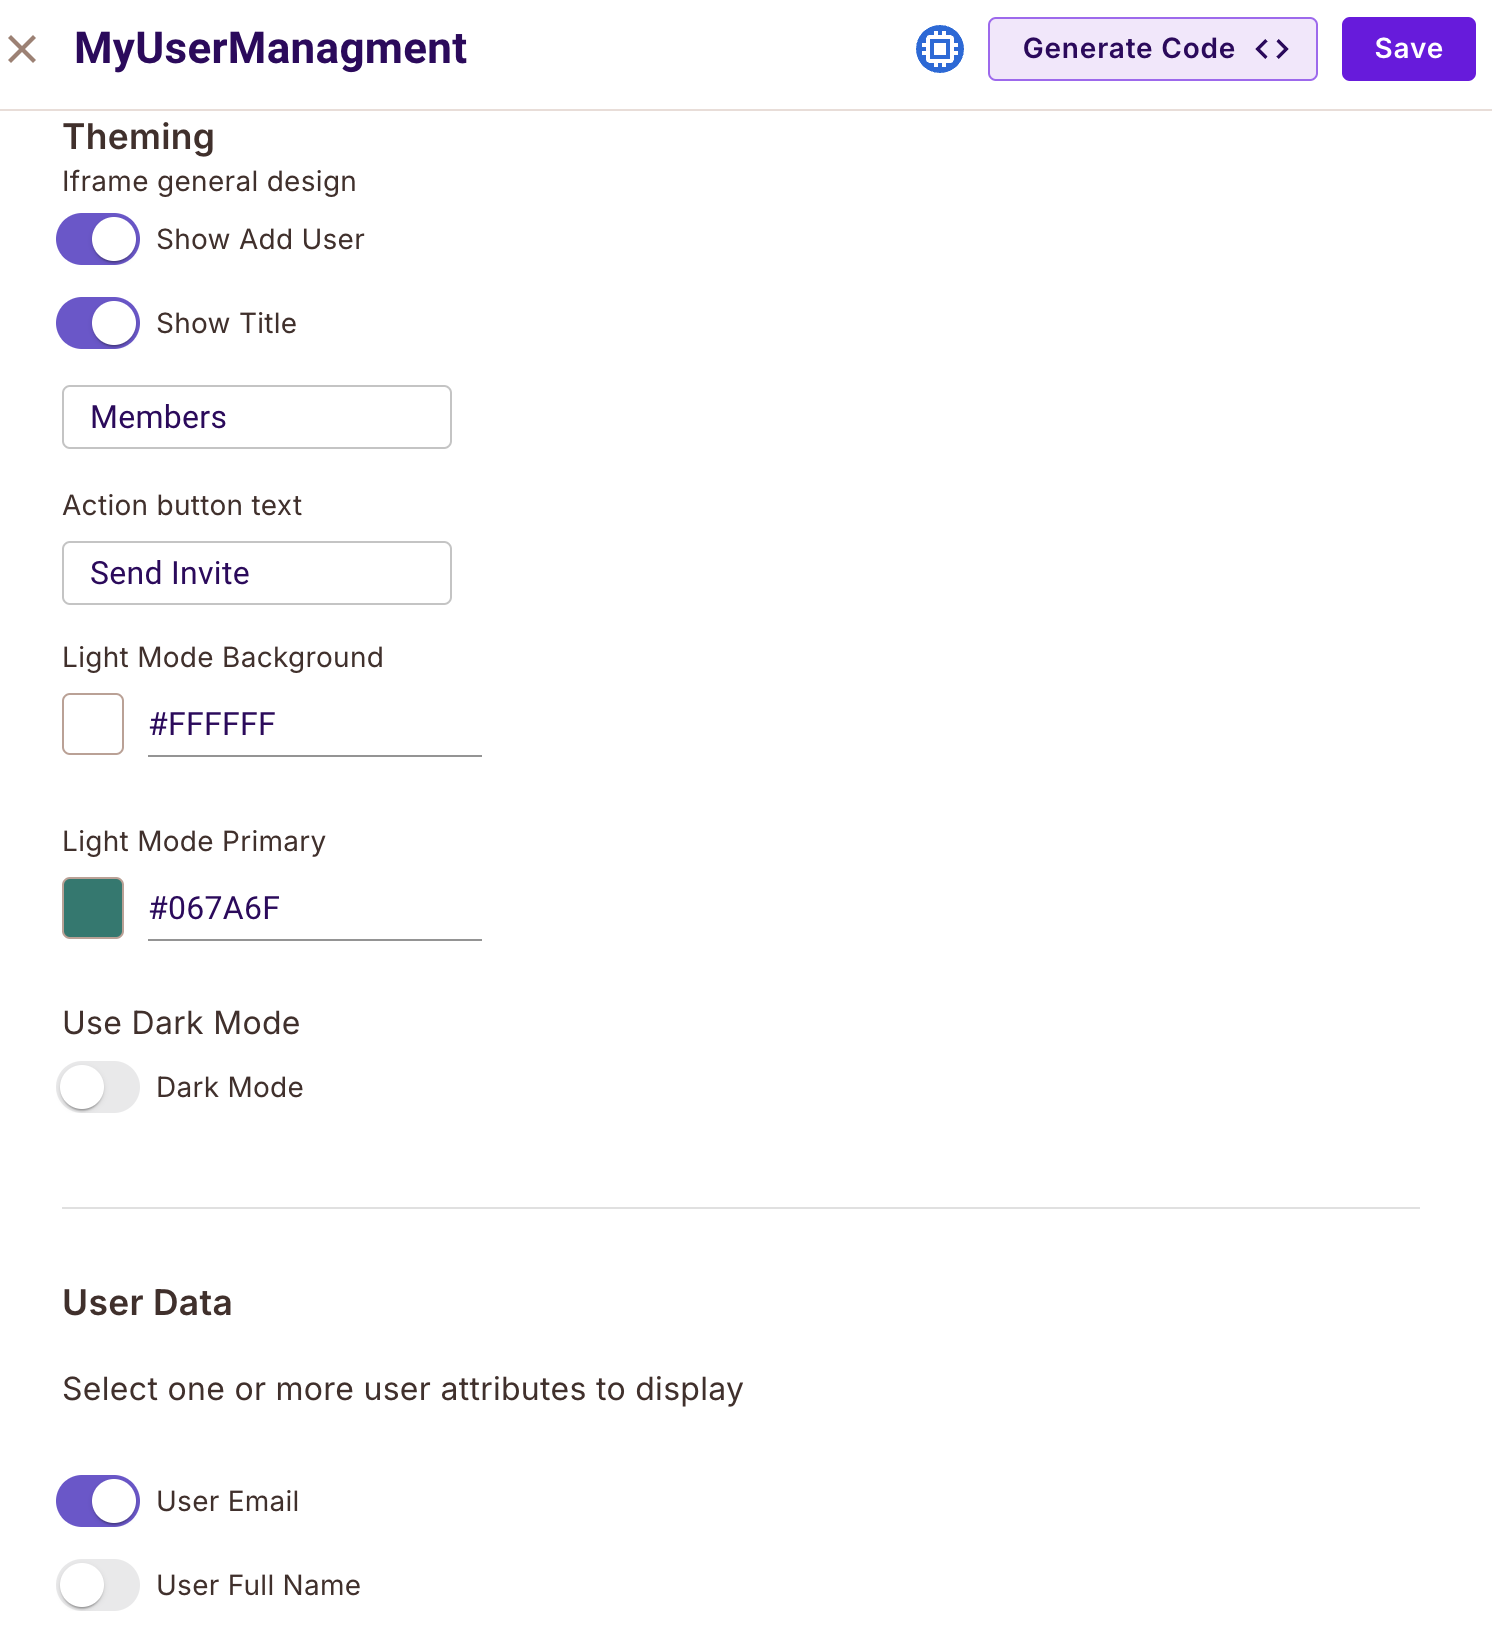
In the same form, set how the element looks and behaves:
- Colors: set the background color and primary color to match your brand.
- Title: give the element a title your end users recognize, or hide the title.
- Add User field: show or hide the field. Hiding the field changes only the display, and doesn't change what users can do.
- User details: show the user's email, full name, or both.
- Webhook: send a request to your server when users act in the element. See Configure webhooks.
4. Preview the element
The End User Preview on the right of the form shows the element as an end user sees it. To preview a specific permission level or tenant, see Preview an element.
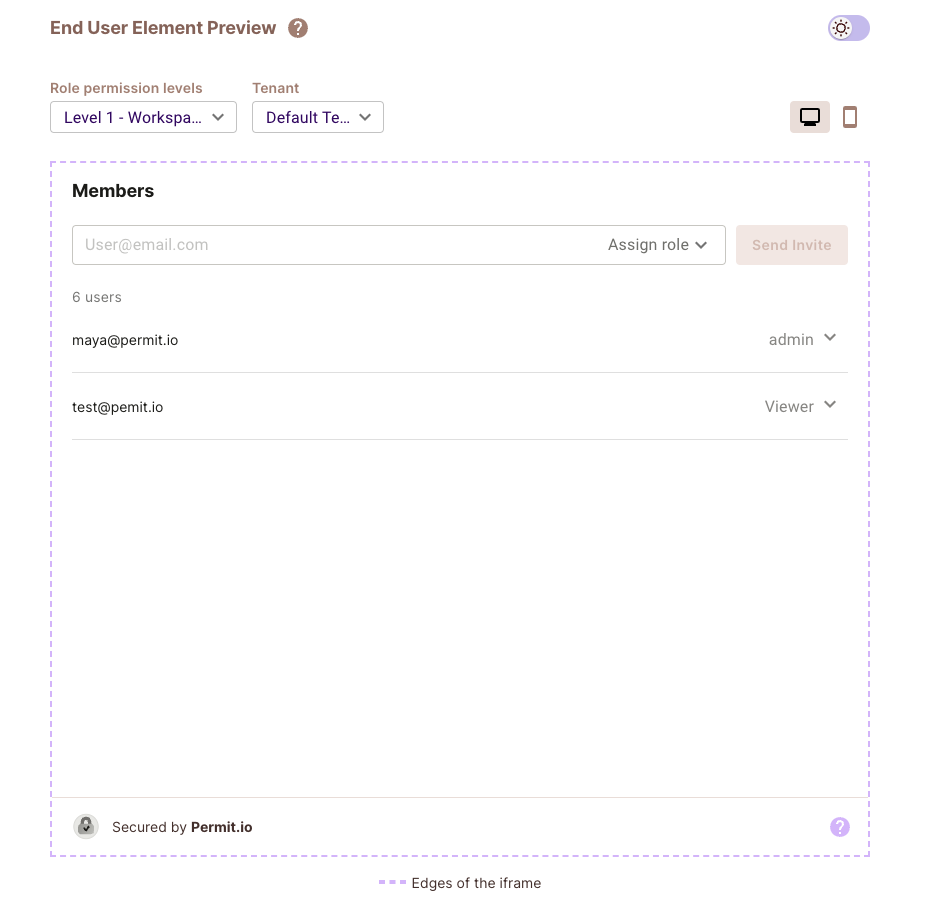
Click Save. Permit creates the element and opens the element's page.
5. Add the iframe to your application
-
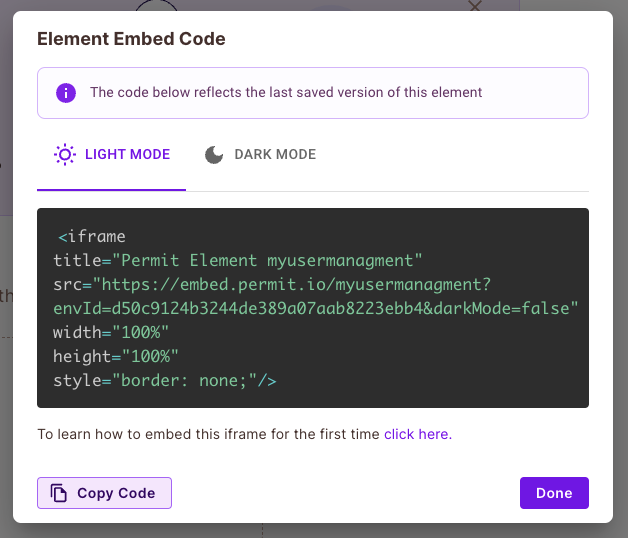
On the element's page, click Generate Code.
-
In the Element Embed Code dialog, click Copy Code.
-
Paste the iframe into the page of your application where the element appears.
The iframe src contains the environment ID as envId. You need that ID in step 7.
6. Install permit-js
Install the @permitio/permit-js package in your frontend project. The package provides permit.elements.login() and permit.elements.logout().
npm install @permitio/permit-js
7. Log the user in with frontendOnly
Call permit.elements.login() after your identity provider signs the user in, and before the element iframe renders. Import the package with import permit, { LoginMethod } from "@permitio/permit-js", and set these parameters:
| Parameter | Value |
|---|---|
loginMethod | LoginMethod.frontendOnly |
userJwt | The signed-in user's JWT. |
tenant | The key of the tenant the element shows. The user must have a role in this tenant. |
envId | The environment ID from the iframe src, or from the List Environments API. The environment must have the JWKS from step 1. |
userKeyClaim | Optional. The JWT claim that holds the user key, when the key is not in sub. |
Replace <YOUR_USER_JWT>, <YOUR_TENANT_KEY>, and <YOUR_ENV_ID> with your values:
permit.elements
  .login({
    loginMethod: LoginMethod.frontendOnly,
    userJwt: "<YOUR_USER_JWT>",
    tenant: "<YOUR_TENANT_KEY>",
    envId: "<YOUR_ENV_ID>",
  })
  .then((res: any) => {
    console.log("success", res);
  })
  .catch((err: any) => {
    // you can handle the error either here or in your BE
    console.log("err", err);
  });
For the other login methods, which use a backend route, see Log users in to Permit Elements.
8. Log the user out
Call permit.elements.logout() in the code that signs the user out of your application. If you skip the call, the element session stays active in that browser after the user signs out.
permit.elements.logout();
Verify the element loads
- Sign in to your application as a user whose role is in a visible permission level.
- Open the page with the element. In the browser's developer tools, the Network tab shows a successful login request, and a cookie named
permit_sessionis set. - The element shows the users of the tenant you passed as
tenant.
Login errors
If the login fails, Permit returns an error such as USER_NOT_FOUND or TENANT_NOT_FOUND. For every error, its cause, and its fix, see Login errors. For network and cookie problems, see Troubleshoot Permit Elements.
Next steps
- Assign roles to permission levels to control what each user can do in the element.
- Configure webhooks to get notified when users act in the element.
- Set up email invitations for the User Management element.
- Embed the Access Request element so users can ask for access.